I used a magic ring for the motifs-they are slippers for goodness sake, you don’t need giant holes in the middle of your motifs!
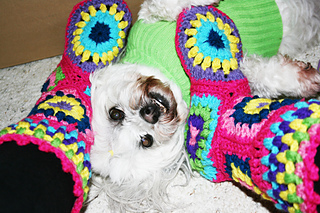
I finished my second pair of slippers,they turned out MUCH better than my first-the first image (with the doggie) is my second pair and all the rest are from my first pair and I have changed up the base of the motifs-
round 1: 12 dc in magic ring, join.
Round 2: cluster in next 2 dc, cluster between next 2 dc; repeat from around-this brings you to 18 stitches
round 3: cluster in cluster, chain 1, repeat from * around
Carry on from original pattern after the cluster round ( which is round 3 on the pattern)
I used a Motif B for the two back hexagons (like the pattern said) and then another two B hexagons for the top of the boot (keeping the flat part at the top)and a Motif A for the front toe.
For the trim:
Round 1: sc around top of boot, putting hdc, dc, tdc whenre there are those two dips between motifs to even out the top
Round 2: Cluster in same stitch, ch 1, skip a stitch, cl in next stitch, repeat from
Repeat round 2 as many times as you want
Then I hdc around in a different color.
For final round: sc, ch 3, sc in last sc made (picot made), sc in next 3 hdc, picot, repeat from around finish off
This came together much better than my first pair.
I made a THIRD pair and attempted to make the size smaller, as to fit 6-9 and I think I came close In the dc round 4 of motif A(which with my variation it is really round 5) I sc instead.
I also sc instead of dc in one group between 5dc on the motif B for the bottom portion of the boot-this makes it just a tad shorter.
The sole for this version (which lays better than the original and fits this variation of a smaller bootie) is:
Sole: 1st rnd: sc in BL of each sc-putting a 3scCL between the side motifs and front on each side (72)
2nd rnd: 3 scdec, sc in 14 sc, (dec, sc in next ) 10 times, sc in 14 sc, 3 scdec
3rd rnd: Ch 1. 1 sc in each sc around. Join
with sl st to first sc.
4th rnd: 3 scdec, sc in 10 sc, (dec, sc in next sc) 8 times, sc in 10 sc, 3 scdec.
5th rnd: 2 scdec, sc in 10 sc, 7 dec, sc in 10 sc, 2 dec, join.
Sew flat seam
My first slipper pair notes : (I am only leaving them here so others can learn from my mistake-the second pair , notes are above, came out much better):
I am making 10 of motif A (5 matching pairs) so I can make mine into booties-the finished motifs are in 2nd photo so you can see what different colors look like.
I added an extra round on each motif in my base color which shall be hot pink. The extra round goes as follows: sc in 10 sc, 3 sc in next sc (which is the center of the 3sc of previous round) repeat from around-
Be very careful when joining the hexagons! I had to undo all my stitching and rejoin them. In the third picture, you can see how they look when joined (pay attention to my notes below-my next one will not have the points on the bottom of the foot in back)
To even up the top of the boot I used sc around the top, but use hdc, dcs, and an 8tdc cluster over the big dip as the motif takes a dip down, to help make it a more straight edge. I will then used cluster stitches for a few rounds (same as in the motif, only without the ch 1 between) in different colors. Then for the sc above the cluster stitches I did sc in next stitch, 2 sc in next stitch; repeat from around and then the next row was just sc in each sc around.
The sole is a little bunchy (because I chose to use all motif A) so I folded them to the inside and stitched them closed, making the heel have extra padding which was a nice bonus. Next time, I will use 4 motif B (which is for the sole and will not have that obnoxious point) and 6 motif A and join the B to the back of the bootie just like the origonal-I was going off of someone else’s notes who used all 10 of the motif A and I’m not pleased…


 dragonbird notebook
  handspun
 queue
queue favorites
 friends
 needles & hooks
 library