patterns >  WoollyRhinoCrafts' Ravelry Store
> No-Face

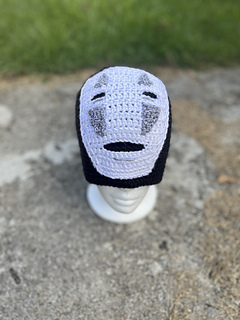
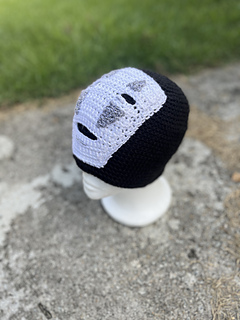
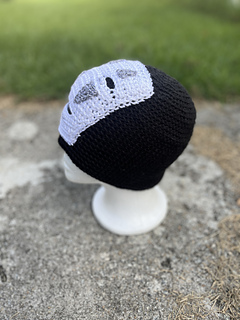
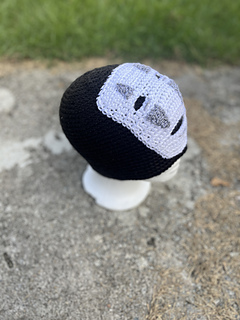
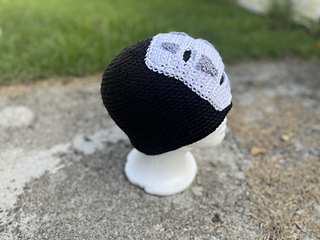
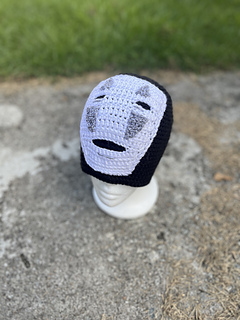
No-Face
Pattern ONLY!
This is NOT a physical item. It is a downloadable PATTERN to make one. I can’t believe I have to say this on a PATTERN website, but here we are. The pattern includes step-by-step pictures and a video link.
If you purchase this item, the PATTERN will be immediately available for you to download as a PDF file, which can be opened with Adobe Reader. The awesome PDF file explains how to make the pictured No-Face hat.
This hat is two layers thick, so it’s warm and squishy. It’s made by creating a long tube shape with two closed ends and then folding it in on itself and securing the ends together. Don’t worry if this is confusing because there are lots pictures and also some video links to help you out!
The hat is one size fits most adult heads and it’s intended to be a bit big, but it shouldn’t be too hard to resize to meet your needs by adjusting your hook size and/or yarn.
I would consider this a suitable BEGINNER pattern. It will NOT teach you to crochet but it is a good way to PRACTICE new skills if you’re just starting out! The pattern assumes you know or are capable of looking up the required stitches, etc. There is a bit of assembly and some of the details are stitched on, but it is nothing advanced, though it may take a little trial and error.
Tools and Materials
• US size G (4.25mm) crochet hook for the body of the hat and face, and US size F (3.75mm) hook for the face details
• Stitch marker (optional, but recommended for the base hat and some other pieces because they are worked in continuous rounds)
• Yarn needle, for attaching parts and some light embroidery
• Worsted weight yarn in BLACK, WHITE, and GRAY (or kind of a purplish gray if you can find it).
o The color you will need the most of is BLACK. One (1) 6oz/170 g/315yd skein should be enough (this is a regular Caron Simply Soft skein, which is the yarn I used).
• (Optional) pins, for holding pieces in place during positioning and attaching – I use bobby pins
• (Optional) mannequin head – it’s REALLY helpful for positioning the face and attaching it to the hat, especially since the hat is two layers thick. Having a foam head is not a bad investment though if you plan to make a lot of hats.
Abbreviations/Skills Needed
• rnd/rnds: round/rounds
• st/sts: stitch, stitches
• ch: chain
• sc: single crochet
• inc: increase
• dec: decrease
• sl: slip stitch
• BLO: back loops only
Running stitch or whip stitch will work for attaching the pieces. Use whatever looks/feels right to you. I tend to use running stitch when attaching flat pieces to a surface and whip stitch when joining pieces with dimension. All of the face details are flat pieces to the flat face so I used running stitch for them and then whip stitch to sew the face to the main hat.
The gauge is approximately 3 sc sts/inch and 3 sc rows/inch for the main body of the hat (or 3 sc sts/2cm and 2 sc rows/2cm). The detail pieces are approximately 5 sc sts/inch and 4 sc rows/inch. A finished hat as patterned with the mentioned gauge is about 10” (25cm) across with a 20” (50.5cm) circumference and 9” (22.5cm) tall when lying flat. It is very stretchy!
You can change your yarn weight and/or hook size to make slight size adjustments without making changes to the pattern (because you probably don’t want to do math). FOR EXAMPLE: If you want a larger hat then use worsted weight yarn with a J hook. And for a smaller baby hat, change to sport weight yarn and an F hook for the body. I would stick with an F hook for the details unless you’re making a much smaller size then drop this hook size down as well. You can easily change the length of your hat in a section of the body that is noted in the pattern if you want a slouchier hat – or, of course, shorten the section for a shorter hat.
NOTE: The entire hat is worked BLO. BLO makes the fabric a little more stretchy/floppier and I wanted a squishy, slouchy hat. I recommend this. Total sts/rnd are noted in parentheses (). All rounds are continuous, which means they are worked in a spiral without a joining sl, ch 1.
- First published: August 2025
- Page created: August 30, 2025
- Last updated: August 30, 2025 …
- visits in the last 24 hours
- visitors right now


