

 Authentic Knitting Board Blog
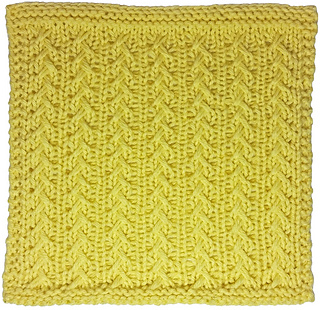


Slip Stitch Braid- Stitchology 31
This lovely stitch is perfect for spring knitting. It contains pretty braids that almost look woven in appearance. This technique is created by using slipped stitches combined with 1 over 2 cables. Don’t let those cables cause you any dismay, because they are super simple to work with the help of that elongated slipped stitch. Repeated throughout a project, this stitch makes me think of baby knits, socks, or even a lovely hat (anything that the back isn’t going to necessarily be a feature). Change the color every two rows and the look goes from delicate to Wow!
We will be changing the format just a little bit for our Stitchology Column. Each of the featured stitches will be explained row by row via both written and video instructions. We will be focusing on highlighting the repeating stitch pattern itself, so that you can enjoy the freedom of putting these new stitch patterns to use in your own projects as creativity strikes. We hope you will enjoy this new way of learning new stitches with us! :) All these things will be included at the link to the Knitting Board Blog above.
Find all the previous Stitchology Columns at this link here.
For those of you who are still desiring a pattern for a square to continue with your afghan plans, the information on yarn used, etc can be found below, and the chart for the square can be downloaded right here AT THIS LINK. I hope to continue providing this extra step for my readers as long as I can. Enjoy!*
Items Needed
Loom: Authentic Knitting Board Adjustable Hat Loom: 2 rounded pieces + 3 peg connectors, with pegs in all holes for a 3/8” gauge. The Sock Loom 2 or the All-n-One Loom could also be used.
Yarn: approx. 75 yards Worsted Weight (Sample uses Berroco Vintage in kiwi)
Notions: Loom tool, yarn needle, scissors. (Also helpful: cable needle, peg markers, row counter, and blocking pins)
Pattern Notes:
To work this pattern in the round, such as for a hat, use the Repeating Pattern Rows chart, and make sure to read it from right to left for each row, rather than alternating sides each time. Also, cast onto your loom in a clockwise direction, using a number of pegs that is divisible by 5—the number of stitches required for each pattern repeat.
For flat pieces of a greater size, simply increase the number of Repeating Pattern Rows inside the garter stitch edges for the length and width required, then complete with the Finishing Rows.
The last chart on the left shows where to change colors, if an alternating color square is desired.
81356 projects
stashed 45310 times


