

 Knitty, Winter 2022


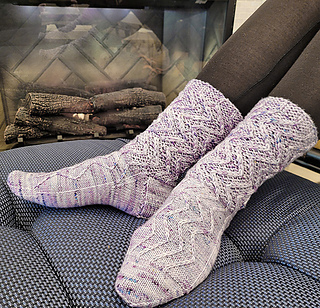


Slouch-warmer
Choose a size approximately 1 inch/2.5cm smaller around than your foot, measured at the ball of your foot.
****************
A sock with ambition, perhaps? A kicky leg-warmer above the ankle, a comfy and long-lasting sock below.
The leg is worked double-stranded in a garter-based pattern stitch, the heel flap and turn are worked with double-stranded yarn for extra reinforcement and comfort, and the foot is finished with your standard sock needles and one strand of yarn so that they fit into all of your regular shoes. The sock leg is substantial, so the slouch will only happen if you want it to. See pictures below for what it looks like unslouched.
To create the slouchy leg without having to adjust the pattern, I’ve indulged in a strategy that some might feel is cheating: you start the sock on a larger needle, then change to progressively smaller needles as you work the down the leg. This means that the pattern requires what seems like a truly horrifying number of needle sizes, but knitters who have an interchangeable set and work on magic loop will likely be fine! You can also fudge the leg a bit, too: if you are missing one of the sizes, just work with the ones you have. There are only two needles that are crucial: those for the heel and those for the leg.
Also, note that the foot instructions require a little bit of attention. To accommodate the change to a single strand of yarn, plus the fact that there’s a left and a right foot and to allow you to work any length leg you want, the instructions for the transition from the leg to the foot patterning require you to read your knitting and decide on the increase positions yourself. Consider it as a guided “increase evenly across”. Details are provided, but you will have work this section carefully. Extra attention is also required in the transition of the cable pattern into the instep, with cables “disappearing” into the sides.
1293 projects
stashed 1919 times


