

 Tinna Thórudóttir Thorvaldsdóttir's Ravelry Store


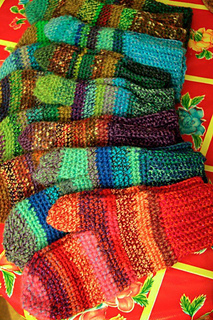

Tinna´s Mittens
Quick and easy crochet mittens pattern, perfect for making a warm winter gift for your loved ones. full tutorial for the fingerless version avaible on my YouTube channel:
This is an old pattern of mine, one of the first ones I ever made, published in my first Crochet book Þóra Heklbók back in 2011. I have made countless of these basic mittens, both for the boys, myself and as gifts. And although it is a very basic mitten pattern, I love how simple they are because you don´t have to think very much while making them, can easily fudge the stitch count if you make some mistakes and after making a pair you almost know the pattern by heart! As an added bonus they´re super quick to make, I make a pair easily in just one night, so they make for great warm gifts!
YARN
Léttlopi from Álafoss, or other DK yarn.
For the kiddie size (SMALL) you only need 1 ball for a pair and some leftovers for the ribbing if you want to make that in another color.
For the grown up sizes, M, L and XL, you need 2 balls of the main color and leftovers for the ribbing if you want to do that in another color.
With a set of two times 2 balls of each color (4 balls total) you can make a set of 2 pairs of adult sized mittens (M, L or XL) if you switch the main color and the ribbing color on the second pair!
You can also just use any DK or worsted weight yarn you like, just try and get the same gauge as given here or go up\down one size in the pattern according to your gauge.
I do sincerely recommend the Lettlopi though, or at least some natural wooly fibers. Especially if you want them to be warm and cozy, because the wool will felt on its own once you start using your mittens and make them even more dense and more soft and comfy. This applies especially to mittens for kids, 100% wool mittens who have already got a bit felted by use are perfect for cold weathers and snow. And the Icelandic wool has this special quality that it is somewhat water repellent too (due to the layer of extra-long hairs in the wool of the Icelandic sheep), so I honestly can´t recommend it enough. I would use these all winter long for my boys, snow rain what have you! And they were always well protected from the cold AND the wool mittens are so much more flexible than the ones made with fabric. Alas they are so big now that they don´t want to use these anymore, but I´m sure they´ll get back on board once they´re older, I use these all the time myself.
Hooks
You will need a 5 mm hook, or maybe a bit smaller, depends on what hook you need to get the correct gauge.
Gauge
16 rows & 16 ST in SC stitching = 10 cm
Abbreviations (US terms)
ST = stitch/stitches
CH = chain stitch
SS = slip stitch
SC = single crochet
Sizes
This mitten pattern comes in four sizes, S (M) L (XL)
small is suitable for kids (approximately 5-7 yo), sizes M, L and XL would suit tweens, teens and up to adults.
Circumference of ribbing: approx. 14 (18) 22 (26) cm wide circumference.
Length from tip of the mitten to the end of ribbing: approx. 20cm (25cm) 28cm (30) cm long.
It’s easy enough to use other weight of yarn as well, to get bigger or smaller sizes.
General instructions
The mittens are worked from the ribbing up. You start by working the ribbing flat, back and forth, with the back loop single crochet texture that looks like ribbing, see next photo. Then you join the ribbing into a circle on the short ends with slip stitches.
From there on you work the mitten in the round, continuously in a spiral form. Once you get up to where the thumb will be added you simply skip a few stitches, leaving a hole there where the thumb will be added later, and continue all the way up to the top.
There you make an easy decrease and close the mittens off.
Then you work the thumb in the round into the stitches you skipped for the thumb hole and close that off with decrease as well. In the end you will only have 2 ends to weave in! it´s like magic it´s so easy!
64101 projects
stashed 61186 times


