

 Andoliando
 Pattern


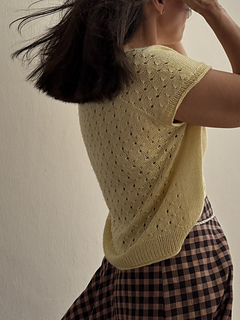
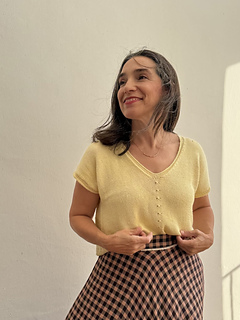
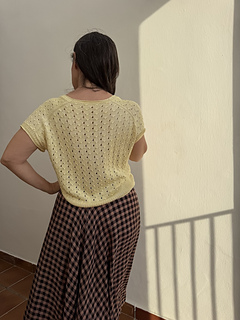
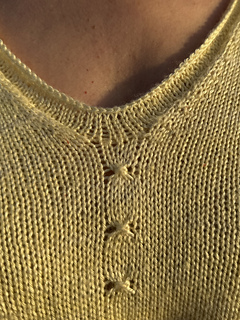
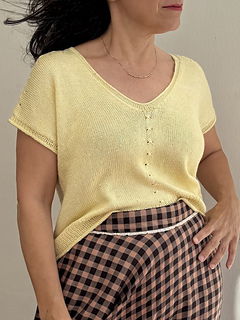
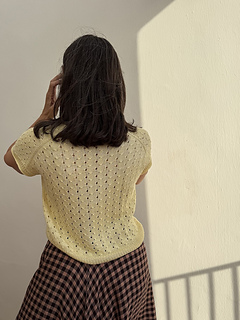
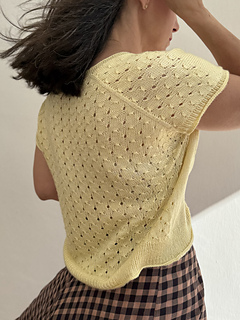
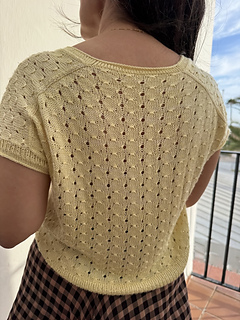
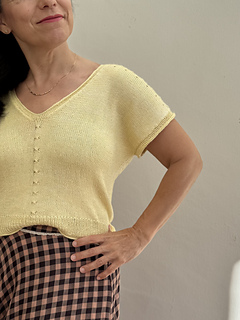
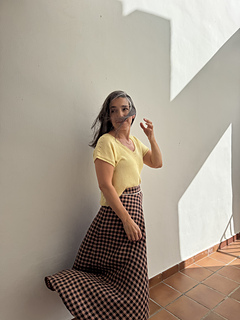
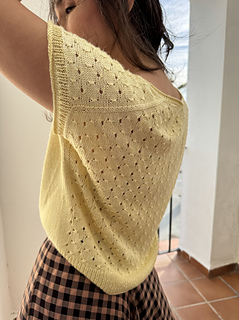
VAINILLA Tee


----------------------- ENGLISH
VAINILLA includes video tutorials that make sure you do not stop at any time in your knitting.
VAINILLA includes video tutorials that make sure you do not stop at any time in your knitting.
Sizes:
1 (2, 3, 4) (5, 6, 7) covers a range of chest circumferences from 80 to 140 cm.
Final item measurements at the chest in cm:
89 (101, 110, 121) (130, 139, 148)cm approx.
This top is designed to be worn with positive ease of between 7 and 17 cm approximately at the chest.
The sample shown is size 2 with 11cm of positive ease.
Yarn: Fingering weight yarn 400m/100g approx.
705 (791, 880, 971) (1066, 1163, 1263) m
176 (198, 220, 243) (266, 291, 316) g
2 (2, 3, 3) (3, 3, 4) skeins
These amounts are approximate. The total yarn used
will also depend on the type of yarn, your gauge or any
modifications you may make to the garment.
The sample shown used EL ROBLEDAL DE LA SANTA
Mulberry Fingering (100% Mulberry Silk, 400m/100g)
colour Manteiga
Needles:
• 3mm circular needles with a cable of 60 or 80 cm or size needed to get gauge.
• 2.5mm circular needles with a cable of 60cm.
• 3mm and 2.5mm needles for working in a small circumference for the armhole edgings.
Gauge: In stockinette stitch 10 x 10cm gives:
28 stitches and 38 rows before blocking.
27 stitches and 36 rows after blocking.
It is advisable to note down the measurements of your
swatch before and after blocking, so you can estimate the
final measurements of the garment.
Other materiales:
• 3 stitch markers, one of which should be different to mark the beginning of round.
• Several locking stitch markers for counting the rows/rounds (optional).
• A piece of waste yarn or a stitch holder for leaving stitches on hold.
• A long cable with a connector or any accessory to allow you to try on the garment.
• Tape measure, tapestry needle and scissors.
Construction notes: VAINILLA is worked top-down as follows:
- Cast on stitches for the neck on the back.
- Make increases to drop the shoulders until you reach the desired width of the garment.
- Pick up and knit stitches for the left shoulder and work the front to the lowest part of the armhole.
- Do the same for the right side.
- Join the fronts and back at the underarms.
- Work the body in the round down to the hem.
- Finish off the armholes and neckline.
And it’s ready! Time to find the perfect look for it.
Difficulty level: 3 out of 5
----------------------- ESPAÑOL
VAINILLA incluye videotutoriales que hacen que no te quedes parad@ en ningún momento en el tejido.
Tallas: 1 (2, 3, 4) (5, 6, 7) cubren un rango de
contorno de pecho de 80 a 140cm.
Si tu contorno de pecho es mayor no dudes en contactarme y te escalo la talla a la medida que necesites.
Medidas finales de la prenda en el contorno de pecho en cm:
89 (101, 110, 121) (130, 139, 148)cm aprox.
La camiseta está diseñada para ser llevada con una holgura de entre 7 y 17cm aproximadamente en el contorno del pecho.
El modelo de la fotografía es la talla 2 con 11cm de holgura.Hilado: Fibra de verano de grosor Fingering (100g/400m aprox)
Hilado: Grosor fingering 400m = 100g aprox
705 (791, 880, 971) (1066, 1163, 1263) m
176 (198, 220, 243) (266, 291, 316) g
2 (2, 3, 3) (3, 3, 4) madejas
Estas cantidades son aproximadas. El metraje total de
hilo empleado va a depender también del tipo de hilado,
tensión o de las modificaciones que hagamos a la prenda.
En el modelo de la fotografía hemos usado EL ROBLEDAL
DE LA SANTA Mulberry Fingering (100% Seda Mulberry,
400m = 100g) color Manteiga
Agujas:
• Circulares de 3mm con cable de 60 u 80cm o grosor adecuado para obtener la tensión de la muestra.
• Circulares de 2.5mm con cable 60cm.
• Agujas de 3 y 2.5mm especiales para tejer círculo pequeño para el remate de las sisas.
Otros materiales:
• 3 marcadores uno de ellos distinto para el inicio de vuelta.
• Varios marcadores de imperdible para contar las pasadas /
vueltas (opcional).
• Un trozo de hilo de desecho o útil para dejar puntos en espera.
• Cable largo con conector o cualquier útil para ir probándonos
la prenda.
• Cinta métrica, aguja lanera y tijeras.
Tensión:
28 puntos y 38 pasadas antes del bloqueo.
27 puntos y 36 pasadas después del bloqueo.
Es aconsejable anotar las medidas de la muestra antes y después del bloqueo, de esa forma podremos estimar las medidas finales de la prenda.
Construcción:
VAINILLA se teje de arriba a abajo de la siguiente forma:
1.- Montamos para el cuello en la espalda.
2.- Hacemos aumentos para conseguir la bajada de los
hombros hasta conseguir el ancho de la prenda.
3.- Recogemos y tejemos los puntos para el hombro izquierdo y tejemos el delantero hasta la parte más baja de la sisa.
4.- Lo mismo para el lado derecho.
5.- Unimos delanteros y espalda a la altura del bajo-sisa.
6.- Tejemos el cuerpo en circular hasta abajo.
7.- Rematamos sisas y escote.
¡Y listo! A buscarle un bonito look.
Nivel de Dificultad: 3 de 5


 Ravelry download


 Cancel
40 projects
stashed 42 times
 stashed