NOTE: Errata
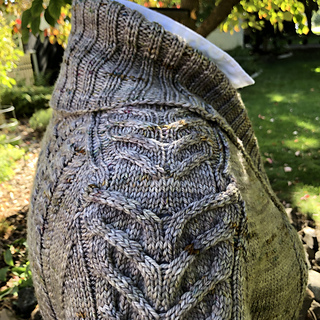
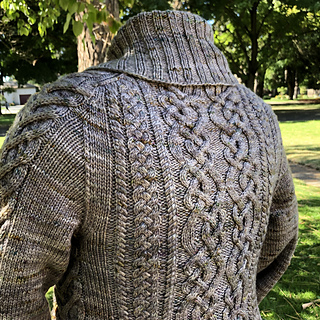
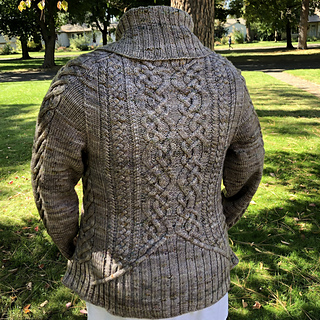
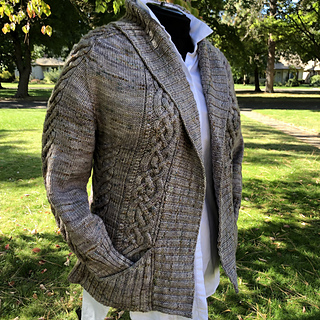
SODE
by Hiroko Payne
Two cables, on the Right and Left front charts (each on row 21) are missing from the Master Key/Abbreviations. They are the following cables:
2/1 RCP:
Slip 1 st to cable needle and hold in back, k2, p1 from cable needle
2/1 LCP:
Slip 2 sts to cable needle and hold in front, p1, k2 from cable needle
Abbreviations:
3/3 RPC:
Slip 3 stitches to cable needle and hold in back, k3, p3 from cable needle
January 5, 2019
Whew! This is a tough one to get started. Definitely not a pattern for a beginner. Finally getting the hang of the pattern after 12 painfully slow rows.
Reading the charts can be confusing because they do NOT account for the increased sts. It is true that the written pattern states they do this to save space, but it can be confusing to follow the charts without this information. So I added notes to the charts to remind me where the added sts go.
January 6, 2019
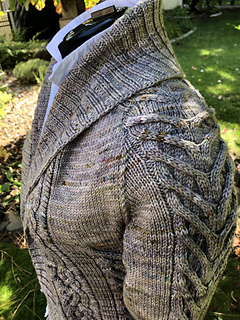
Made it to the shoulder caps. Whew.
January 7, 2019
When working in the first 6 rows of the shoulder caps, note that the lifted increases are reversed from the previous shoulder charts.
January 12, 2019
Finished the “shoulder caps.”
I think the instructions for the sleeve increases are unclear. Here is what I have done to help me with this part of the pattern.
1) I moved the markers surrounding the “large stag cable” on the sleeves out three (3) sts on each side for each sleeve. This is basically moving the markers to the edges of the “shoulder caps” chart.
Note: I will be doing the lifted increases on the right side rows only surrounding each newly place marker for the sleeve.
2) Right side row:
Follow pattern charts as written to the newly placed sleeve marker.
Then LLI AFTER newly placed marker, knit added sleeve sts, then knit “large stag chart”, then knit added sleeve sts, then RLI BEFORE newly placed marker.
Note: Following this method keeps all the increased sleeve sts between the markers.
3) Wrong side row: knit as pattern indicates.
Continue these sleeve increases for each sleeve until you have the desired number of sleeve sts between the markers. For size Large this is 68 sts between the markers.
January 13, 2019
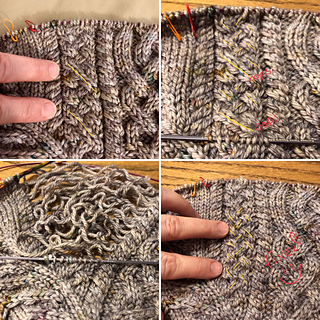
Last night I discovered two errors I made in the cable pattern. I was able to fix it. 
It’s hard to explain in writing. I put the sts right before the error on a dp needle. Then what I do is isolate the sts that need to be fixed and leave the rest of the garment on the working needles. Then I frog the sts to the dp needle. Next while working only from the front of the work I redo the cable pattern row by row using the corresponding strands of yarn for each row. I use dp needles of a smaller size; that makes it easier. Also, because I’m on dp needles I do not need to turn my work, just work each row on the chart from the right side. The sts are a little bit looser in the repaired area, but that usually disappears with blocking. Hope that make sense. I’ve done this many times, but practicing on a swatch is a great idea. It will give you confidence. My philosophy is: Might as well try fixing only the area with a mistake before ripping the whole thing back which is always option 2.
February 23, 2019
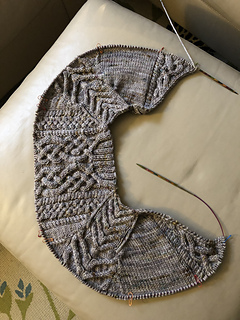
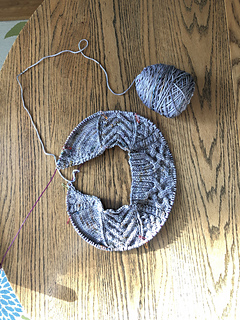
This project was resting for awhile. Now I’ve split the sleeves and started working on the torso. Things are moving along now at a steady pace.
September 16, 2019
Working on this again.
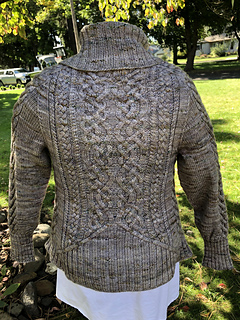
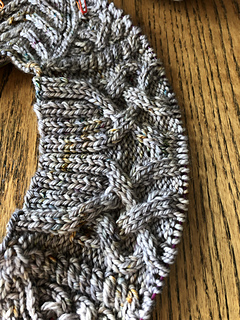
I’m on row 85 and the second patter repeat after the sleeve split on the fronts and I’m on row 7 of the back outro.
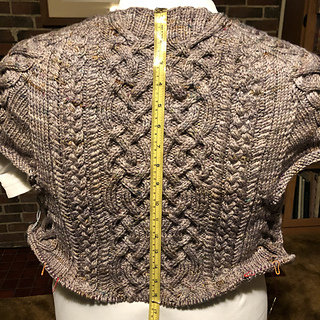
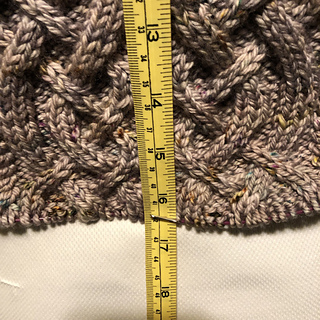
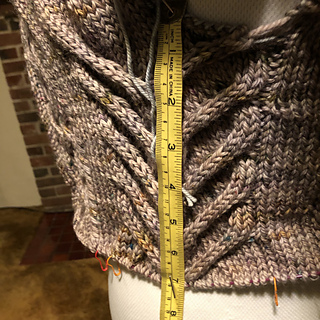
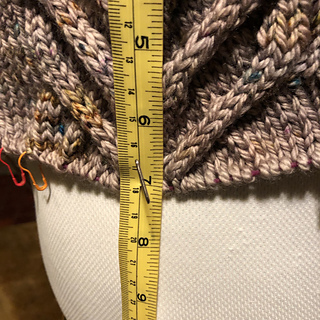
The back is 16.5 inches from the neck, the arm pit down is 7 inches.
October 1, 2019
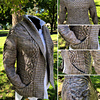
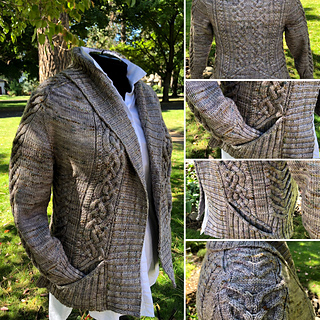
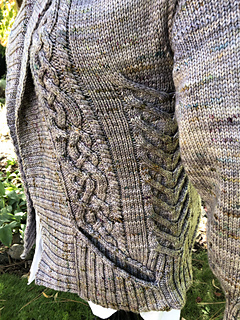
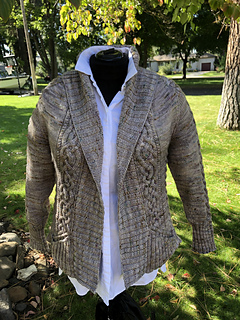
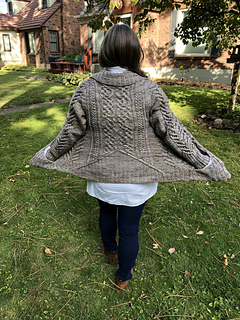
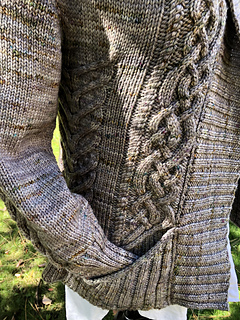
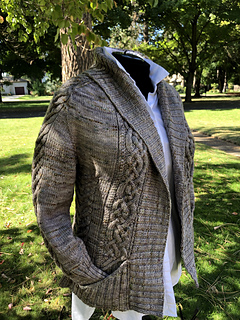
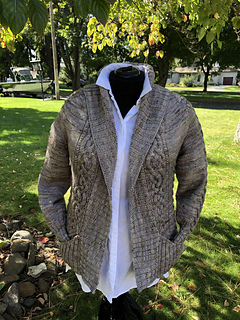
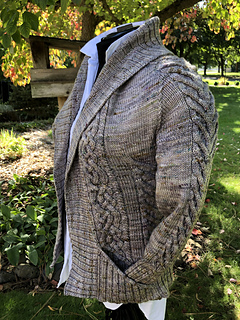
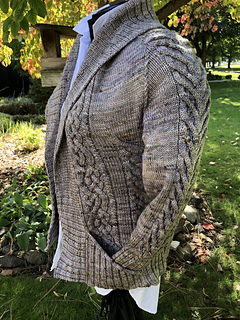
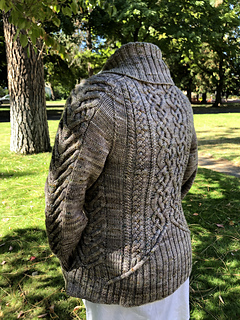
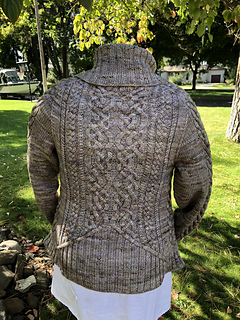
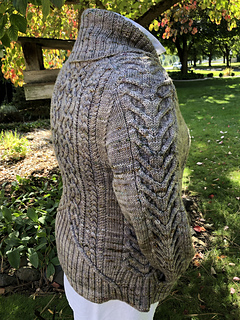
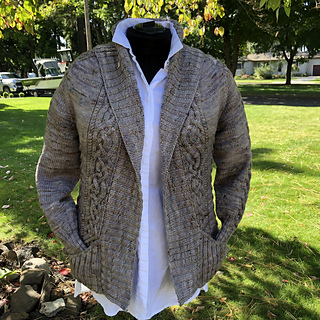
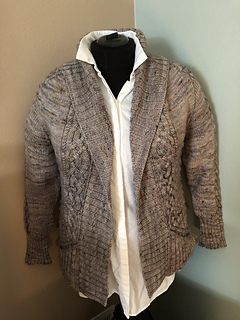
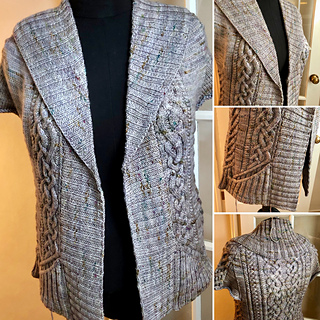
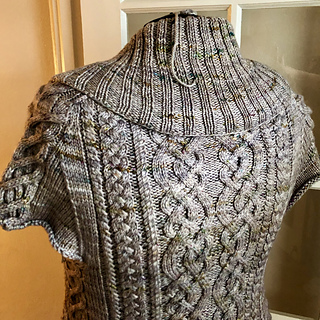
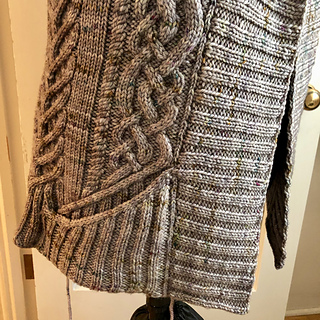
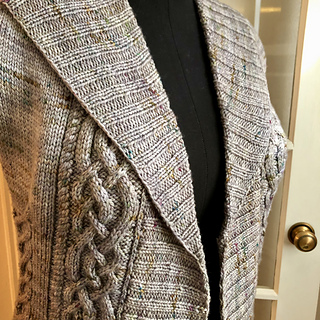
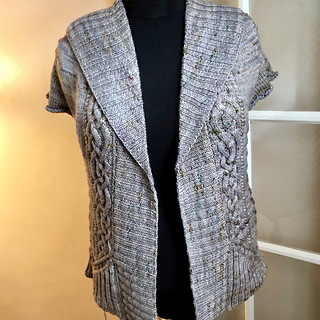
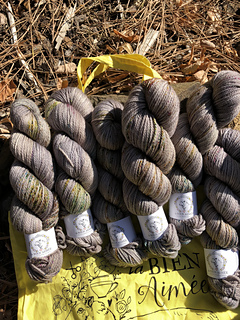
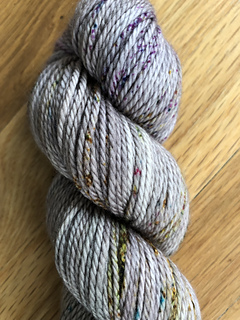
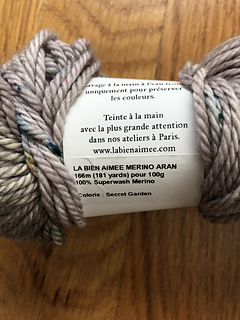
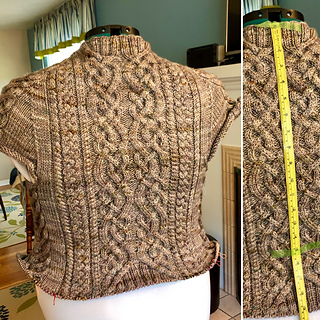
It’s done!!!! All washed, blocked, and ready to wear. Sode Cardigan by Hiroko Payne/The Hare And The Crow. Knit with La Bien Aimée Merino Aranin colorway Secret Garden. Size large and I used exactly 9 skeins. Only had 3 yards remaining.
Note: I did not make the cuffs as long as the pattern described. I did not want to fold them back. Otherwise, I followed the pattern.
April 20, 2020
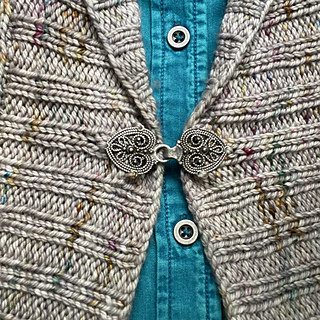
I added a frog closure to the sweater. This makes it even more wearable for me.


 CarmenIsKnitting notebook
  handspun
 queue
queue favorites
 friends
 needles & hooks
 library