Proof of concept project. I would like to make something like this out of the Lion Brand LB Collection silk recently purchased.
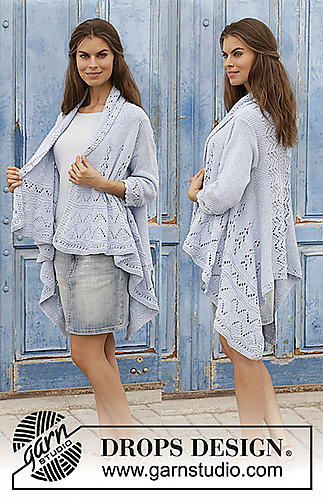
I am modeling my sweater after a pattern from Drops. They have numerous variations of this pattern.
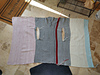
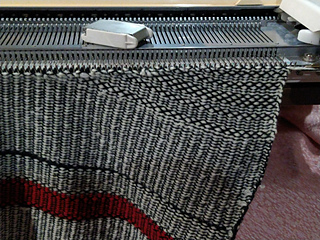
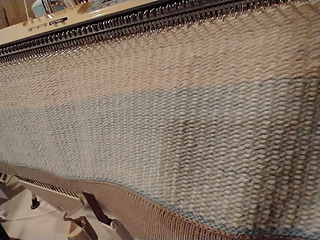
I just used the full width of the machine. Stitch size 8, with Woolike as the base and old bulky acrylic as the weaving yarn.
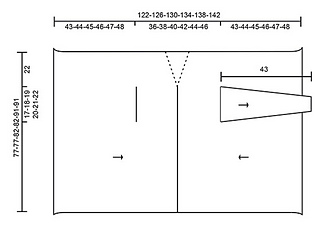
I stuck with the basic dimensions from the pattern, but made the arm hole larger, and will have to adjust the width of the sleeve.
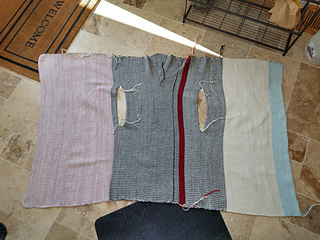
After 175 rows (18 inches after steaming, pattern calls for 19inches), I created the armhole from 52R to 11L by using a bridge method to knit part of a row, then bind off, then knit the rest of the row. Same on the way back, with binding on. It was extremely awkward to deal with the weaving yarn, which I just ended up cutting each time at the edge of the arm hole. And getting the knitting yarn out of the yarn feeder and back in, to do the cast on, required moving the carriage all the way off the machine (onto the extension arms) in order to get access to the yarn feeder. Next time I would consider doing a cut and sew for the arm hole!
After the arm hole, the pattern calls for 9.25 inches to center back. I ended up knitting 89 rows to center back, 9” after steaming.
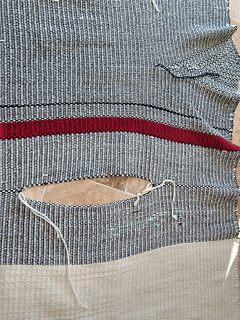
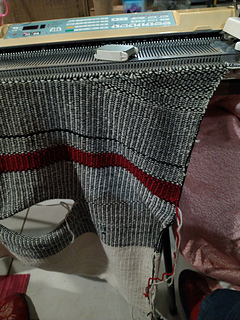
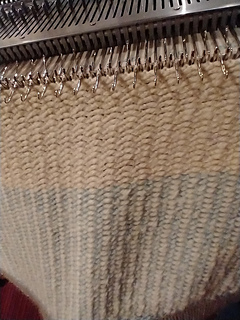
Short rowing for the gusset at the neck proved to be a challenge. If non-working needles are in hold, the weaving yarn gets trapped. The only way I could figure out how to do the short rowing was to keep the non-working needles in B, and carriage set to PART both directions. Then, hand weave the weaving yarn. Since I’m using a 1x1 pattern, that’s pretty easy. I came up with the easiest way of doing that is move the yarn up and down while bringing out one needle at a time from B to D, then knit across. I couldn’t really keep track of which needle to weave over or under, and as a result, the pattern in the gusset is random - I like it, though.
After posting about my ‘found’ method for short rowing in knitweave, it was brought to my attention that the established way to do this is to knit back the held stitches with ravel cord. Alternatively, I suppose one could knit the held stitches off onto waste yarn. Either of those might’ve made this easier, as it was quite time consuming to hand weave every row, and it would’ve been completely impractical to maintain a pattern anymore complex that 1x1. Additionally, there was considerable wear on the held stitches from the weaving brushes going over and over them for every row!
But, it did work.
After the short rowed section, I continued by just replicating the right side.
My plan is to knit the sleeves sideways, keeping close to the profile from the pattern. The sleeve will be wider and shorter than the pattern.
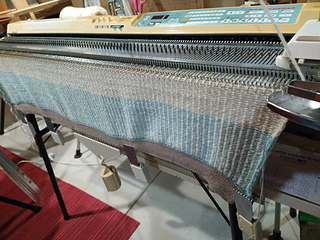
After completing the body of the sweater, it was a bit stiff, and pretty curly at the edges. I pressed it with steam, basically killed it, and that gave it a much nicer drape.


 ItMakesYouSmile notebook
  handspun
 queue
queue favorites
 friends
 needles & hooks
 library