

 ItsBrynn notebook
Winter Rainbows
 handspun
 queue
queue favorites
 friends
 needles & hooks
 library
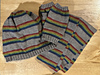
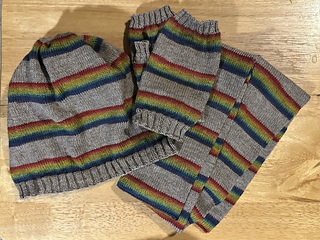
Hat, mitts, scarf set.
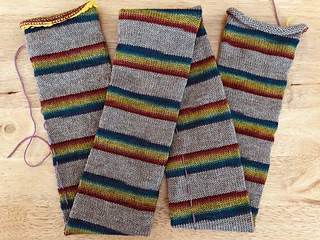
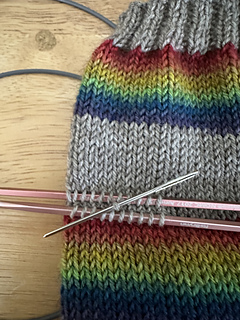
64st sock tube measures 49”L x 3.75” W (7 7/8” circumference).
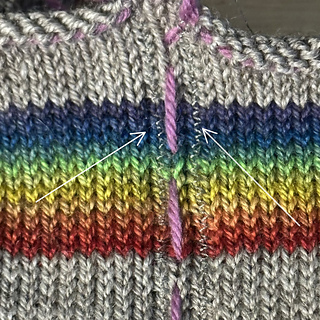
Running vertical stitch for split line.
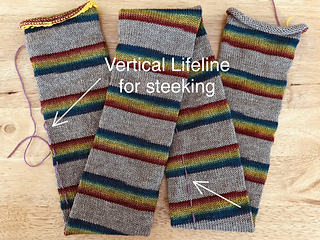
Vertical lifeline placed in the same column for the length of the tube.
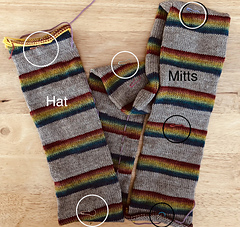
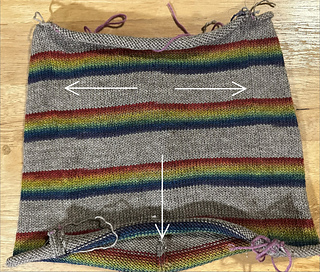
Removable stitch markers (circled) indicate the hat and mitts sections.
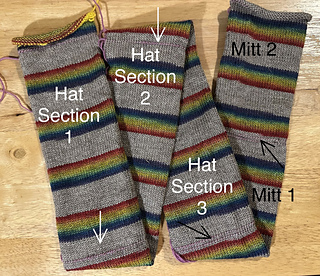
Lifelines (arrows) placed and ready to separate into 3 Hat sections and 2 Mitts.
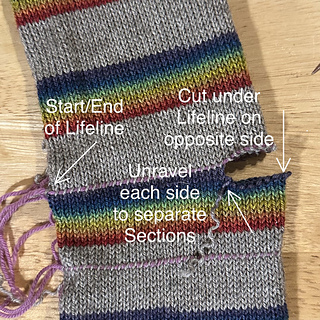
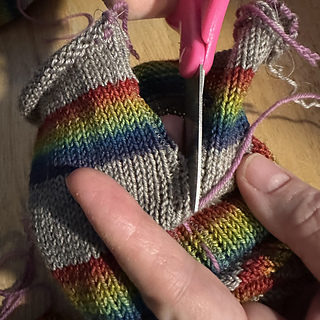
Cut yarn in row above or below Lifeline (as appropriate), directly opposite from beginning/end of Lifeline.
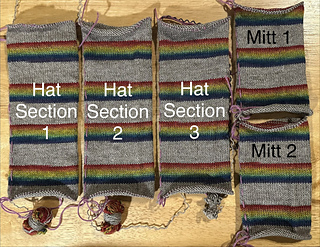
Separated pieces.
Hat (all sections): reinforced steeking line with machine sewn zigzag stitch on either side.
Steeking the column between the reinforcements.
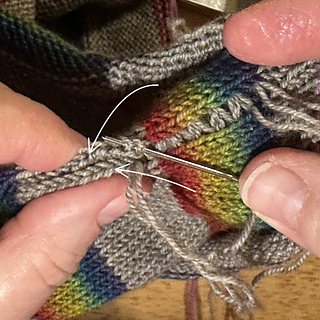
Use mattress stitch to join three hat panels together.
Hat seams.
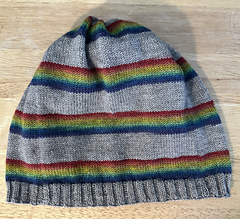
Gather the crown and secure closed. Add 2x2 ribbing for the brim. Hat complete.
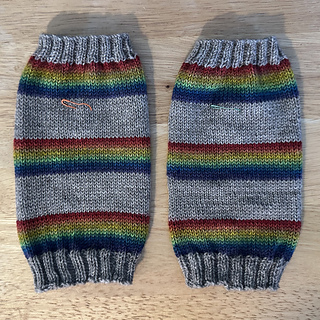
Add 2x2 ribbing on tops and bottoms of mitts. Determine which is front/back.
Afterthought thumb 1.25”/10 sts. Needle in cutting stitch.
photos above
©
ItsBrynn
Winter Rainbows
viewed 6 times
Finished

January 2, 2026
January 18, 2026
by White Birch Fiber Arts
Fingering
70% Merino, 20% Yak, 10% Nylon
437 yards
/
100
grams
23 projects
stashed 60 times
ItsBrynn's star rating
- Project created: January 2, 2026
- Updated: January 18, 2026