11-06-2020
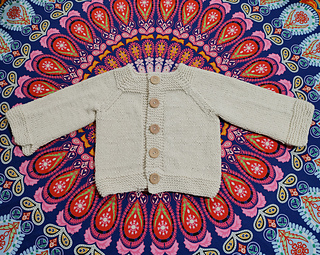
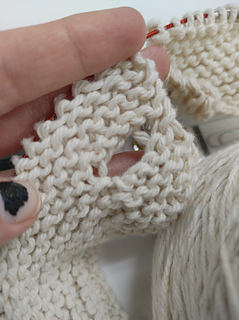
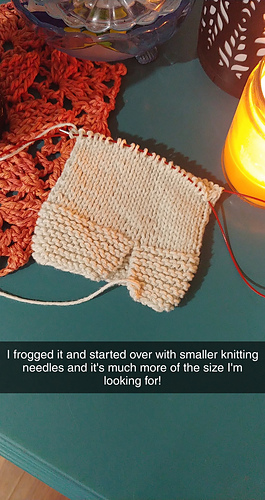
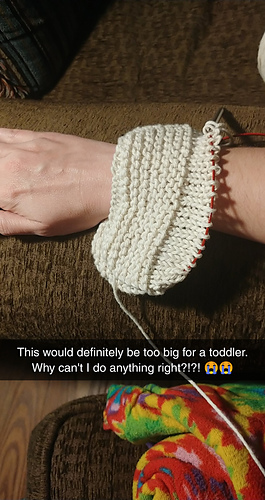
This is my first ever sweater and I’m making the 2T size for my friend’s toddler. The last time I gave them a handmade gift, it was far too small for the baby, so when I started making this sweater, I wanted to ensure that it wouldn’t be too small. For this reason, I started by using 5.5mm needles instead of 5.0mm. This was a mistake, because the sleeve was going to end up wider than an adult sweater. I frogged it last night and restarted it today with a 5.0mm set of needles instead. This seems to be much closer to the size I wanted, even though the needle size is only .5mm different.
11-17-2020
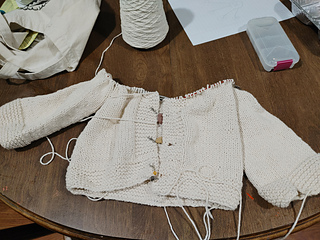
I finished both sleeves a few days ago, but I was too scared to start on the body part because the buttons made me nervous. Tonight I decided to just do it. I looked in my button stash and found some ADORABLE striped buttons that would work perfectly. So now I’m going to power through this sweater. Can’t believe I waited so long to start the body part.
11-18-2020
I STRUGGLED on my first buttonhole. The reason is because instead of doing two yo for the small buttonhole, I did two slips! My brain read it wrong for some reason. So when I got to the second row to finish off the hole, I realized that I had just decreased two stitches, but didn’t have any increase to replace them with. That’s when I noticed the pattern said to yo. I had to tink all the way back to the beginning of the two button rows (slow process when you’re at work) to do it the correct way.
11-19-2020
I made the buttonhole successfully last night. Only problem? IT WAS TOO SMALL. The small buttonhole instructions made a hole that was was too small for my button so I needed to tink again to do it over. Instead, because it was so late at night and the idea of unknitting two entire rows again felt like torture, I just decided it was time to start the entire thing over and I frogged the whole project.
Today I did start over, and I wanted to avoid having to tink two rows if my buttonhole was wrong again, so I changed the location of my button. Originally, I was putting the buttonhole at the beginning of row 7, which meant that I would do the first half of the hole, complete row 7, then row 8, and at the end of row 8 I would finish the step for the buttonhole. If you mess up, you have to unknit both rows. What I did instead this time was start the buttonhole on the end of row 8, that way when I got into row 9 right after, I would be working on the button hole altogether within 5 minutes. Now if I mess up, I only have to tink that tiny part. It also helped to keep the buttonhole on the side that I wanted, the traditionally male side since this is for a little boy. My first buttonhole this way was the correct size, but ugly. I’ll try a new technique on my next button tomorrow.
11-20-2020
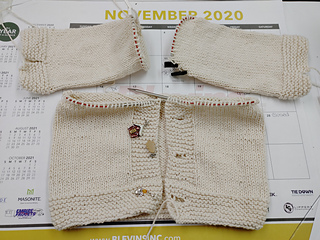
I decided to space the buttons 18 rows apart.


 KimmyIsRad notebook
  handspun
 queue
queue favorites
 friends
 needles & hooks
 library