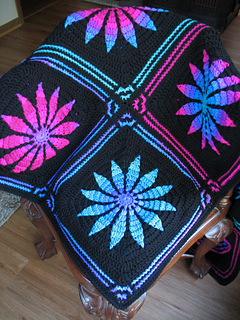
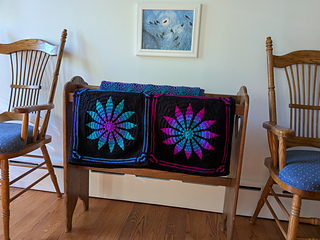
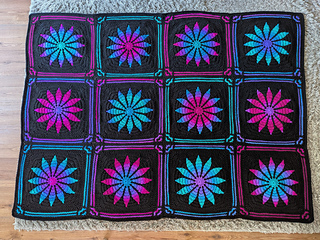
This was one of those love at first sight patterns for me. I bought the pattern & the yarn pretty much instantly when I first saw it, I think in an Annie’s email. At the time, the original yarn color of the sample was already discontinued (Flamenco Stripe), which was a bummer, but I did like the suggested alternative (Polo Stripe), so I went with that. The pattern at the time was available only as a video class from Annie’s, so I went with that too, and was all set to go, when something came up. Don’t remember what it was, but it came first. Then one thing led to another, when all of a sudden it was 4-1/2 years later when I finally got to it!
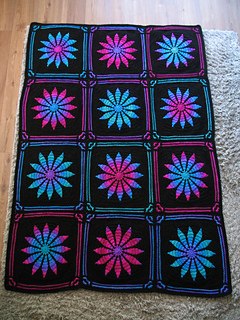
Such a beautiful piece! It proved very helpful to have the video class, as I may have been confused without it. With it, it became a very straightforward project and quite pleasant to stitch.
I have just a few mods/errata to mention:
Beg with magic ring instead of ch-4
Round 6 differs from the video in that it says to alternate 1 increase with 2 even sections, for a total of 52 sts. The video says to alternate 1 incr with 1 even section, for a total of 54 sts. I went with the video.
Round 20 Stitch Count Error:
My pattern says I should have 112 sts, the errata says it should be 116, but I get 128. My number actually makes more sense, as the round increases 2 sts on each side & round 19 ended with 120. It also works for the following round, which increases 3 on each side, and it supposed to end with 140.
Round 22:
Joined in the last sc made before the join (instead of in the “next” stitch) and worked sc in ea of the next 8 sts (9 incl the join). This in order for the 2 sts w/2 sts ea to fall in the center of the corner.
Did not fasten off between rounds of the border.
Other Notes:
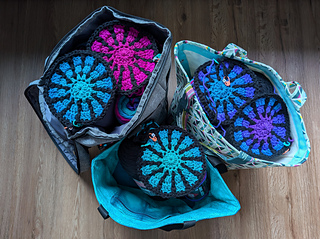
Note that In the video, Rohn strongly suggests that we stitch all 12 blocks assembly line style instead of 1 at a time. But since you don’t fasten off the Stripe color until round 17, and the Black until round 21 (and if you want to keep the color flow of the stripe through each block), this would require that you have 12 skeins of each color, unless you want to cut and divide up the skeins. I guess you could do that, but I decided to do just 6 at a time instead of all 12. I had enough of the Stripe to have a dedicated skein for each block this way, but I had only 5 skeins of the black. So for blocks 5 & 6, I used one of the black skeins from both the inside and the outside. All of this involved quite a bit of yarn management, and made for not a very portable project, but it was still fun.
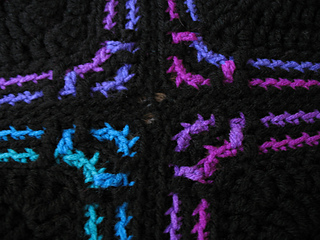
I assembled the blocks with whip stitch instead of single crochet. I tried the recommended sc first, but didn’t like how it looked. I also assembled them 1 at a time instead of the whole row at once, as Rohn suggested. That may have worked for the sc join, but with the whip stitch, I was getting long threads at the intersections, no matter how taught I tried to keep it.
I’m a little bit disappointed in how the blocks lay when assembled. They kind of pop up in the middle instead of laying flat. At first I thought it was user error, like maybe I stitched them too tightly when seaming, but then I remembered that when I originally had stacked the completed squares as I was making them, they did kind of mound up in the middle. I think this may be because the 2-color sections in the center were more bulky in the back than the single color sections which laid flat. So when you transitioned from one to the other, the thicker parts of the block sat higher. I dunno, but it was funky looking when spread out.
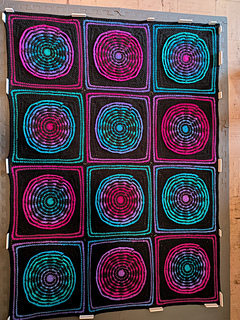
So I tried to steam block it, as per the pattern. I’d never done this before, so was kind of nervous about it, but it did seem to help. It didn’t totally fix the problem, but it did make it a little better. I think I got a little overconfident after a while though, as there were a few spots where I must have held the steam too long, and the yarn kind of melted into some of the holes where it was pinned! It was weird. It kind of formed little plugs in those spots. Yikes! I had blocked it on the wrong side to be cautious, but that kind of backfired on me, as these plugs formed on the right side which was face down into the pin holes. Oh, well. It wasn’t in too many spots, and it definitely was a lesson learned!
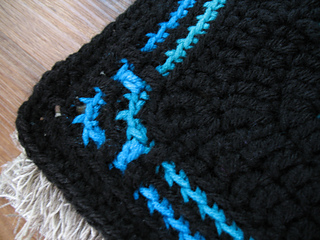
The edges are also a little bit scalloped, as a remnant of the circular shape that they started out as. I considered doing another round of sc border, doing hdc just before & after the joins, and then dc right at the joins, or maybe just sc right up to the joins, and hdc at the joins. I’d have to experiment, but by that time I felt kind of done with it, so I left it alone.
Yarn Usage:
It’s odd that the pattern called for 4 skeins of the Black and I used more, and that it called for 6 skeins of the stripe and I used substantially less (note though, that although in total I may have used only 3.78 skeins of the Stripe, I did break into 6 skeins at once).
Thoughts on the Annie’s Class:
My biggest beef about the class was that are no time stamps at all for the chapters, nor does it remember where you were if you leave and come back. These 2 things made it so much more cumbersome than it needed to be (and kind of annoying). I ended up taking an evening to go through and write down time stamps for myself, so that I could more easily find my place or re-watch sections as needed. This took a lot of time, but I found it to be helpful. I present them here for future reference, and for others who may benefit:
Round 1 - 4: 7:40
Round 4: 14:47
Rounds 5 & 6: 16:58
Round 6: 21:24
Rounds 7 & 8: 24:24
Rounds 9 - 11: 28:19
Round 10: 31:47
Round 11: 32.39
Rounds 12 & 13: 33:38
Rounds 14 & 15: 36:18
Round 15: 37:42
Corner Setup & Squaring the Motifs: 40:17
Round 16: 40:22
Round 17: 43:21 (then fasten off the colored yarn)
Round 18: 45:50
Round 19: 53:48
Round 20: Essentially the same (no video instr)
Rounds 21 & 22: 57:29 (Round 21 Fasten off Black)
Round 22: 58:22
Round 23: 1:01:23
Round 24: 1:06:05
Round 25: 1:10:49
Finishing Steps: 1:14:25
Blocking: 1:14:29
Assembly & Borders: 1:17:54
Border: 1:22:36
Weaving in Ends: 1:23:04
Final Block: 1:24:44
Class Wrap-Up: 1:25:23


 KnitSister1 notebook


 projects
 handspun
 stash
 queue
 favorites
 friends
 groups & events
 needles & hooks
 library
 blog posts
 Project


 stashed

