MC - Some very old yarn. Still working on my New Year’s Resolution for 2025 - Use up old yarns that I don’t especially like.
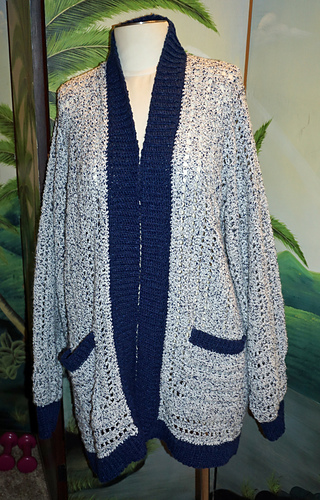
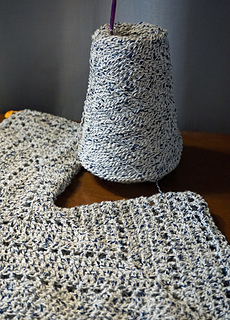
This is a nubby yarn with a tweed look in very light blue and navy. It’s not very soft. I don’t think it will work well for ribbing but I have some navy yarn that would work as an accent.
Trying it out in this cardigan pattern. It needs a pattern without a lot of stitch detail because of the tweed look to the yarn. I searched for a pattern that was not just boring rows and rows and rows of dc.
This pattern is ALMOST boring! I switched up the row patterns to make it more interesting for me.
CC - I held 4 strands of lace weight navy yarn together. 2 of the cones are cotton. I have no idea what the other 2 are - probably nylon or polyester because of their age.
Ravelry doesn’t let me put in the full amount of yardage on my large cones. These cones probably have about 20,000 yards each. I just stuck in 1000 on each cone for a number to be there.
Notes for consideration
Aiming for Size 2X/3X. Project posts say that size L/1X gives a size 2X.
Stitch counts to L/1X are off. Video/PDF/blog do not match in instructions (according to other project posts).
Pattern uses about double the amount of yarn that the designer posts in pattern.
My previous cardigan with this pattern had issues with the setup row for the ribbing (bottom and collar) causing the cardigan to look a bit ruffled. This is because the setup rows have a lot of decreases. If I add ribbing to this cardigan - modify the number of decreases so they don’t change how the cardigan hangs.
Sleeve decreases
Start increasing the decreases for the sleeve around Round 14. Work Round 4 decrease as written to center the underarm seam. After that, decreases need to be on both sides of the join to keep the seam centered.
Cuff ribbing
Cuff ribbing setup round decreases will be less than called for because of the increased side 1 decreases.
Gauge Check
I hook (5.5 mm) and edc stitch
Radius = 4 in
Side measurement = 7.5 in (except side 1)
too big
H hook (5 mm) and edc stitch
Radius = 4 in
Side measurement = 7 in (except side 1)
just right
goal radius = just under 4 in
goal side = 7 in
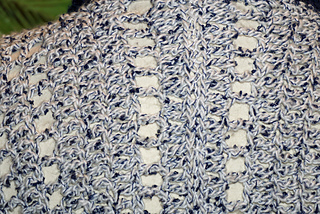
I am playing with the stitch pattern. Sometime the rounds are 3, 4, 4, 4 and sometimes they are 3, 4, 3, 4. I have a set of 3 solid dc rounds and a set of alternating open and solid dc rounds. The alternating rounds have 3 rounds of solid dc embedded between the open rounds.
Hexagon rounds
Rnds 1-5 - as pattern
Rnd 6 - dc2tog on each side of join
Rnd 7 - all dc, no dec
Rnd 8 - dc2tog on each side of join
Rnd 10 - all dc, no dec
Rnd 12 - dc3tog on each side of join
Rnd 14 - all dc, no dec
Start extra sleeve decreases.
Rnd 16 - dc3tog on each side of join
Rnd 17 - all dc, no dec
Rnd 18 - dc3tog on each side of join
Rnd 20 - dc3tog on each side of join
Rnd 22 - dc3tog on each side of join
Rnd 24 - dc3tog on each side of join
Rnd 26 - dc3tog on both sides of join, 1 increase on each corner of Side 1, 2 increases for other sides.
Ended on L/XL number of rounds with 103 edc for Rnd 26.
Body extensions
I did 4 rows of body extensions. To continue my stitch pattern, I did rows 2, 2, 3, 2.
Note - I did not have to skip “2 stitches” at the beginning of any of my rows for the extensions, on either of the cardigans that I made.
Sleeve extensions
Because this yarn is VERY nubby, it is difficult to hide the ends with a yarn needle. I am hoping that I did that well enough, but it was hard. I didn’t even know how I was going to handle the seams. When it occurred to me that I could use white, No 10 crochet thread for seaming. This worked like a charm.
First, I seamed my sleeves. It’s much easier to work the ends of the sleeves without having to deal with the whole cardigan.
My sleeve extensions are worked in the round. Then I did the first foundation round (for the ribbing) with the same yarn so that it would blend in and look nice. I did a 2nd setup row for the ribbing because the sleeve end was still too large. Then the ribbing in navy.
Sleeve Extensions Rows worked as Rounds
Rows 1, 2, 3, 4, 5, 6 with dc2tog on each side of the join on even rows.
Setup round 1 - sc2tog around
Setup round 2 - sc2tog, 3 sc around
Ribbing worked with sl st’s in same row and next row, next one is sl st in next 2 st’s. repeat around alternating.
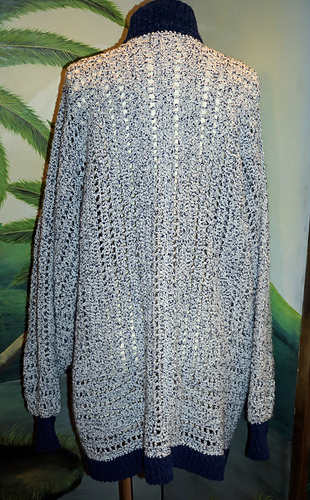
Bottom and collar
I seamed the back seam first. Then 2 more rows of extensions to smooth out the bottom. Without fastening off, I then did a setup row all the way around the bottom and along the collar. Then I cut my MC yarn.
Bottom ribbing
I worked a row of sc (no decreases in this row) along the bottom in navy. Then I worked the ribbing. The extra row of sc smooths the transition between colors.
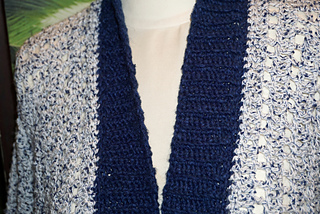
Collar ribbing
I turned at the end of the bottom ribbing and did a row of sc along the collar. I didn’t do as many decreases as the pattern calls for because I want my cardigan to hang smoothly. Hoping this works!
When I finished the foundation row of sc, I was at the wrong end to work the ribbing. I just turned and did another row of sc - lol - to get to the other end. The things I do to avoid all those ends!
I have been working the ribbing but it is slow because I have to take time out to make Easter Egg Pockets for my daughter’s Easter Egg Hunt (for my grandkids). It does break up the monotony of the super long ribbing……
Hindsite
When I tried the sweater on, the sleeves are too long. I didn’t even do the full amount of rows! For some reason, this designer thinks that if you wear a larger size that your arms must be longer, too.
The sleeves will still work because of the cuffs. But I should have done less sleeve extensions.
I knew from reading other projects that this pattern ran a LOT bigger. I used the instructions for Large and I swear this is a 4X!!! It’s a gift to my daughter. She says she doesn’t mind that it’s going to be too big, it’s just going to be cuddly.
Still, I mind that it ended up so large. But it is what it is.
6/3/2025
I stopped for awhile even though all I had to do was sew on the pockets. Easter Egg Pockets for the grandkids came first and then I got sidetracked with some other projects. So, here we are, back again to finish up.


 PiggyWiggy96 notebook
  handspun
 queue
queue favorites
 friends
 needles & hooks
 library