Going to give this a try. Looking through the projects, no one has really documented them very well. One gal mentions that you should have more than the 100 grams the designer says to start with. The problem is that I can’t find if that’s 100 grams of WHAT size thread?
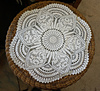
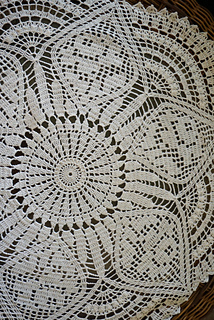
So, I guess it’s up to me to try to get some comments going about how much thread, the finished size, and all that. It does look pretty.
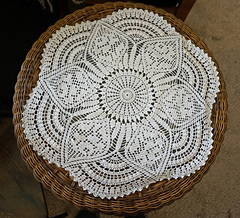
One gal had a hard time with it laying flat. I think that the round insets can be adjusted to not be quite so full, if i have a problem with that. good to know in advance.
I am using #30 weight thread with a US Size 9 (1.4 mm) hook. a large hook for this weight thread.
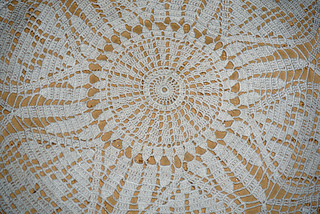
in this particular instance, the ch 8 joined circle is MUCH easier to use than a magic circle. you need the space for all the stitches in Rnd 1.
I am NOT using a video to make this as that would drive me starkers. i am using a chart that is not in English. We will see how it goes.
Rnd 3 - Not sure what this Tall Oval symbol means. Looking at other projects pictures, it looks like a 3dc popcorn. I have decided (on Rnd 27) that a 4dc popcorn looks a lot better. but i am not frogging back to Rnd 3!
I used extended dc (edc) instead of dc to make my stitches a bit taller and so my filet blocks would be square. i used tr where tr stitches were indicated.
Rnds 1-11 - worked exactly as the chart indicated with the exception of using edc instead of dc.
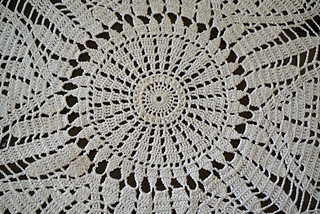
From Rnd 12 on, i have decreased the number of chains between each set of stitches. my doily was just too full and this has helped tremendously.
Number of chains used in ch spaces from Rnd 12
ch 1 = ch 1
chs 2-4 = ch 2
ch 5 = ch 3
ch 6 = ch 4
ch 7 = ch 5
ch 8 = ch 6
ch 9 = ch 7
ch spaces by 3 dc borders in pattern
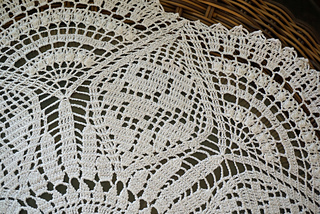
On the inner side of the ‘leaf’ section, where the roses are, I used ch 2 consistently between the 3 dc border and the roses except at the top where it was ch 1. Outside of the 3 dc border for the rose i used the substitutions listed above.
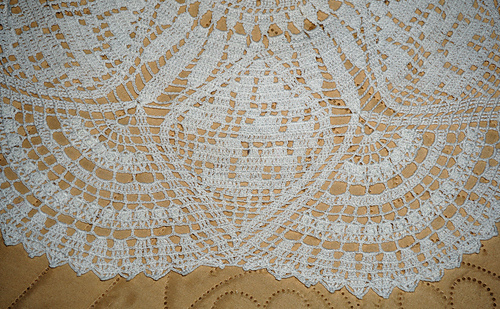
In the fan sections, along the outer edge, the chart has the ch spaces getting larger as you get closer to the final rounds. I used ch 2 consistently for the inner and outer ch spaces along the 3 dc borders of the fans.
Rnd 24 - I made 7 dc instead of 9. This is to make the fans lay flat. Worked great!
Rnd 26 and 32 - The symbol appears to be a Y stitch. I am going to try it. When looking at existing projects, only Fed1r uses the Y stitch for these rows. Everyone else used a (dc, ch 3, dc) in the same stitch to emulate the Y stitch. I like the look of the Y stitch and it’s taller than the alternative.
It’s very hard in the charts to follow the row instructions across the fan into the rose section. You have to be VERY careful.
Before starting the rounds that have decreases around the rose motifs, read Rnd 35 below.
Rnd 28 - ch 5=ch 5 in the fans.
I am on Rnd 35 and have closed the tops of the rose motifs. I can clearly see that everything I have done has been beneficial to the doily laying flat. BUT the tops of the rose motifs are causing them to buckle because of the rapid decreases. The only thing I can think of that would mitigate this problem would be to substitute 3 tr for the 3 dc in all of the rounds that have decreases and only on the rose motifs until you reach the top of the roses. There is no buckling once you start on the open blocks at the top of the rose motif.
Another possibility is that you could try switching to the next size smaller hook when working the inside of the rose motifs. Just brain storming possible ways to fix this major problem in this pattern. I haven’t tried them because no way am I frogging everything back. I want to be done with it and move on.
I am not sure how these suggestions would work out in reality but other than radically modifying the pattern, I don’t see any other way to do it. I can only hope that the doily will block out flat, if I soak it overnight to make sure the cotton fibers are thoroughly soaked through and through, maybe.
Rnd 40 - (I made it to the last round!) The problem here is that the picots are all leaning to one side. The only person’s doily where this does not happen is Fed1r’s doily. Her picots stand up perfectly straight on the tip of each of the tr3tog. Her picots look larger than a normal ch3 picot.
How I made pointy bits on Rnd 40.
make tr3tog as indicated by the chart. ch 3, sl st into first TWO (2) front strands of the tr3tog then sl st into the top side of the last tr of the same tr3tog. Yes, you are sl stitching into it twice. the first sl st pulls the picot back to the right. the 2nd sl st anchors it.
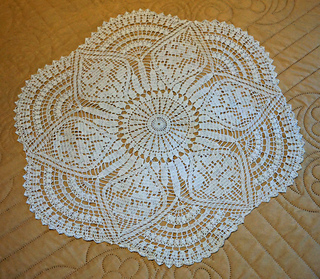
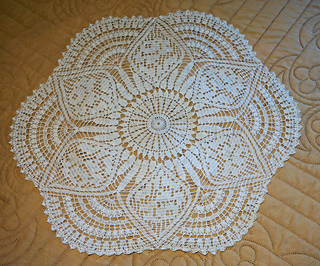
FINALLY!!!! i am finished. This took so long because I was trying to fix it. The only thing I didn’t know I had to fix ahead of time was that the rose filet sections needed to be a smaller tension that the rest of the doily. It’s not ruffling which is too much fullness horizontally in the round. it’s folding (which is too much fullness vertically) in the rose sections. As mentioned above, this is because of the severe decreases around the rose part of the flower.
Dimensions
pre-block
diameter - 22 inches
post block
diameter - 21 in (after ironing - blocking will be better at flattening this)


 PiggyWiggy96 notebook
  handspun
 queue
queue favorites
 friends
 needles & hooks
 library