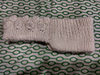
Trenchcoat Headband
I had originally purchased the recommended yarn to create the teeth on the shark socks I had made for my son. I came across this pattern while looking for something to make with the remaining yarn. As this pattern required a whole skein, and the socks had required so little, I figured I could make it work, possibly making some size concessions by omitting a few rows if needed.
I began by casting on with one extra stitch to be slipped over the first to join in the round, then completing the first 12 rounds of ribbing.
At this point I made an unfortunate error reading the pattern and did not notice until I had fully completed both rows of puffs. My error was in making one puff less per row than called for, which became quite evident when trying to complete the final row as written which sent me out six stitches too far in the puff pattern before resuming the ribbing pattern.
My options at this point were to rip back both sets of puffs back to nearly the beginning of the pattern, or modify the pattern slightly to my new number of puffs. This modification would shorten the front side by six stitches while lengthening the back by the same amount. As the earflaps follow the length of the back, the increase of six stitches by sixteen rows would mean a total increase of 96 stitches, just under one row’s total. I figured this was acceptable.
As I finished the next rounds of ribbing and started the earflaps, it was becoming clear that I was going to run much shorter on yarn than I was anticipating. From the beginning I had been figuring that I would have to leave out some rows from the final rounds, but at this point I was starting to consider other options as well.
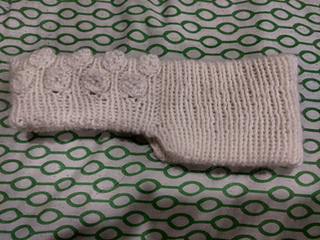
To begin, I cut the earflaps short at 14 rows, worried any shorter would defeat the point of having them at all. After completing the first two rounds after the earflaps, which attach and then anchor them, I had just enough yarn left to either Bind-Off or complete one more round.
Knowing that even if I bound-off now I would not have enough yarn left to seam the two sides together, and I couldn’t very well go back a round as that would compromise the integrity of the earflaps. Wishing I’d had the foresight to begin with a provisional cast-on, I began implementing my plan to try and save my project.
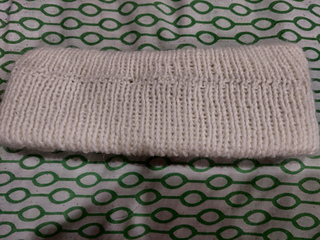
First, I started by completing a third round after the earflaps, cutting the tail to 6 inches and using what remained to seam the two open holes at the sides of the earflaps with mattress stitch on the inside of tube that will be the finished headband. I have included a photo trying to show how one of these seams turned out on the outside.
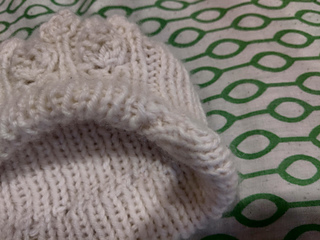
Next, I undid the original cast-on (which was painstaking and took forever). While the new uncovered tail was long enough to make 2 rounds, I decided not to make a new round starting at this end as I did not think it would look good as the ribbing stitches did not look the same upside down and I was not confident in my ability to match them.
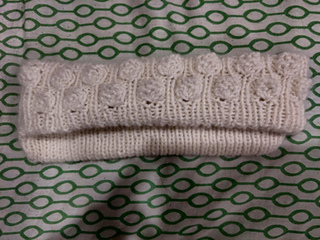
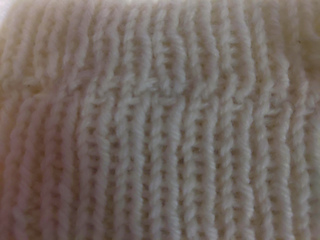
Instead, I used the information from this site to seam the top and bottom rounds together using Kitchener stitch. This was my first time attempting such with ribbing, and the instructions were for seaming a folded flat knit piece, not a folded piece knit in the round, and I believe I did not 100% successfully modify as needed. I have included a couple pictures of the seam. As it is on the inside of headband against the wearer’s head, I’m happy with it as a first attempt, though I will try and learn how to do it better in the future.


 RealFinnan notebook
  handspun
 queue
queue favorites
 friends
 needles & hooks
 library