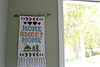
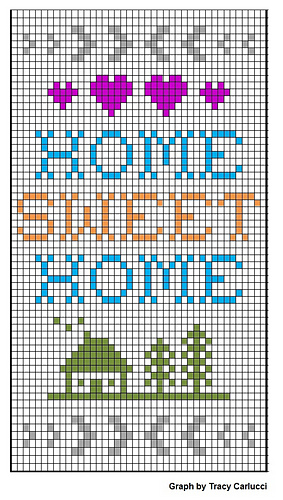
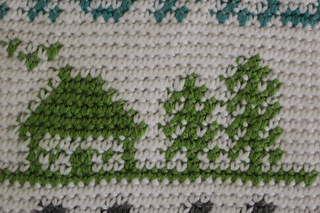
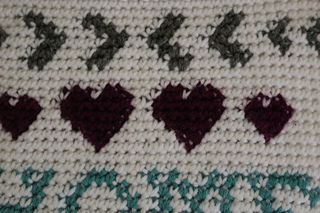
I’m not a pattern writer, but I was searching high and low for a graph to create a wall hanging for our first house that we just bought. I ended up creating a graph in Excel based on a stock photo I came across online when I was searching for cross-stitch patterns. I liked the simplicity of the image (read: not too many color changes), even though it wasn’t an actual graph or pattern. Here’s the link to the stock photo that inspired me: http://www.istockphoto.com/vector/sweet-home-cross-stitch...
I did one SC per square of the graph and used tapestry crochet techniques for the color changes. Finished graph measures approx 11.75” x 19.25” (not including fringe or stick). Gauge is not important for this project.
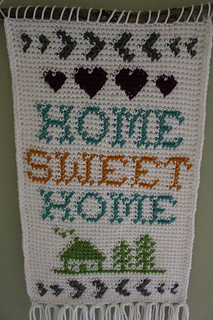
For some reason, I wasn’t happy with how it was turning out when I turned at the end of each row, even though I was doing the color changes correctly. So I actually fastened off at the end of each row, rather than turning!! Kind of unconventional, but for whatever reason, I thought the it came out better this way! Of course that meant a lot more ends to weave in, but I didn’t bother weaving the ends at the beginning and end of each row - I snipped them short and left them (gasp!) I did weave in the ends of the color changes though to make sure they were secure. When I was finished, I used craft glue to secure it to a piece of posterboard, so you can’t see those ends anyhow!!
This posterboard step was also necessary because my graph tilted on an odd diagonal (maybe because of my unconventional fastening off at the end of each row?) Much to my distress, the entire thing sloped down and to the right :/ I’ve never had this happen before! Even blocking didn’t fix it!! I was able to reshape it into a more symmetrical rectangle by pulling and tugging at it while I glued it to the back of the posterboard, leaving a little overhang so the posterboard isn’t too visible from the sides. It’s still not perfect, but such a big improvement! I came so close to giving up on the wall hanging altogether until I came up with this solution.
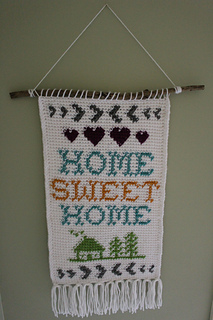
To finish it off, I used a tapestry needle to weave a long piece of yarn over the stick and under each of the stitches at the top, and wrapped it several times over the ends after making a long loop for hanging. (Note: test out how high you want your hanging to be on the wall before finalizing the size of that loop!)
For the fringe, I used 5 lengths of yarn for each tassel, each cut to approx 9 inches. I placed the tassels approx every 4 stitches, starting on the 2nd stitch in from the corner. When completed, I trimmed the fringe to a (somewhat) even length of about 4 inches.
Just wanted to share in case this graph is helpful to anyone! I could see it being a nice throw blanket done in C2C or bobble stitch.
Enjoy! :D


 TracyCarlucci notebook
  handspun
 queue
queue favorites
 friends
 needles & hooks
 library