taking my time with this pattern, it’s very involved.
the seaming is the most difficult part.
The kit is great, it came with everything including US 2.5 circular needles, a little plastic box with the color coded stitch markers, plastic eyes, wool roving to stuff Eeyore, a cute project bag and more than enough yarn to complete one Eeyore. The yarn is lovely and very soft.
I tried doubling the yarn as an experiment but it didn’t look good and I would have run out of yarn.
Re the pattern: I wish there were more photos especially of the belly and legs, some of it is confusing re how to sew up the parts. I found a few helpful photos in other knitters Eeyore projects posted on ravelry.
Sewing the seams and shaping is causing a lot of anxiety! I even knit the tail and ears first (without seaming the ears, I tried and gave up) first as a procrastination tactic  .
.
I decided to sew seams and shaping up on the Right Side using mostly mattress stitchesque technique as it was too hard for me to do back stitching on the WS and make it look satisfactory.
I noticed some errors with the colored marker assignments once I got to the belly area so I reused the colors that were no longer needed at that point.
I also added extra markers where there is a bend in the back between the neck and foreleg but not a corresponding bend in the belly so my sewing up hopefully will not be too lopsided there.
I filled in holes in my knitting where my tension wasn’t tight enough by adding strands of yarn woven into the back side, that seemed to work better than adding overstitching. I messed up part of the belly the first time so I frogged that part and reknitted it, good thing I did because I had totally missed 3 repeats the first time!
I also redid the cast off of the hind legs belly side to be looser as they have to stretch enough to sew to the edge of the hind legs back side (15 sts across for both edges).
01-22-2025
getting there slowly.
already decided to add eyes and ears before stuffing to make it easier to sew.
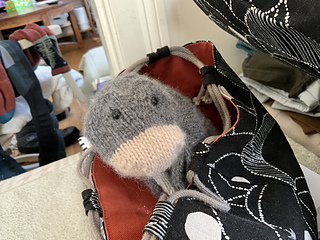
just mattress stitched ears shut and put in screw in plastic eyes that came with kit (carefully counting up 8 rows from color change and making sure they are centered correctly).
still have to sew on ears, knit chin, sew up legs, stuffing as i go,
01-23-2025
couldn’t figure out how to sew up hind legs. tried various methods and experimented with adding short rows to match grey flap (foot).
got frustrated and asked thussung for help who patiently explained how to sew up the hind legs. Basically the belly color is like a legging and the grey flap gets turned back to form a “heel” for the hind foot. Thank you thussung!
Decided the method thussung explained looked better than my short rows addition.
01-24-2025
got ears in, redid left foreleg seams so it matched the right one better (sewed closer to the edges, the left foreleg was too skinny the first time). experimented with picking up 10 grey, 10 white sts on end of foreleg and creating a circle, think I like it so far. tested stuffing the head to see how he looks, the eyes were too tightly screwed in so I ended up taking them out and plan to embroider eyes. I generally dislike plastic eyes for making stuffies (we have two kitties so ribbons and little plastic things they can choke on or swallow are banned lol). I prefer embroidered ones.
01-25-2025
Finally finished! Whoosh that was really a difficult project! I opted for the super floppy, squishy look.
Modifications to pattern:
- embroidered eyes using the black cashmere that came with the kit. larger than the plastic ones.
- knit circular paws for fore legs
- knit oval paws for hind legs
- pink yarn from stash for bow


 ajfluxus notebook
  handspun
 queue
queue favorites
 friends
 needles & hooks
 library