Aviator hat:
- magic loop 6 with long tail
- (inc)x6 around (12)
- (sc, inc)x6 around (18)
- sc3 (inc, sc5)x2 inc sc2 (21)
- (sc)
- ch1, sc-fl, hdc-fl, dc-flx3, hdc-fl, sc-fl, ch1, (sc)x15, ch2 turn
- (sc)x15, ch2 turn
- (sc)x15, ch2 turn
- (sc)x7 dec sc(6), ch2 turn
Earflaps:
Row e.1: (sc)x3, ch2 turn
Row e.2: skip 1 (sc)x2, ch2 turn
Row e.3: skip1, sc, slip-stitch along side,
e.4: slip-stitch 8, ch1,(sc)x3, ch2 turn
e.5: skip 1, (sc)x2, ch2 turn
e.6: skip 1, sc, ch8 for chinstrap.
Form a ball at the end of the chinstrap. Slip end through hole in opposite ear flap.
Glasses:
Find the first turning row. At the back of the hat, with fresh yarn:
Slip stitch around post of turning row sc to two posts before the edge of the hat. ch 13. Skip two posts and then slip stitch around.
Slip stitch into bottom loop of original band and two of the chain. ch1, then, into bump of the middle 9 ch stitches:
sc, hdc, ch1, skip one and slip stitch bead in place. ch1, sc around chain strip, ch1. Slip stitch bead into next bump. ch1, hdc, sc. There should be only two chain stitches left. Slip stitch into the bottom loops and around to the back. Tie off.
-=-
I used 1mm polystyrene for the wings. Thicker would be better. For the supports I used 2mm square aluminum tubing and threaded them on to the wings with holes in the wing plastic. That helped somewhat with assembly but I don’t think it added any stability, really.
1mm polystyrene for the propeller with a safety eye as the pin. It turns very nicely.
The wheels also have safety eyes, which are threaded to an aluminum tubing sideways support. I was going to bend it so that the wheels cleared the bottom wing, but they ended up very wobbly. I crocheted a support to attach the axle to, and that worked well enough. The wheels turn although mostly awkwardly since they’re soft.
The supports ended up being entirely too wobbly, so I used 2mmx9mm polystyrene strips to make diagonal supports going from the cockpit to the top wing between the uprights. This seems to have solved it.
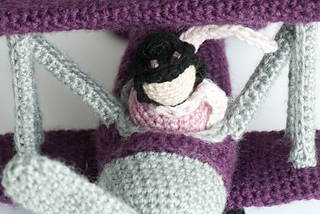
I made the person a little taller than I intended but I think it’s okay. I put a magnet in the person and under the cockpit, although the hold is very soft because of all the layers of fabric.
Initially I sewed the plane body around the outside. The plane body was fairly wobbly on the bottom wing, so I used grey yarn to stitch from the cockpit down into the wing. This pulled it snugger, which helped the pilot fit.
I used pink yarn for the pilot body so that she would have clothes. She’s made out of cotton scraps, with a bamboo and mohair aviator helmet.
-=-
Should have paid attention to the instructions, the decreases are much nicer her way (using the front loops only).
-=-
If i were making it again, I’d stagger the increases in the plane body more so that it didn’t have ridges. And depending on how picky I was feeling, might cut the yarn for the cockpit rather than going back and forth, because it makes ridges.


 dreadsci notebook
  handspun
 queue
queue favorites
 friends
 needles & hooks
 library