All day Rigid Heddle Workshop at Shuttles, Spindles & Skeins, Boulder, CO. 16 May, 2010
Instructor: Jane Patrick of Schacht.
Loom: Schacht Flip 20” Loom - 10 dent
FINISHED MEASUREMENTS:
Before Felting: 55”L x 6”W (minus fringes) pics 5&6
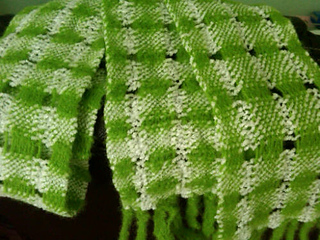
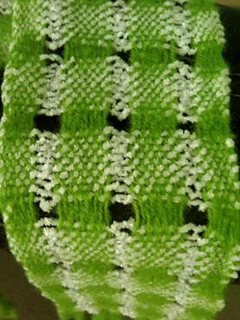
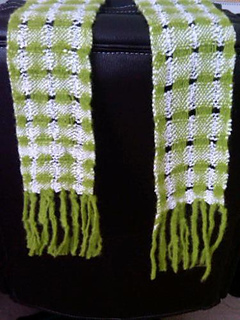
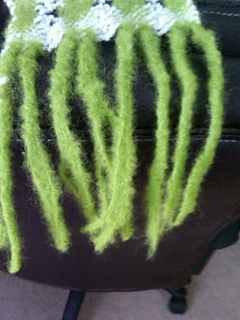
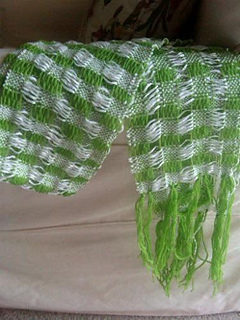
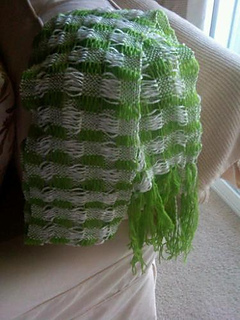
After Felting: 48”L x 4”W (minus fringes)pics 1-4
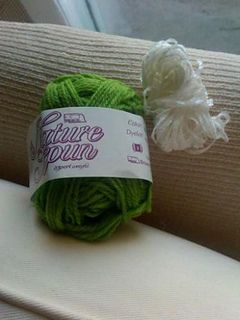
Chenille - Weft (pic 7)
Nature Spun - Warp (pic 7 - the amount left over)
16 May 2010: My first class on how to use the Rigid Heddle. Schacht Flip Looms provided by Shuttles for the class. Scarf weaving was finished during Workshop (pics 4 and 5). Now to be felted…Although it’s pretty cute the way it is! You’d need to make sure any ends are secured well if you leave it unfelted.
NOTE: Similar/same pattern can be downloaded free from KnittingDaily’s site:
http://www.knittingdaily.com/media/p/47541.aspx
27 May 2010: Felted (pics 1-4) - Huh….maybe I needed more specific felting directions. I’m not sure what I did differently from the sample - Jane has a front loader, I have a top loading machine.
I used Med (Jane suggested this) rather than Hot water to try to be more gentle with it. Rolled this into cotton dish towels (not terrycloth) to machine wash ‘till done. Because of my hand issues I did not want to undo, midway, a bunch of safety pins holding the package together. My towels were only a bit wider than the scarf so the edges had to be pinned. I only had just enough towels to make it to the end of the scarf. The ends of the roll of towels had to be pinned closed too.
I think it would have been better rolled in either parts of an old sheet, cut so it had ends I could have tied and untied with cotton yarn (as Jane suggested). Or, put it into an old pillowcase that had the side seams opened up to form a long strip, then roll up the scarf.
NOTE: I now realize this should have been in the machine for a much shorter time (look at the link below) in order to end up less felted (more “fulled”?) and somewhat wider & longer. I left it in for the entire short cycle, as I usually do with knitted items.
Specific felting directions can be found in here for a similar project -- download the pdf for Handwoven Bags: http://www.interweave.com/weave/projects_articles/11-07_f...
While the scarf survived intact, at first it looked shockingly thinner in width than the sample scarf that Jane had shown us.
I peeled the damp scarf from the towels. The fringes were very sticky and had to be pulled hard from the towels - the Tea Towels did have slight texture to them. I stretched the scarf widthwise. It was damp but not wet. The Chenille seemed to be holding the wefts of wool together, widthwise, with their texture, so that it was about 2 1/2 - 3” wide…it spread to a tad over 4” wide after stretching and revealing the spaces. This turns out to be roughly up to 2” less than the original, non felted, width.
Hung overnight to dry. It’d been practically dry by the time I finished stretching it.
After drying: Any imperfections in weaving and a few loose ends (from joins) had disappeared, except one end, which I clipped.
The fringes ended up looked like fuzzy dreads (pic 4)…I’d try twisting these or braiding them before felting and perhaps they’d have more dimension afterwards? I snipped them to about 4 1/2”L.
A great kids scarf! For a skinny adult scarf IMHO it needs to be much longer to be correctly proportioned. It’s pretty (except for those fringes) and soft to the skin.
 elizaduckie >
  notebook > projects > Plain Weave Green & White Scarf


 handspun
 queue
queue favorites
 friends
 needles & hooks
 library
