Goya wants a circumference of 35 cms with a height of 10 cms. I’ll need to do more than 35 to get the overlap for the buttons.
Couldn’t find a pattern that was as close-fitting as Goya wanted and was simple enough to go with such a busy variegated colourway. So decided to make up my own, constructed sideways so that the buttonholes would be incoporated rather than added on at the end.
Okay, 40 cms barely met around her neck so needs to be longer.
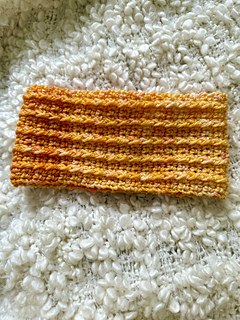
That worked out quite well, actually. It’s a bit loose for me so hopefully it’ll fit Goya perfect. At least the post stitches and the nylon component means there’s some stretch to it.
Row 1 (RS): Fdc 17 (multiple of 3 + 2) for a height of 10 cms.
Row 2 (WS): Sc across.
Row 3: Sc 2, fpdc around next sc 2 rows down, sc 2, repeat.
Row 4: Sc across.
Row 5. Sc 2, fpdc around fpdc, sc 2, repeat.
Repeat rows 4 and 5 to a length of 45 cms or until one end overlaps the other around the neck for a few centimetres before proceeding to buttonhole section which starts on the wrong side ie the sc row.
Buttonhole section:
Row 1 (WS): sc 3, ch 2, sk 2, sc 7, ch 2, sk 2, sc 3.
Row 2 (RS): sc 2, fpdc around fpdc, 2sc into ch sp, fpdc around fpdc, sc 2, fpdc around fpdc, repeat to second buttonhole, 2sc into ch sp, fpdc around fpdc, sc 2.
Work rows 4 and 5 of main pattern one more time. Fasten off and sew in ends.
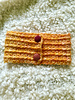
Attach the first button between the first and second fpdc on the other end of the collar. Attach the second button between the last and second last fpdc.


 ennaih notebook
  handspun
 queue
queue favorites
 friends
 needles & hooks
 library