Since my gauge is wildly off as uzsh, I’m going to aim for the 39 cm circumference and adjust as I go along since it’s a top-down construction.
MC = Lichen Leaves (green)
C1 = Red Rocks (red)
C2 = Cayenne (orange)
Hmm. The 39 size calls for a starting stitch count of 136 which was ridiculously big on me so ripped back the fsc to a decent size which was 116 sts.
Actually, 115 worked perfectly with the increases on round 1. Hopefully that will continue. Gotta keep trying it on to check fit.
Welp, somehow finished the yoke with 154 sts which is exactly the stitch count for the smallest size so going with that.
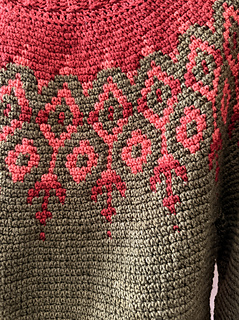
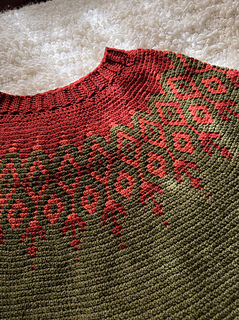
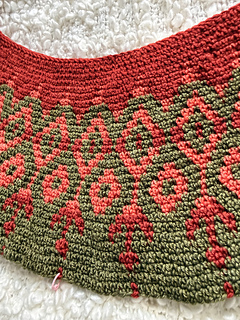
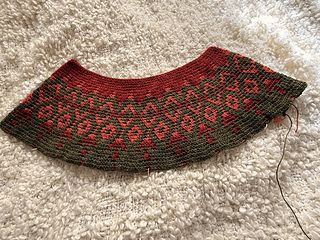
Good christ, I thought I was going mad not being able to see the increases in the colourwork section. And nobody mentioned them in project notes!
Thank goodness Megan asked in the comments on the pattern page and the designer replied that they’re the jutting out bits on either side of the chart. That has to be the dumbest way to chart increases ever. Good grief. Luckily I was going to write out each row anyway like I always do with charts.
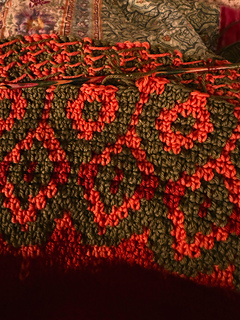
Not loving my tension on the C2 stitches but I’m hoping that will even out as I go on.
My rule for floats: enclose the unused colour in every fifth stitch. Always ease the fabric behind.
Definitely needed to do a decreases round on the neckline before the ribbing. Like everyone else, the neckline is just too wide. So what I did was:
Round 1: Esc2tog (using the method above), esc 2, repeat. Do not join.
Round 2: Sc around. This was to fill the gaps.
And then did the ribbing which decreased by 2 sts every ribbed row which worked out brilliantly. The neckline does still dip at the back but I’m okay with how much. Glad I did that as soon as I split for sleeves and set up for the body instead of waiting til the end. The whole thing sits so much better with the neck ribbing done.
Really want to do just the bottom orange and red arrows on the sleeves cos they’re so cool, esp with the changing colours. Rounds 16 to 26 so 11 rounds.
Possible way to do an esc decrease: pull up loop in first st, pull up loop in second st, yo, pull through 2 loops, yo, pull through remaining loops.
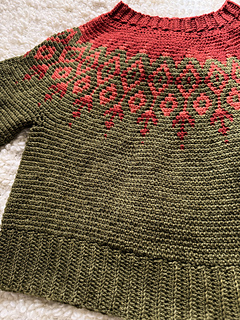
Am going to resist the urge to do colourwork on the bottom half of the sweater in case that creates unflattering emphasis of the belly bulge.
Okay, I left off the sixth of the short rows because already by the fifth, the ends were in the middle of the arms and I don’t theenk short rows are meant to go that far into the front.
Did use a variation of the smoothing stitch for the ends of the short rows from the last beanie I made. The esc version: pick up loop in side of end row stitch, yo, pulll loop through that loop, insert hook in next st along previous row, yo, pull loop through that loop, yo, pull through all loops.
Incorporating the underarm technique from Any Yarn Will Do cos those side stitches have stretched awfully in the trying on. So to close the gaps: when working into the first and last of underarm stitches, do an esc2tog by picking up a loop each in the last underarm chain st and the first st of the body round. And I’ll weave the ends through any remaining gaps.
Continued with the body rather than the sleeves to make sure the length was okay and cos I knew I could start the sleeve with a different skein of green.
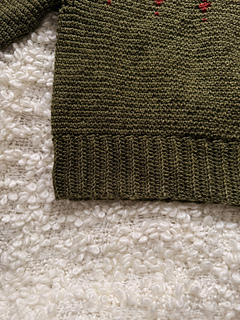
Not sure I like how long the bottom hem ribbing is so I haven’t joined the ribbing yet. Will work the sleeves and then decide whether to frog the ribbing and do a few more rounds of the body and then a shorter ribbing, maybe 10 sts instead of 16.
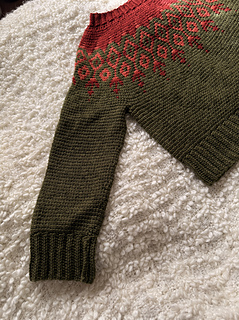
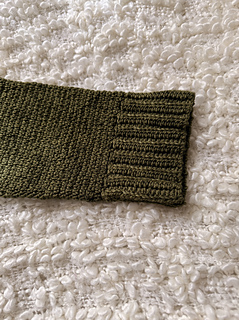
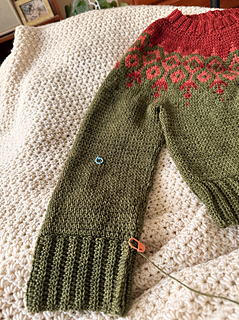
Ha, I didn’t realise the sleeve was tapered anyway. Followed the pattern to 49 sts and one round before switching to the ribbing cos again, I didn’t realise the ribbing was the length of the bottom hem rather than the neckline. Which is 8cms for me.
The colourwork I want to do is 11 rounds plus I want some green between that and the cuff so will do some ribbing to check length, then mark the start and end of the colourwork rounds and rip back to do that. Luckily the decreases are only at the start and end of a round, not all the way through.
Hmm. Ended up with 49 stitches before the cuff and that’s a little too broad for my liking. Tempted when I redo the sleeve with colourwork to go down to 47 or maybe even 45. But no, that might cause some weird pouching so I’ll stick with the 49 sts.
I was right about the sleeve ribbing balancing out the hem ribbing. I was tempted to rip back the hem and do another two rounds of the body to make the sweater longer. But then I tried it on with my work trackies and with jeans and the length is perfect. I have to remember that my pajama bottoms are always slung very low and not reflective of my actual clothes. So just need to join the hem before starting on the colourwork sleeves.
Much easier to slst the ribbing ends together than sew even though both result in a ridge.
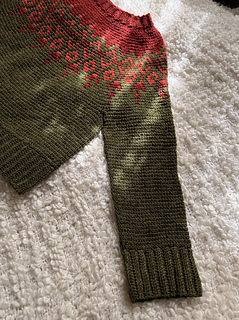
Decided not to do colourwork on the sleeves after all. I think I’ve had enough of that. For now, at least. Plus I wasn’t sure how the numbers would work with the number of sleeve stitches and whether I wanted the colourwork all around the sleeve or just on the front. It all became too complicated so I figured just stick with the plain sleeve.
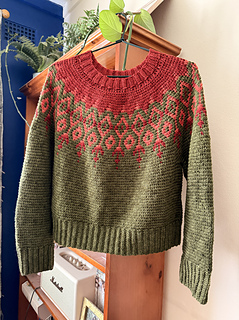
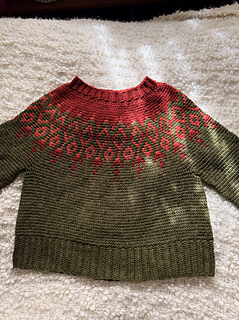
This turned out to be a really lovely easy project that fits very nicely. The only thing that annoys me is the very obvious ridge of the ribbing seams in neckline and hem. I was going to try and undo them but nope, I sewed that end in so well I couldn’t even work out how to undo it. Still, I left the ends long in case it does bother me in the future and I actually can figure out how to redo the seams.
But otherwise, really pleased with this. I expected it to be a disaster at every turn but actually it went beautifully at every turn. And I get to wear it to crochet group next Saturday, yay.


 ennaih notebook


 projects
 handspun
 stash
stash queue
queue favorites
 friends
 groups & events
 needles & hooks
 library
 blog posts
 Project


 stashed