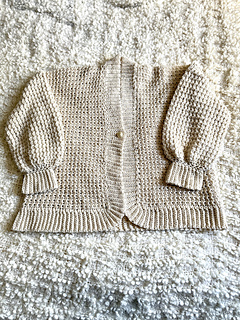
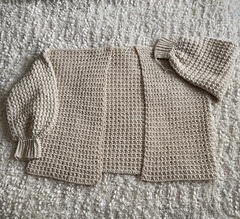
So rather than follow a pattern cos clearly that isn’t working for me, I’m going to use the template I’ve seen on social media and YouTube of measure your fave jacket/sweater and use those dimensions to make a back panel and two front panels, and then I’ll work out what to do with the sleeves and button band/ribbing.
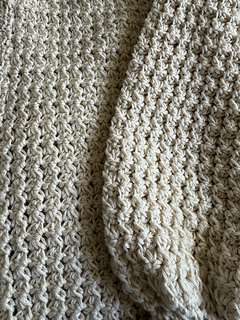
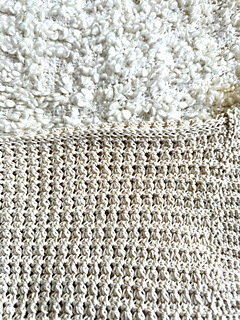
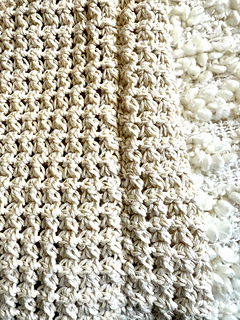
And I’m just using the trinity stitch, one of my faves. Which is a multiple of 2 + 2 for border stitches.
So using my red jacket, dimensions to aim for:
Back panel: 55 cms x 48 cms long (without the button band)
Front panels (without button band): 25.5 cms x 48 cms
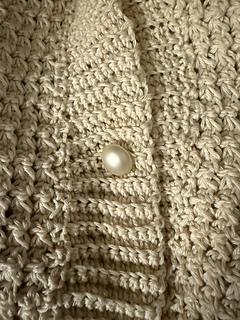
Button band width: 4 cms
Sleeve length (from true shoulder with cuff): 57.5 cms
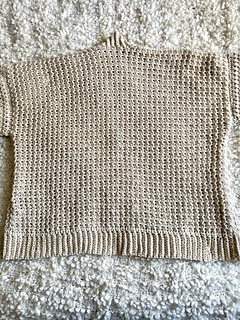
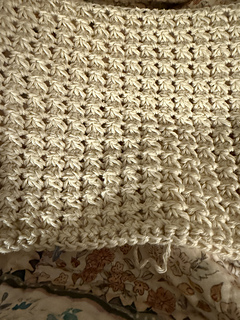
Back panel: Fsc 88 to start. 43 columns across, 64 rows (exc fsc) comes to approx 47 cms long.
Front panel: Fsc 42. 20 columns across, 56 rows (exc fsc).
Huh, interesting. My tension is different on the front panel so I only needed 56 rows to get to 48 cms exactly. I was trying to keep that ch 1 loose so it’s easier to work into on the next row but I didn’t think that would affect my tension so much.
I hope the different row counts from the back panel to the front two won’t affect the button band/ribbing. Gotta pay attention to that. Update: it didn’t.
Pin the panels together, lining up the scs on the outer edges and counting 20 columns in on the back panel. Sew shoulder seams, right sides facing out.
Then try on to ascertain armhole depth. Went for 23 cms from the shoulder seam so that’s 34 trinity rows up from the bottom edge. Didn’t work a stitch into the foundation row cos I’m saving that for the ribbing. Did the seam on the wrong side this time cos I preferred that look for the sides. Tried to line up the waists of each trinity cluster but didn’t quite manage that on one side.
Much prefer the direction and fit of separate sleeves to the set-in even though it’s waaaayy more work or at least feels it at this stage but keeping the method here just for future reference. The set-in sleeve feels too snug around the bicep with an armhole depth of 23 cms but that could be increased with the right stitch. Not the trinity.
// Set-in sleeves: attach yarn to the stitch beside the top of the side seam. Ch 1, sc into that first st. Pull up loop at the base of sc, pull up a loop in the next 2 sts, yo, pull through all 4 loops, ch 1 to secure. Trinity stitch around to first sc. Slst in that sc. TURN. Ch 1, place marker in ch, sc in last sc made. Trinity stitch around. On subsequent rounds, slst into ch 1, moving marker up. //
Separate sleeves (to a bigger circumference of 41 cms): Fsc 70 for 34 columns. Join with slst, place marker in slst. Ch 1, place marker in ch, sc in first st, trinity around, sc in final st. Slst in ch 1. TURN.
39 rounds for the sleeve before decreases.
Sleeve length from armhole seam to first decrease: 30 cms
Attached the foundation row end of the sleeve to the armhole so I could work the decreases to the cuff from the final row of trinity stitches.
I was worried about the greater number of stitches on the sleeve causing an unsightly ripple on the armhole seam but actually all I needed to do was line up the extra stitches on either side of the top and bottom centres of the armhole and there was no sign when finished. Huh.
Decreases
Round 1: ch 1, sk first sc, sc2tog around, sk final sc, slst in ch sp. (34 dec, 1 slst). DO NOT TURN.
Round 2: ch 1, sc2tog around, slst in ch sp. DO NOT TURN. (18 dec, 1 slst)
Round 3: ch 1, sc around, slst in ch sp. (18 scs, 1 slst)
I don’t like how gappy my decrease rounds were so next time, maybe I’d do a round of sc in between each decrease round?
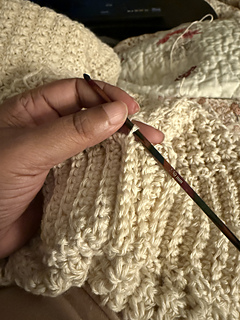
Cuff -- switch to 3.5mm hook
Row 1: ch 11, blsc into second ch from hook and along chain, slst into next st along the round. TURN. (10 sc, 6 cms)
Row 2: ch 1, blsc across. TURN.
Row 3: ch 1, blsc across, slst into next st along the round. TURN.
Repeat rows 2 and 3 along the round til cuff is a snug fit.
Final row (make sure this is row 2 so going outwards to the end): Slst the inner loops of last row and first row together. Fasten off.
Ha, so turns out doing short rows into every stitch around the final round even if it’s tight on my wrist makes for a very loose cuff. So I ripped the short rows back until the fit was nice and snug and then slsted the start and end together. Definitely a lesson learned. To keep on trying as you go instead of blindly following the numbers. Even with cuffs.
I did think the first sleeve was too short at 35 rounds but when I did the second to 39 rounds, somehow they both looked better. The first sleeve is 11 blsc to 6.5 cms, the second is 10 blsc to 6 cms.
So that means the button band and ribbing will be 10 blsc short rows to a length of 6 cms to match the cuffs. Definitely need to do more stitches around the back because those trinity stitches have stretched out an awful lot. I hope the extra stitches won’t ripple.
Try cardigan on, ensuring shoulder seams are in place. Mark on one front panel edge with locking stitch marker placement of buttonhole.
Yep, just like the cuff, doing the ribbing into every stitch along the edge causes some serious rippling. So I’m going to try and align each double row of rib with a trinity column or row.
Ribbing
Row 1: Attach yarn with slst at the bottom edge of the right side seam on the right side of fabric. Ch 10 (not counting slst or ch on hook), blsc into second ch from hook and along. Slst into same stitch as attach slst. (10 sc, 6 cms)
Row 2: Slst into next st at base/side of trinity cluster, ch 1. TURN. Blsc along to end of row. Mark sc closest to slst. TURN.
Row 3: Ch 1, blsc along row. Slst into next 2 sts along the edge. TURN.
Row 4: Ch 1, blsc along row. TURN.
Repeat rows 3 and 4 to the corner.
In the corner stitch, work 1 row, slst only to attach and work 2 extra rows into the same stitch before moving on with 2 slsts. Work extra rows into corner stitch if the fabric stretches too much.
Tutorial for hidden buttonholes
Buttonhole row: ch 1, blsc 3, work 1 foundation sc using the back loop of next st, work another 2 foundation sc using the base of previous foundation sc, sk next st along row, blsc in the next 4 sts.
Tried a shawl collar and belatedly realised the ribbing lessens its effect. It would look much better in both loops sc. So I’ll just put the instructions here for future reference and stick to the 10blsc ribbing for this cardigan all around.
// From the buttonhole, mark a few rows up on both front panel edges where shawl collar will increase.
On marked row (Row 1): work 2sc into the outermost stitch (inc made). Mark furthest stitch for ease of reference. Turn.
Row 2: Ch 1, sc along row as usual.
Repeat rows 1 and 2 until stitches number double? + 2 the button band. Mark this row on both panels. The other panel is where decreases (sc2tog) begin, using the outermost stitch again. //
Seaming lessons from this project: the only acceptable method is the slip stitch using the inner loops alone. Do it on the wrong side for side seams and armhole to sleeve seams. Do it on the right side for shoulder seams that are just a lil decorative.
If one edge is selvedge and the other a foundation row, hold them so you can see the top loops of the foundation row and only use the inner loop closest to the other piece. If you use only the top loops of each side, there’s a line from the foundation row that shows on the armhole seam. If you use the inner loops only, there’s an indent but no line.
If you can’t start the seam in the bottom centre of the underarm, start it a stitch or two to the side and work your way around. Don’t start it at the top.
I’m not entirely happy with the ribbing and how the edge stitches stretch out here and there. There’s a lil rippling on the side but I don’t mind that so much. Maybe next time I’ll do the horizontal blsc rather than join as you go vertical ribbing. Or maybe I’ll try slst ribbing though I suspect my stitches might be worse. Still wasn’t the worst ribbing I saw today so that mollifies me somewhat. I just wanted it to be perfect.
Aargh, how typical that only after I finish the whole thing I find this reel saved on my Insta: slst/hdc ribbing with the outermost st in full sc.
The top of the back definitely stretches so perhaps next time I should do a few short rows at the back. I did see a reel somewhere for a smoothing stitch on short rows and now I can’t find it. But I think it was pick up a loop in the side of the row to complete the sc or something.
I also don’t love my button placement so next time I need to push it back further.
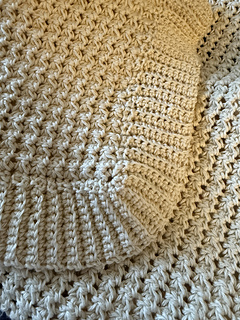
Funnily enough, the ribbing around the neck does form the tiniest shawl collar but I’m glad I didn’t increase like I intended, not with the stretched edge stitches.
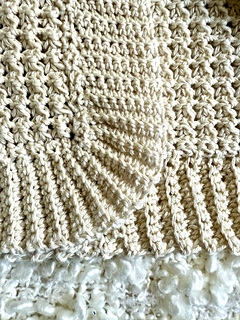
I do love the smooth curve of the ribbing around the corner stitches. But also I’m wondering how to make a proper sharp corner. I suspect that would mean starting the ribbing at each corner separately. Or leave off the ribbing and let the panel be with perhaps just an sc border to neaten the edge.
Used maybe a quarter of the last skein so really this took eight skeins and a quarter. I wish I knew the exact metreage but I haven’t kept any of the labels and I don’t think it’s actually 4ply, more 5 or 8ply. Next cardigan I’ll make sure I note the exact metreage.
Final dimensions:
Back panel from base of collar to bottom edge: 55 cms (perfect)
Back panel seam to seam: 53 cms (this seems to have stretched the stitches out a bit, should have gone for 55)
Sleeve from base of dropped shoulder seam to cuff edge: 39 cms (perfect)
Armhole depth from top of dropped shoulder to bottom: 20.5 cms (fits fine but aim for 23 to get this result)
Front panel from top of shoulder seam to bottom edge: 55 cms (perfect)
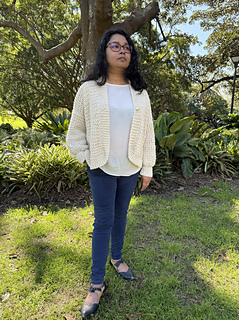
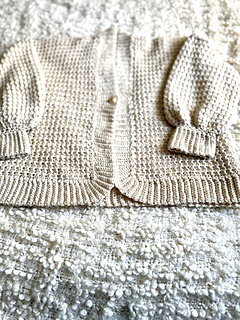
So wonderful to finally have a garment that fits. And the cashmere is so cosy. Well done, me!


 ennaih notebook
  handspun
 queue
queue favorites
 friends
 needles & hooks
 library