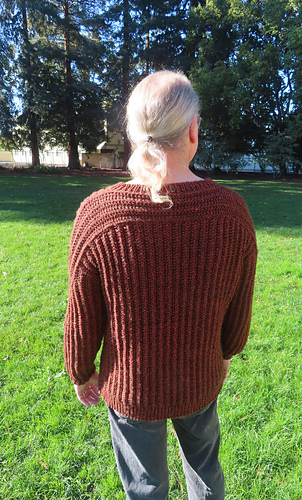
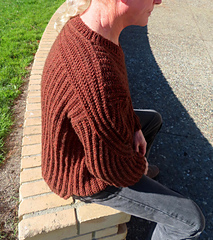
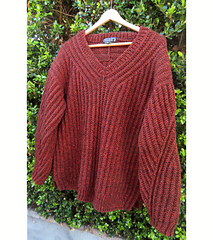
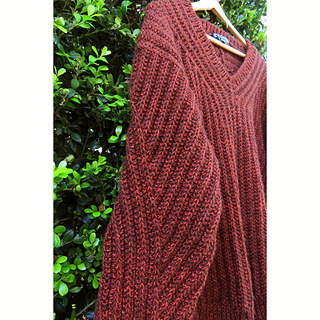
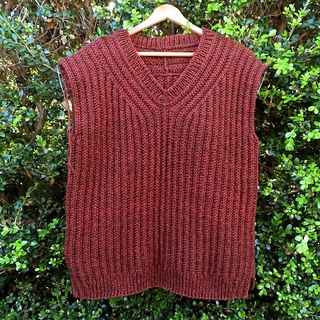
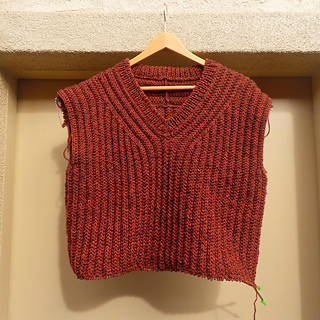
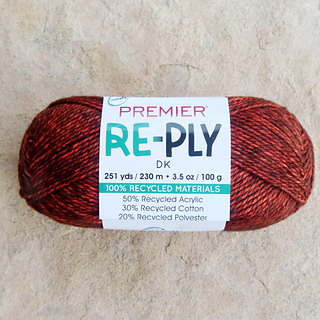
I love Aneta’s designs and her construction techniques. She thinks outside the box. This is a unisex design that I’m making for my nephew’s 21st birthday. My husband, Denny is modeling. The Cartridge Belt Rib Stitch does not make for the fastest knitting, but it’s a beautiful, fun stitch to do - so very rewarding for the extra effort. Although I used quite a heavy (aran weight) yarn, I think that I could easily make this again using a lighter weight, more drapey yarn. If knitting this for myself, I might also choose a pattern size larger than I normally use and perhaps go down a needle size depending on the yarn choice.
What I did differently:
-
I only did about half as many short rows in back. Most patterns call for many more short rows than I like. I feel like 1 - 1.5” addition in back is more than adequate since I don’t like the back to be longer than the front.
-
For the split lower ribbing, I didn’t do the decreasing on the sides as described in the pattern. Also, I did not make the ribbing in back longer. I felt these changes were more appropriate for a man’s version. I also made the lower ribbing longer than what’s recommended in the pattern because the sweater itself is considerably longer.
-
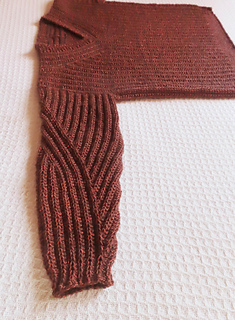
Since men have larger arms, I picked up 4 additional stitches around the armholes (84 sts total which is the same as for the Large size). I followed the instructions for the right and left sleeves in the pattern except that I did a different number of repeats as detailed below. I also did the sleeve cuff ribbing differently because the recipient prefers a tighter cuff.
Tristyn’s Sleeves:
Follow the instructions for right and left sleeves up to the point where the increases and decreases start.
Sleeve section where we do an increase and decrease every other round, but keep the stitch count even - I only did 8 repeats (64 rounds). My stitch count was still 84 sts after completing this part.
Next sleeve section where we decrease a stitch on every other round - I did 7 repeats (56 rounds / 28 decreases total = 56 sts at the end of this section.
- In the next round, I decreased 14 stitches in preparation for the sleeve cuff ribbing:
^p1, p2tog, s1wyb. Repeat from ^ around = 42 sts.
- Switch to smaller needle. I used 5.5 US/4 mm needle.
Sleeve Cuff Ribbing:
Rnd 1: ^ptbl, ptbl, k1. Repeat from ^ around.
Rnd 2: ^ptbl, ptbl, s1wyb. Repeat from ^ around.
Repeat the above 2 rounds a total of 4 times (8 rounds).
Bind off. I used JSSBO with same size needle because this type of bind off wears like iron and is very stretchy.
Needles used:
Size 1.5 US Milward - BO lower edge only (JSSBO)
Size 6 US Susan Bates - Neckband and picking up stitches
Size 5 US Susan Bates - Last 2 rounds of the neckband in preparation for the tubular bind-off.
Size 5.5 US Addi (4 mm) - Sleeve cuff ribbing including JSSBO.
Size 7 US Susan Bates - Lower ribbing
Size 8 US Addi - Body and sleeves
Finished Measurements:
Chest circumference - 46.25”
Length from underarm - 17”
Back length at center (including neck ribbing) - 27.5”
Sleeve length (including ribbed cuff) - 20”
Upper arm circumference - 16”
Armhole depth - 8”
V-Neck depth - 6”
Upper neck opening across - 8”
Neckband ribbing - 1.25”
Lower ribbing - 2.5”
Sleeve cuff ribbing - 1.5”
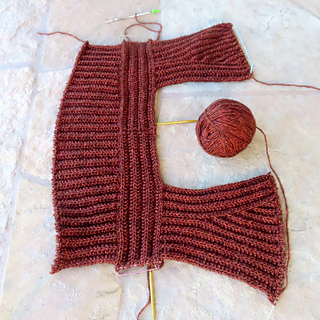
Size of the initial strip that goes across the upper back and shoulders - 2.5” wide X 23” long (unstretched)
Weight of finished garment: 22.3 oz / 632.2 grams
Double Twist Loop Cast On Tutuorial
Tubular Bind-Off Video
M1LP tutorial
M1RP tutorial


 kimmyz notebook
  handspun
 queue
queue favorites
 friends
 needles & hooks
 library