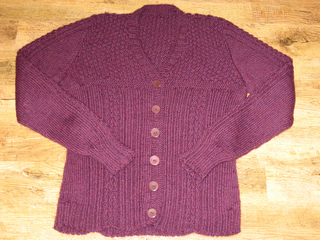
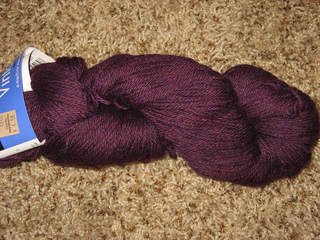
Color of yarn is way more purple than it shows in pix.
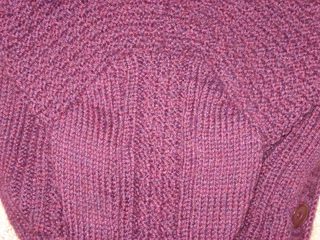
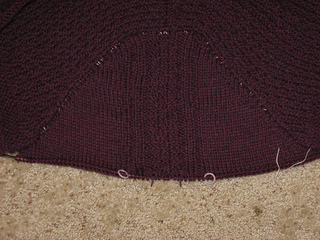
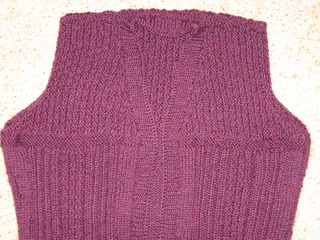
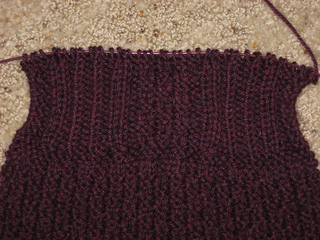
Have found it helpful to place markers around the 6 stitches that are the double seed stitch w/i the 38 pattern stitches. When I get to them on a RS row, I know I need to knit the purls and purl the knits.
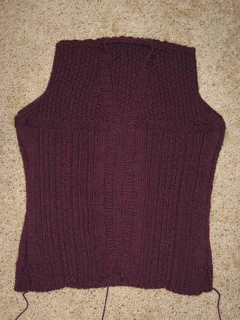
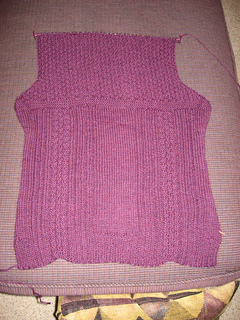
I’m doing my side shaping dec/inc 2 sts in instead of 1. I find that helpful when sewing seams. And I’m doing the lifted increases (Interweave’s Knitting Companion, page 56& 57) instead of M1.
ERRATA - “BACK - Next Row (RS)” where you are transitioning from the pattern stitch to garter stitch - I found the wording of that row confusing. I’m interpreting it to mean that I need to do my decreases in the 38 pattern stitches, not in the plain knit sections. Seems like the commas are in the wrong spots and it never says to knit to the end of the row, it says to knit to the last marker. And I’m removing markers all the way across, not just on the first one as it says.
Loving the way this is looking! :-)
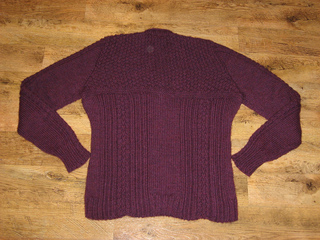
Used short row shoulder shaping instead of staggered bind off. Had to fudge the stitch pattern a little bit to make it work, but I don’t think it’ll be noticeable. Used this technique -
http://knitty.com/ISSUEfall04/FEATpatterns103.html
except I left all stitches on the holder once done. Hardly seemed worth doing on the fronts. Did a 3nbo shoulder, bo neck, 3nbo shoulder across in one process. Back weighs 185 grams. Each front weighs 77 grams.
Did button band next so when I try on with sleeves, it will hang right. Did all as one instead of 2 joined at back neck. Picked up 2 of 3 stitches all the way around, had a few more than called for, so did a few decreases on first k2p2 row. Did my bholes on row 3, I like them close to pick up seam so they don’t gape open when buttoned. I like the curled edge! Used 28 grams for buttonband.
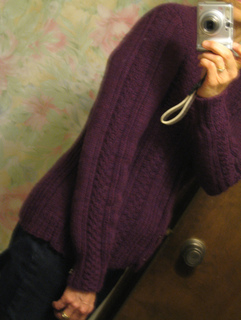
Did the sleeve top down with short row shaping, but knit flat not in the round.
Used this method: Sleeve Cap - Part 1
Picked up every other stitch, had 10 more than needed, so about 1/4 of the way thru the short rows, I did decreases at the turning gap every other set of short rows 5 times. Did the wrap turn method, but did not pick up the wraps as per some suggestions here on Rav. I'm ok with how it looks, but would like to try the Japanese or YO short row methods too. See below, I ended up frogging this sleeve.
I am doing the center 18 stitches of the pattern stitch down the center of the sleeve.
Sleeve seems tight to me when I seam up what’s done and try on, but I’m so used to drop shoulders and wide sleeves. I will carry on and finish sleeve and then decide if I want to rip out and start again.
Finished sleeve #1, still seems tight just pinning the seams. Have gone ahead and started sleeve #2, still picked up every other stitch, but did not do any decreases during the short rowing. I also used embroidery floss along with the yarn when I picked up stitches, using this method Sleeve Cap - Part 2. It worked very nicely to tighten up the pick up stitches after my short rows were done.
Used the Shadow Wrap Method instead of regular wraps during my short rows, they were easy to do and I like how they look. Once the short rows were done, I decreased every 8 rows and went down to 52 sts. At cuff, I did 6 decreases (3 in each stockinette section) to bring total to 46. Switched to a size 3 needle for the K2P2 cuff. Center 6 sts were kept as double moss. Bind off with a size 4 needle.
I liked my 2nd sleeve much better, so ripped out the first one and did it the same way.
Fit is a little bit loose, if there wasn’t ribbing to snug it in, it would be too big.
FINAL DETAILS
Chest - 20” (just under the arms)
Waist - 16”
Hem - 18”
Sleeve Length from underarm - 18”
Sleeve Depth at underarm - 6.5”
Sleeve Depth at cuff - 3”


 knitwit814 notebook
  handspun
 queue
queue favorites
 friends
 needles & hooks
 library