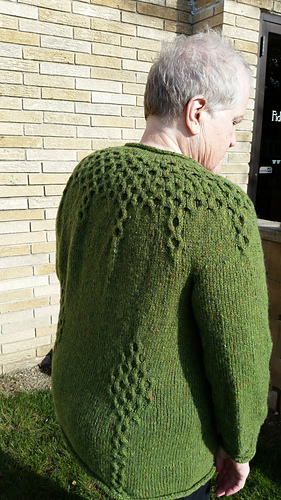
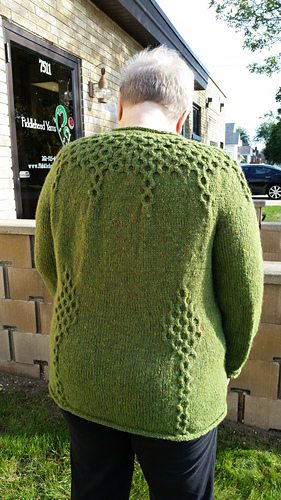
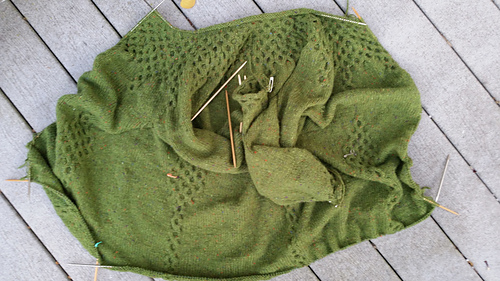
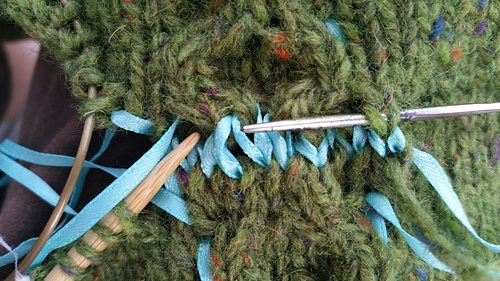
8/19/2014 I-cord looking pretty good after 100 or so of the ~1000 edge sts.. If it still wants to roll to outside after blocking, I’ll use Meg Swanson’s trick of picking up and then binding off a row of stitches just between the stockinette sts and the I-cord. It works a charm and the stitches dissappear into the “ditch,” but I’d much prefer avoiding that ~1000 sts + BO of 1000 stitches and just proceed to the sewing on hooks bit. At least it’s only wanting to roll where the I-cord is at right anles to the knitting.The finishing is my least-favorite part of garment creation.
8/19/2014 5 needles + 2 dpns + 1 working yarn + a gazillion live stitches = Needle Purgatory.
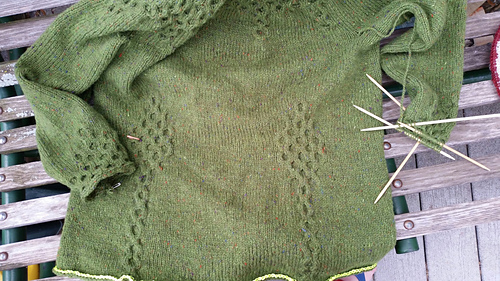
I’m choosing to work the I-cord edging all in one go because I find that the most difficult bit is to make the beginning and ending look good. In fact, the photo on pg. 85 of Carol Feller’s book shows the I-cord flowing smoothly around the corner, not seamed as in instructions. Some editor has been busy! This way I will have only one join which can live at a “side seam” of the body, and I can make four nicely-squared corners. Previous experience tells me that it will work best for me if I first pick up stitches with a separate strand of yarn and then work the I-cord off live stitches rather than just picking up the stitches as I work the edging. I found that I needed to pick up 4 stitches every 5 rows along the front edges up to the yoke where I did 1 for 1; in the stockinette part below yoke, 1 for 1 ruffled up.
I used smaller, #6, dpns to work the neckline/shortrow edge to reduce the gaping I noticed when I had a provisional bind-off--now once again live stitches on a circular needle--for blocking earlier.
I also have plan to fix my grafting misstep which does not involve ripping out the whole row. That comes AFTER I complete the I-cord marathon.
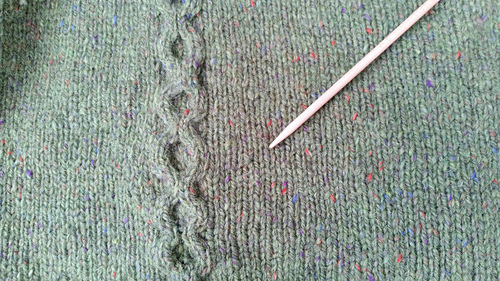
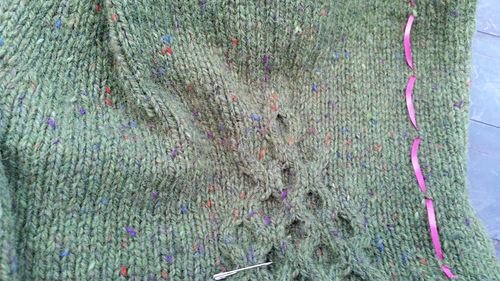
8/10/2014 Sigh. Killibegs is in Timeout while I sulk a bit. I did such a nice job of grafting the whole width of the sweater--amazing how much bigger we are flat than 3-D. Needle points at the graft which is nearly invisible. Except, I miscounted rows and the cables in that set are one row larger than the others. Trying to decide if I can live with it.
17.5 st/ 25 r = 4”
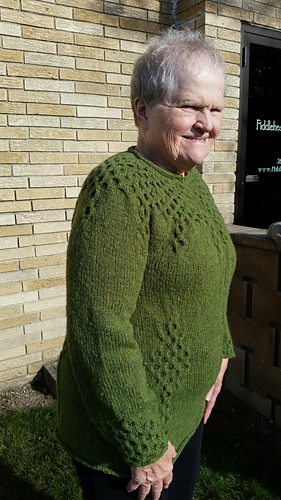
Fit To Flatter
19 st = 4 5/8” = 4.625”
25 r = 4 1/8” = 4.125”
Yarn is same colors, base, 2-ply, as Studio Donegal yarn. It is spun at the same mill but with more twist to the specs of Ann O’Maille, who feels that Studio Donegal is too soft for sweater knitting.
Mods:
-
Used Fit to Flatter basic cardigan in this gauge to be sure sweater proportions were correct for me. I found that the placement of waist shaping was iffy for me, so before I began the armscye shaping, I tried on the sweater body and had a helper mark the location of my waistline on the sweater with cord tied at my waist and pins/markers. I then used my Customfit directions to tell me the correct depth from the waist to begin the armhole shaping. This got the waist shaping placed correctly but resulted in my wanting to adjust the sweater length from the bottom later. See #6, #7 below and photos for more explanation.
-
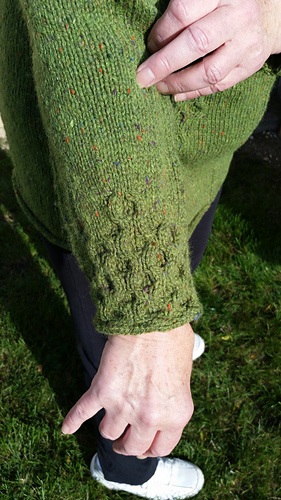
Sleeve for my size starts with 56 sts, 7 cable repeats. I changed pattern, using 5 repeats, then 3 repeats, and then 1 repeat. This made the sleeve cabling more in proportion to the wide sleeve and made the sleeve less wide at the cuff edge, help to keep it out of the spaghetti sauce.
-
I used provisional cast on so that I-cord edging will be continuous around body and can be joined less obtrusively at a side-seam location. Sleeves were begun with provisional CO, also, so edges will match when finished.
-
My size called for 3 repeats of chart A on yoke before chart B. I wish I had done 2 repeats and then inserted chart A’s into 16 sts between cables before starting chart B for a more gradual transition. ETA: I finally did rip back and do this. Worked great. Cables started yoke shaping a little earlier this way, but it worked fine. Mindy of my LYS helped me find EZ’s “recipe” for yoke shaping, which says to work half the yoke depth before beginning shaping rounds; I was concerned that moving shaping down a little might create a problem, but it’s fine. Since I was uncertain about waist shaping, I didn’t work enough length first, so it needs to be lengthened, but I refuse to rip out the cables and shaping. See No. 7, below.
-
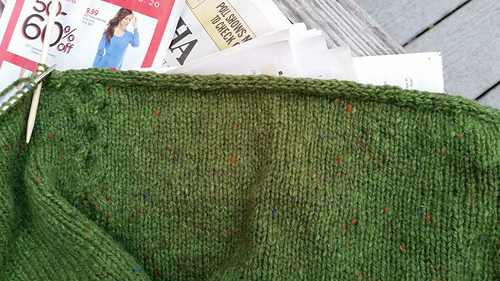
Before joining sleeves and body, I wet-blocked the pieces to be certain of what final lengths would be, especially the sleeves. I could then get a good gauge measurement for cable heights to check yoke length before knitting. I hate me an ill-fitting sweater. CustomFit is awesome, but it is, of course, only as good as measurements and gauge-swatch measurements.
-
I’m glad I did a provisional CO because I need to add length. Not the fault of CustomFit at all. I misjudged where waist shaping would fall on me--it’s a bit hard to tell in pattern photos and info not given in schematic. When I tried it on before joining at yoke, I could then tell what waist-yoke measurement had to be. Fine. That part is great, but I’m not happy with present waist-hip length. Sigh. Lots of kitchenering in my future!
-
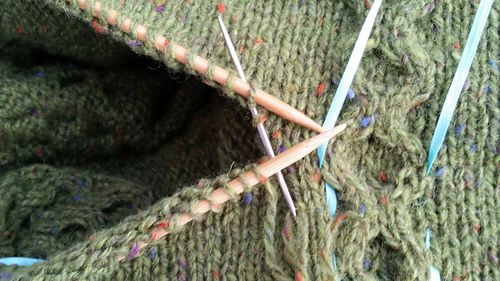
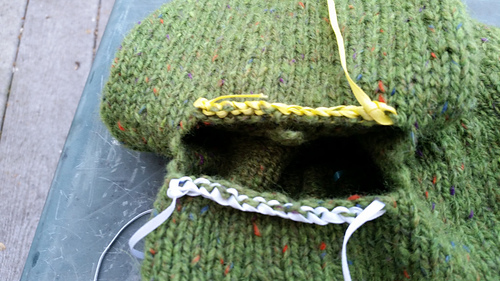
Knitted a 2” piece and kitchenered it to provisionally CO sts of body. A little trouble to get cables matched up, but once I “basted” i.e. kitchenered with 1/8” satin ribbon, starting from cable and matching up here, it worked fine. Unfortunately, I can seem to count, and I had to rip out grafted row, shorten by ONE row, and regraft. Sigh….and then, insert very bad words here, I did the same thing again and didn’t notice until grafting was completed and sweater body was reblocked.
-
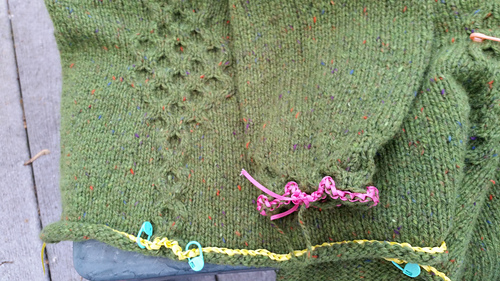
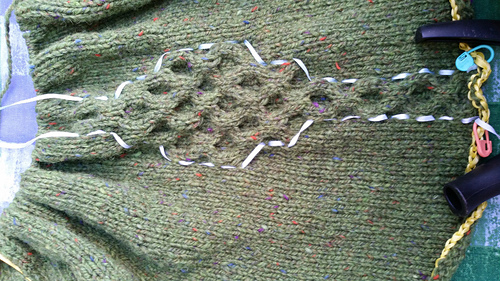
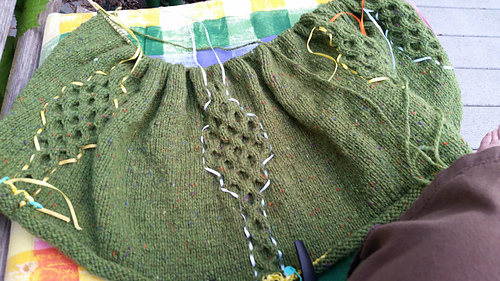
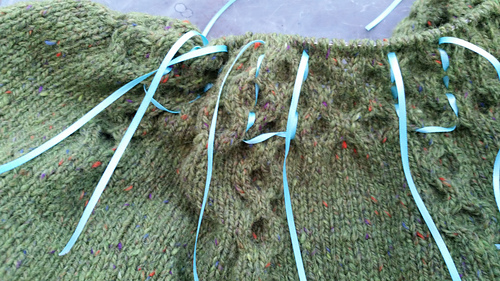
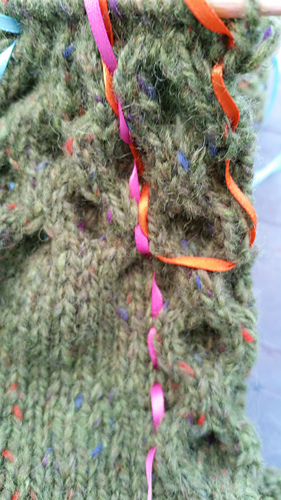
The photos with the colorful ribbons show the various ways I used 1/8” satin ribbons in this project.
First are the provisional CO’s at bottom and sleeve holding sts for applied I-cord finish all around at end. This will allow or nice neat corners and only one join--always a problem for me. (Cable boundary markers have already been removed here.)
Next are the temporary BO’s at underarm, holding sts for later kitchenering.
Then there are the vertical markers marking the boundaries of the cables.
The pink vertical alone in the photo is a row counter. I flipped it over each tenth row.
The pink one with the orange boundary markers is another row counter. This time I flipped it over the knit row without cable twists to make keep track of the tree rows between cable twists.
The ribbons are cheap, colorful, reusable, and easily removable, leaving no mark, even if left in for blocking as I sometimes do.


 knotjusthats notebook
  handspun
 queue
queue favorites
 friends
 needles & hooks
 library