Using my Ireland lambswool
June 22, 2025
Co 48 won’t work. I will do 2 eyelet columns each edge and cast on 32 extra, 8 on each side and another 16 on the back.
Co 80 sts instead.
June 23, 2025
80 sts is too much.
Add 2 sts on each side and 4 on back, instead. 56 stitches. The 2 edge stitches on each side are 2 stitch twisted cables.
I used the alternating cable cast on, because that is stretchy and really strong, and beautiful, with less fuss than a tubular cast on with provisional stitches.
June 25, 2025
56 stitches is working well. Hopefully the yarn doesn’t change too much size when blocking. I knitted up a swatch and blocked it, but I didn’t measure it before washing it so I can’t tell without making a new stockinette swatch (or a mitt!).
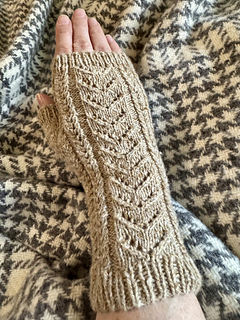
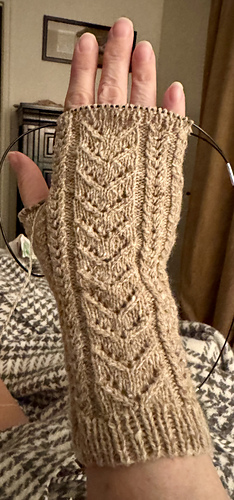
I knit 4 repeats of the center pattern before going into the thumb gusset.
June 26, 2025
I settled on 11 repeats of the center pattern. I wanted an extra repeat on the hand to end up with hand coverage I want.
When I switched to the final ribbing, I had an odd number of stitches and did a ssk on the final left stitch on front (the added 2 column twist) to get an even number for the ribbing.
June 27, 2025
I knit 8 rounds at the end before binding off, instead of the pattern’s 7 rounds.
TBL means to make a twisted stitch, so in combination knitting, the back loop is sometimes actually in the front of the needle. Just purl the front loop to make a twisted stitch.
I chose the alternating cable bind off, which consists of:
- Slip all the stitches, turning them so they are all mounted backwards from normal (for combination knitting)
- Purl the Knit stitch TBL (through the back loop). TBL means to make a twisted stitch, so in combination knitting, the back loop is actually in the front of the needle. Just purl the front loop to make a twisted stitch.
- Slip the worked stitch back to the left needle (without turning the stitch, keep the yarn in front).
- Move the yarn to the back, behind the stitch.
- Slip the stitch back to the right needle (without turning the stitch). The working yarn will now be in the back of the work.
- Knit the next Purl stitch TBL.
- Pass the first stitch over the second stitch (the one you just made) to bind off the first stitch.
- Slip the stitch to the left needle (without turning).
- Move the yarn to the front, behind the stitch.
- Slip the stitch back to the right needle (without turning). The working yarn will now be in the front.
- Purl the Knit stitch TBL (through the back loop).
- Pass the previously work stitch over the new purl stitch to bind it off.
- Repeat steps 3-12 until you are done.
- Repeat the pattern from step 3 (Purl the Knit stitch TBL) until all stitches have been worked.
- Find the very first stitch, pull it up on the needle, and work it again before weaving in the end for a more smooth and even end of round.
- Break the working yarn and weave it through the first and last stitches in a pattern that sort of mimics the other stitches before pulling it down one column of ribbing, then back up half the next column. Cut yarn close to the ribbing without nicking it, then frizz the end of the yarn so it settles in with the rest of the yarn.
Alternating cable bind off, in other words:
Purl all the knits TBL and knit all the purls TBL while binding off, and never pass the yarn between the stitches. Instead, pass the yarn around the back by slipping the one stitch back onto the left needle and moving the yarn around behind the working BO stitch, then place the stitch back onto the right needle to continue the bind off. Every. Stitch.
Or the video: https://youtu.be/4HGqTNC40sg?si=TFXsl29MhUCT6uaD
I like to do this bind off in a way that feels fairly tight. It still ends up stretchy because of all the yarn passing on the back, but it has more strength to it and holds its shape better than the Kitchener bind off I have used in the past.
The next step is to do the thumb! After the left mitt is complete, I will wash & block it before moving on to the right mitt to ensure it didn’t grow too much.
June 28, 2025
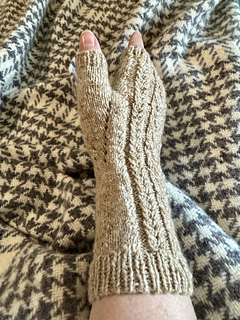
When picking up the thumb, instructions are to pick up 3 and then decrease two stitches. When decreasing, use K2tog instead of SSK. Because it is a known smaller stitch and will be less visible.
6 stockinette rows before switching to ribbing.
June 29, 2025
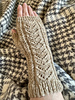
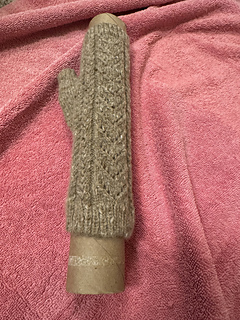
I blocked the right mitt on a paper towel holder & started the left mitt.
July 3, 2025
On the left mitt, I have 26 stitches across the back. On the right mitt, I have 27 stitches across the back. Oops.
I finished the main body of the left mitt. All that’s left is the thumb, weaving in ends, and blocking the 2nd mitt to dry on a paper towel roll.
February 26, 2026
Months ago I semi#finished the project, everything except sewing in ends on the right mitt and blocking the left. I just started wearing it instead of finishing. I will finish the blocking & weaving soon.


 marybeshaw notebook


 projects
 handspun
 stash
stash queue
queue favorites
 friends
 groups & events
 needles & hooks
 library
 blog posts
 Project

 stashed