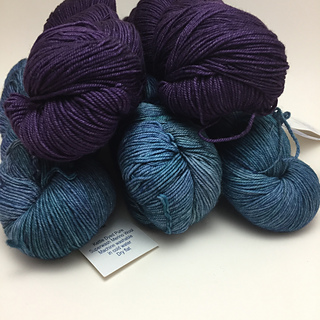
waiting on wwfy yarn to begin! Swatched using stash Malabrigo Sock which is the yarn Kay will be sending
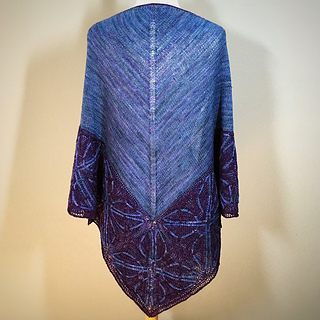
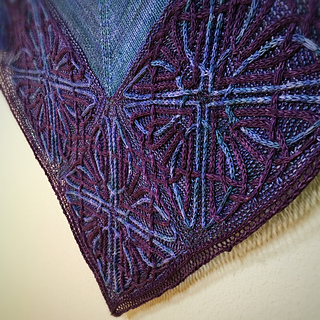
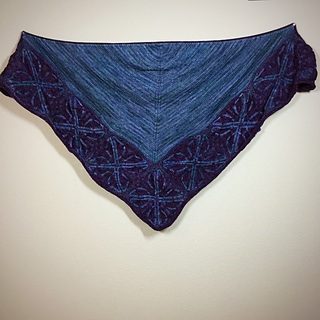
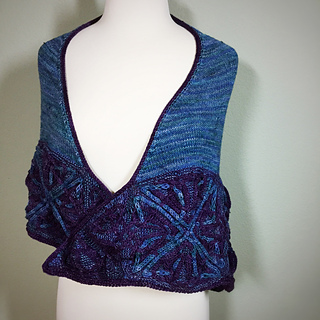
Background: Azules
Cables: Violeta Africana
Thoughts
Fun and interesting pattern, but it is filled with lots of different techniques. But don’t be deterred, the overall project is not overly difficult and the different section keep the knitting interesting.
Sorry for all the notes, there’s a lot of different sections, techniques and tips I found helpful and wanted to record! Hopefully if you are thinking about knitting this but are unsure, my rambling isn’t off-putting :)
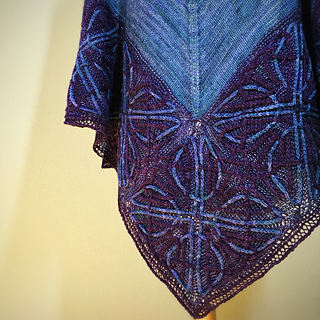
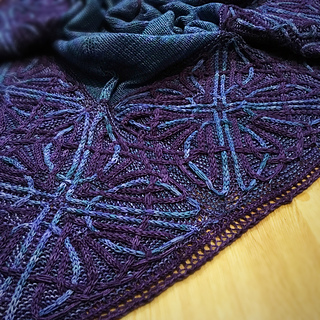
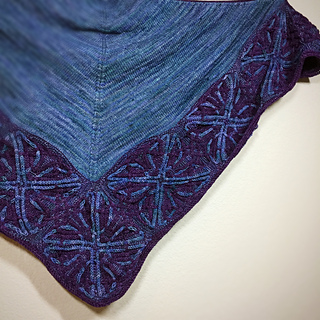
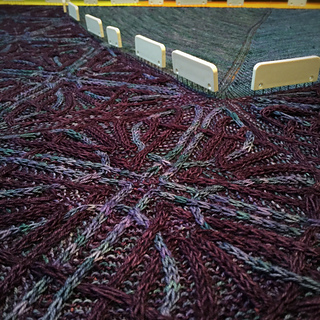
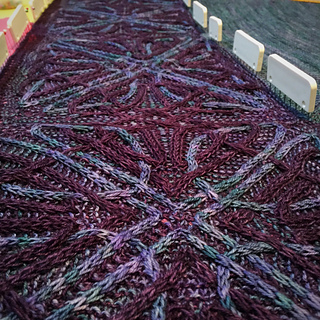
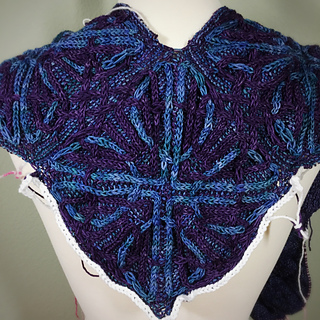
Border
- The cabled border is knit in segments and the 7 squares consist of only 2 different charts so once you get the hang of the flow it goes much faster
- This pattern uses different symbols than I have used, but after working the first square I got more used to the symbols and it was fine
Squares 1-4
- Start squares 1-4 using a 3mm crochet hook and the pinhole cast on method to eliminate any gap in the center of the square
- place markers for each repeat of chart A (3 markers since the chart is repeated 4 times each round)
- Begin working squares 1-4 on circular needles using magic loop, then switch to small circular needle on round 25
- Use m1L and m1R for increases for neater corners
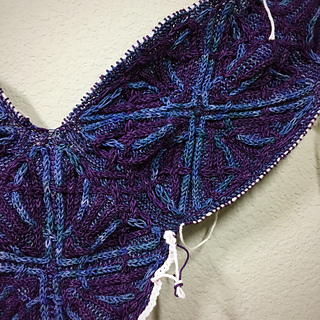
Squares 5-7
- When provisionally casting on stitches use this crochet method but with a 3,5mm hook and a smooth sport weight yarn. This makes picking up these stitches much easier since there are decreases immediately after the cast on row
- Begin squares 5-7 on small circular needle then switch to magic loop when the stitches got too tight
- Unlike squares 1-4 where the increases are worked on both sides of a center “corner” stitch which creates the square shape, squares 5-7 use a double decrease for the corner. This means I couldn’t use a marker to indicate each chart repeat and because of the double decrease the “corner” stitch shifts each decrease round. Instead I placed a marker in the first decrease for each corner and made sure all subsequent decreases lined up.
- Because the corner decrease happens over 3 stitches, every decrease round begins essentially by using the last stitch from the previous round. I found the instructions for this on the chart to be confusing…I simply knit the chart as instructed and at the end of the even numbered round moved my beginning of the row marker 1 stitch to the right so that the odd rounds used the last stitch previously knit as part of the double decrease. Worked just fine and seemed less finicky
- I found when knitting squares 1-4 that the double yarn overs used created very long elongated stitches when the second yarn over was dropped. I kept using them to complete squares 1-4 for continuity but for squares 5-7 only used single yarn overs. This worked fine and kept the stitches much more even throughout
- Try as I might I could not find the instructions for the 7-into-1 abbreviation. I worked it just like the 3-into-1 and 5-into-1, moving the last 3 stitches from the previous round to the left needle and moving the BOR marker then sl next 4 st to rn, pass 2nd slipped stitch over the first. Slip st back to ln and pass 2nd st over the first…repeat until 7 stitches are decreased into 1, then knit remaining stitch
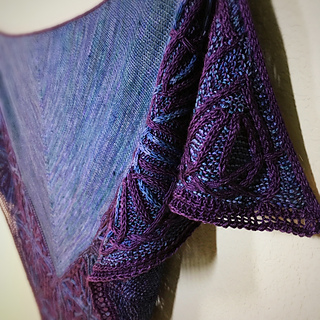
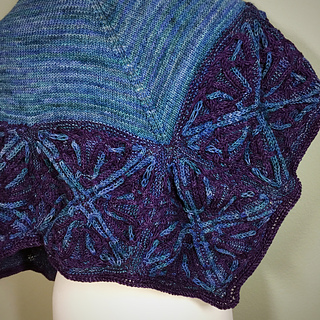
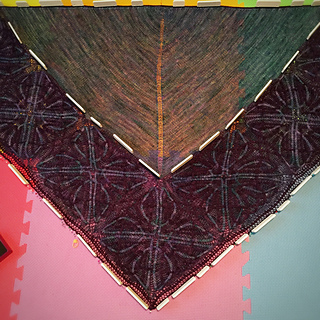
Corner Triangles 8-9
- After the squares, the corners work up much quicker!
- There is a small amount of WS cabling, most of which the key provides WS instructions for. However there are a few that aren’t given…when in doubt, turn the knitting over to see the RS, rearrange the stitches accordingly and then flip back over to work the stitches ;)
- Remember that there is a slip stitch edging on both sides of the work after both chart repeats that are not charted because of the way the pattern is worked you end up with one color slip stitch edging on one side and a second one color slip stitch edging on the other side
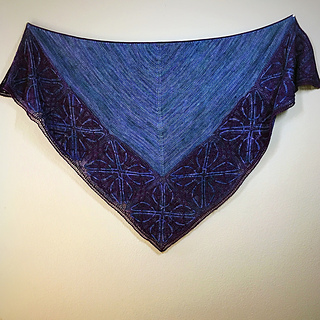
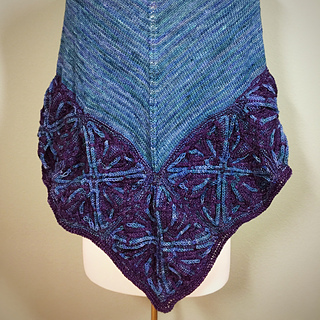
Body
- Picked up held stitches, closing gap between squares by picking up an extra stitch and working together with the live stitches
- Azules skeins were from the same dye lot but appreared to have different amounts of blue and green so I chose to alternate skeins throughout the body
- Alternated skeins 2 stitches in on every RS row for a neater pickup for the edging
I-Cord Edging
- Never knit an I-cord edging? It’s not nearly as complicated as it sounds, here are basic I-cord instructions and here is an example of the variation of the applied I-cord bing off used (fig. 3)
- After picking up the 46 stitches for the corner, to get the patterned 180 stitches along the slip stitch edge of the top of the shawl I picked up approximately 3 stitches for every 4 rows. I placed a marker at the center of the body as an indicator to make sure I was on pace to pick up the right number of stitches
- There were slight gaps where the blocks met, so I picked up a stitch to tighten the gap and worked it together with the regular stitch, worked like a charm
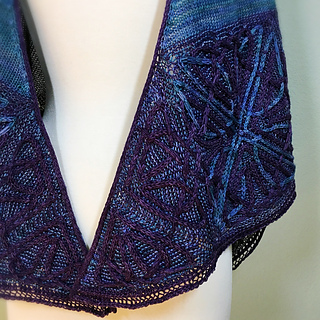
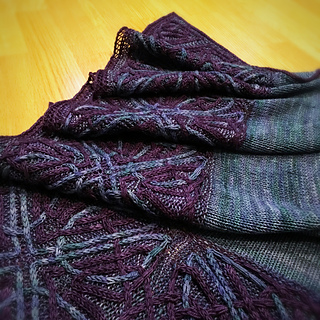
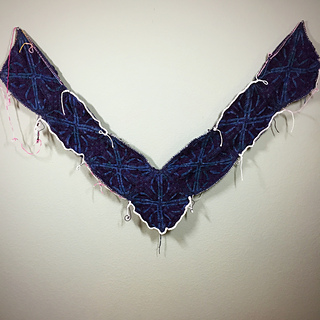
Lace Border
- Whew, picked up all 440 stitches along the lower portion of the shawl (picking up an extra stitch to close the gap between squares and working together with the live stitch to maintain stitch count) and placed marker between the point of the corner square
- The lace edge is a six stitch knitted lace bind off. Each 6-row repeat decreases 4 edge stitches. The pattern is simple and easily memorized. However, to remember when to decrease 2 edge stitches so I could work while watching tv, I placed a marker every 4 edge stitches
- I’m not a big fan of flipping +400 stitches back and forth to work such a small amount of stitches. Instead I like to knit backwards (and using the same technique to purl backwards as needed), so the RS is always facing me and I don’t have to flip my work back and forth
- At the end of the lace edging you end up with your yarn between your live stitches and the body of the shawl with your I-cord tail above. In order to make grafting the live stitches to the I-cord tail easier, immediately after finishing the last patterned row, I turned my work upside down so the I-cord tail was below the live stitches. Using my working yarn I picked up 5 stitches from the I-cord tail. Then I flipped my work back and used Kitchener stitch to graft the stitches
Just needs to be blocked!
Yardage
Square 1:
Purple: 16g
Blue: 15g
Square 2:
Purple: 15g
Blue: 14g
Square 3:
Purple: 15g
Blue: 14g
Square 4:
Purple: 16g
Blue: 14g
Square 5:
Purple: 14g
Blue: 12g
Square 6:
Purple: 14g
Blue: 12g
Square 7:
Purple: 14g
Blue: 13g
Corner 8:
Purple: 6g
Blue: 5g
Corner 9:
Purple: 6g
Blue: 5g
Body:
Blue: 71g
I-cord and Lace Edge bind off:
Purple: 20g
Total
Purple: 136g
Blue: 175g


 minj1249 notebook
  handspun
 queue
queue favorites
 friends
 needles & hooks
 library