10/23/12
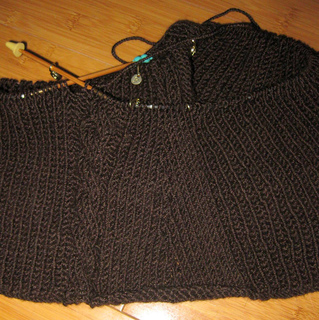
Wore this once to work this month, but it’s just too loose. Going to frog it and re-do the entire thing as a new project.
02/14/12
I placed my markers as I cast on (read the set-up row instructions backwards to do this), both to help count cast-on stitches, and because counting during the first row of knitting drove me crazy. This is how I discovered that there are errors in the # of cast on stitches in the pattern instructions. The total was off by 8 on all sizes. I’ve corrected in my notes here.
02/18/12
Bah. Twisty circular needles… First cast-on + 3 rows = twisted. Had to take it all out, cast-on again, and re-joined with help of my husband. I hate starting projects…
02/21/12
Did I mention I hate starting projects? 2 rows in and it feels like I’ve been working on this project for weeks. At least now it’s established and I can just go.
02/24/12
Through the first skein of this cozy-soft yarn, got about 10 rows out of it… I only have 4 skeins, and can’t find more. I’ll either have to decide to make a very short haramaki (which might work, since I’m extremely short-waisted) or change to another fiber/color to finish the top. I think it could look cute either way.
2/27/12
Through two skeins, on to the third — at about 26 rows. Such an easy pattern (once you get it started). Cute!
2/29/12
I took it all out (down to row 5) and started again with the decreases at the beginning & end of the knit sections so that it will look neat and tidy. 7 years ago, I would have never done that. But I know that I can finish it again in a week or so, so I’m not worried. And this way the counting is even easier. And it really looks better. Totally worth it.
3/14/12
Binding off using Jeny’s Surprisingly Stretchy Bind-Off, and yes, it is surprisingly stretchy. I had to cheat the last cable & decrease row because I’m completely out of yarn, so I did it at 5 rows instead of 6. The last cable + decrease row is on 41, and bind-off is row 42.
3/15/12
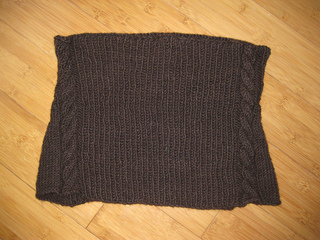
Realizing I would probably run out of yarn if I continued with JSSBO, I back-tracked to the knit section and re-did the ribbing section bind-off normally. Even so, I ran out of yarn before I could finish binding off the 2nd ribbing section. Meanwhile, I realized that I had not idea if it would fit, and whether it was worthwhile to agonize about how to finish it with so little yarn. Ta-da! It did not fit. WAY too big. Literally fell off.
Finished measurements: 8” tall, 38” around unstretched — but 49” around lightly stretched. Which works out to ~130% stretch. So it seems I need to make the medium size this time around? I guess it’s possible my gauge was off — but 38” is within the range for the XL size that I was aiming for. I guess it’s good to be specific about whether the inches indicated are for the stretched or un-stretched piece?
This time around, I’m also going to decrease more rapidly because I have what people call “an hourglass figure.” I’m quite short-waisted and there’s a 12” difference between my waist and my high hip measurement, so I need this to go from medium to small, bottom to top. I’ll be decreasing every 2 rows instead of every 3.
3/17/12
Casting on… augh. I mentioned I hate starting projects, right?
3/19/12
Knit 3 rows, find out it’s twisted, tink back to about 20 stitches in, where I find that the yarn got wrapped around the project. Thank TPTB I didn’t have to cast on again.
Knit 6 rows, find out that this time around I put the decreases on the wrong side. Frog back to 2nd row, pick up stitches again. I’m now back up to 4 rows, and I think (I hope, touch wood, cross fingers) that the project is clean now and I can just proceed. Wish me luck.
One other annoyance — on a couple of occasions, my Webs interchangeable circs came unscrewed and I found that I’m knitting along and my stitches are coming off the right needle! Augh. Thankfully the threaded end of the cable is a little scratchy and I catch it before I’ve gone more than 10-15 stitches.
4/20/12
Finally finished, finally took and uploaded final photos. Thoughts on this project:
Making the first row of the knit sections a purl row did the trick. No rolling on this one.
If I were to re-do it (yet again), I would go with decreases every 2 rows and every 3 rows (2 decreases over 5 rows). Every 3 rows was too gradual, ever 2 rows is a little steep. Although it fits me fine. I would also keep decreasing, as the top a bit looser than I would like. I’d also replace the knit sections with more 1x1 rib and just do the decreases in that. I don’t love how the knit sections call attention to themselves.
But overall, easy, quick, and cute. Will be a nice addition to my fall and winter wardrobe.
Pattern info originally copied from http://web.archive.org/web/20080420035302/http://mysaucyl...
Modified as noted below.
Original pattern:
Small knit section 1, large 1x1 rib section (middle-back), small knit section 2, cable A, smaller 1x1 rib section (middle-front), cable B. Knit 5 rows. On row 6, start decreases and cables. Decrease every 3 rows, cable every 6.
Modifications:
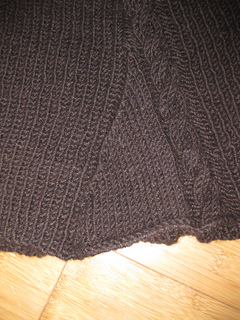
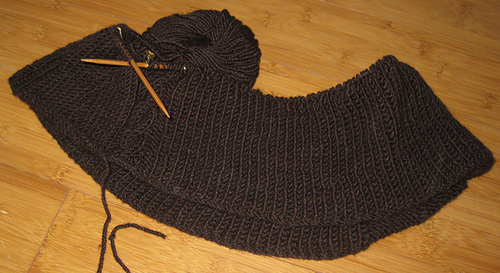
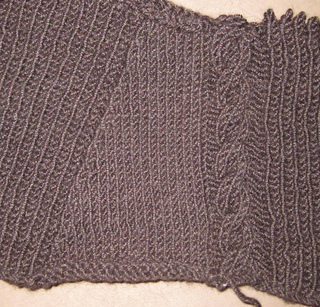
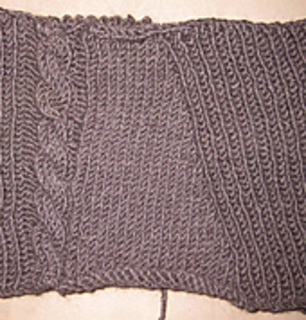
- All decreases in the original pattern happen in the middle of the 20 stitch knit sections. I altered this to put all decreases on the back side of each knit section, since the decreases up the middle looked a messy (see 2nd photo for original, 3rd & 4th photos for modification). This means the decreases are at the end of knit section 1 (ssk) and the beginning of knit section 2 (k2tog). (I originally did it the pattern way, and then took it all out, just for this detail… Can you say perfectionist?)
- After completing it once, I decided to modify the pattern this time around so that my beginning/end point is in the middle of one of the ribbed sections, rather than after the end of a cable. My brain just wants more symmetry.
SIZE: S [M, L, XL]
FINISHED MEASUREMENTS:
Waist: 25-28 [29-33, 34-38, 39-42] inches
(Length: 12 inches)
Extrapolating for a size XXL (waist 43-47”): Cast-on 262, work in 1x1 rib pat over 107 sts before Cable A, work in 1x1 rib pat over 95 sts before Cable B.
MATERIALS:
- 24 length-inch US #6/4mm circular needle
- 6 stitch markers
- Cable needle
GAUGE: 20 sts/22 rows = 4 inches in stockinette stitch
PATTERN NOTES:
1x1 rib pattern: All rows: *p1, k1* continue to last st, p1
Cable A:
- Rows 1-5: p2, k6, p2
- Row 6: C6F
- These rows form the cable.
Cable B:
- Rows 1-5: p2, k6, p2
- Row 6: C6B
- These rows form the cable.
HARAMAKI PATTERN (modified):
Cast on 166 [190, 214, 238] st using circular needle. Join.
Original pattern, set-up round (row 1):
- k20, place marker
- work in 1x1 rib pat over 59 [71, 83, 95] st, place marker
- k20, place marker
- work first row of Cable A, place marker
- work in 1x1 rib pat over 47 [59, 71, 83] st, place marker
- work first row of Cable B, place marker 166 [190, 214, 238] stitches
My own preference:
- work in 1x1 rib pat over 35 stitches, starting & ending with purl stitches (right half of middle back)
- p20 (NOTE: After this row, knit these stitches; this row helps keep the knit section from rolling up. k2tog decrease at the beginning of this section.)
- work cable B
- work in 1x1 rib pat over 59 stitches
- work cable A
- p20 (NOTE: After this row, knit these stitches; this row helps keep the knit section from rolling up. ssk decrease at the end of this section.)
- work in 1x1 rib pat over 36 stitches, starting with purl, ending with knit (left half of middle back)
Work in pattern for 2 more rows (rows 2 and 3).
Row 4, 1st decrease row: k till 2 stitches before marker, ssk; work in 1x1 rib pat over 59 [71, 83, 95] st; kt2og, k till 2 stitches before marker; work in pattern to end.
Row 5: work in pattern.
Row 6, 2nd decrease row, 1st C6F and C6B row: work in 1x1 rib pat to marker; kt2og, k to marker; work cable B; work in 1x2 rib pat to marker; k till 2 stitches before marker, ssk; work in 1x1 rib pat.
Continue in pattern, decreasing every 2 rows, working the cables every 6.
Because of the amount of yarn I had, I ended up with about 45 rows.
For the final row, purl any stitches left in the solid knit section.
Bind off.
Block and weave in all ends.


 morgybear notebook


 projects
 handspun
 stash
stash queue
queue favorites
 friends
 groups & events
 needles & hooks
 library
 blog posts
 Project