Designs are my own, but the learning and inspiration to get there comes from these two books in particular; see my library for details.
Beyond the Square Crochet Motifs, Edie Eckman
The Finer Edge by Kristin Omdahl
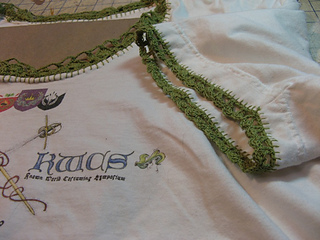
P.S. Now that I have worn it a few times, I’ve received tons of compliments.
How to Insert the Eight-Inch-Wide Rondel in the Back of the T-Shirt
--->Instructions are deliberately wordy - it’s not that big a project :-)
Aggressively block the rondel to be inserted.
Cut the T-Shirt up the two side seams as far as the armholes. This allows the back of the t-shirt to be laid (mostly) flat.
On the wrong side of the back of the t-shirt iron on a lightweight iron-on-tear-away stabilizer. Note that water-soluble stabilizer won’t work for this method.
Place the rondel on the right side of the back of the t-shirt. Take into account how long your hair falls and where your bra strap line is.
Once you are happy with placement, pin the rondel to the stabilized t-shirt. Pin is going through three layers: rondel, t-shirt, stabilizer, and back up.
By hand or by machine, sew the rondel down to the right side of the back of the t-shirt. I found that it it was preferable to sew by hand, and to sew only at intervals, rather than all around.
Oh-So-Carefully, cut away a circle of the stabilized t-shirt that is about one inch smaller in diameter than your rondel.
Just as with any curved seam on woven material, clip the curve of the entire circle.
Fold the clipped curve to the wrong side and pin in place.
With a sewing machine satin stitch, sew the right side of the t-shirt at an even distance from the edge of the rondel, making sure to catch the folded-back clipped curve. In this case, about one-half inch out from the rondel.
Either trim the clipped curve on the wrong side OR sew it down with another round of machine satin stitching.
To put the t-shirt sides back together:
Decide how you feel about the t-shirt’s overall fit. Did it used to be a little big, just right, or a little loose? When you cut away the serged seam, and when you sew it back together, those two seam allowances need to be taken into account.
If loose: tricot-zig-zag OR serge up the sides.
If “just right”: You will need to add back about as much fabric as equals the seam allowance you cut away PLUS the two seam allowances for the insertion of a small amount of fabric. I recommend using a coordinating fabric, as the vertical line on the sides is actually quite complimentary. The added fabric does NOT need to be a knit.
If a bit small: Same as “just right” but with a wider strip of fabric.
Note that I ended up using a stretchy lace sold to be used for hemming that worked fabulously.
Considerations: Yes, this means that the tear-away paper stays in the t-shirt around the edge. One alternative is using any light interfacing held in place by fabric-specific spray adhesive, or a light iron-on interfacing. Overall, however, it is helpful to temporarily stop the knit fabric of the t-shirt from pulling while you are working.


 nicoletteb notebook
  handspun
 queue
queue favorites
 friends
 needles & hooks
 library