Made with Aran yarn. The head, ears and legs were made with one strand of yarn and a 4mm crochet hook. For the body I used 2 strands together (2 different colours) and a 5mm crochet hook.
As my yarn was much thicker than the yarn recommended by the designer, I had to make a few adjustments to the body (everything else was crocheted according to the pattern).
I have to admit I’m not used to charts and at first these charts looked a bit intimidating. However, I loved the look of this hedgehog and had already made up my mind this was going to be my son’s teacher’s gift (it was her first year teaching and my son was in the Hedgehogs class).
Firstly, I printed the charts and wrote down the pattern for the head, ears and legs. They were very straight forward.
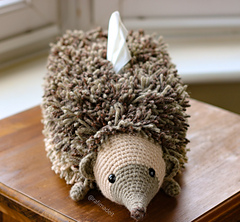
I used 12mm plastic safety eyes. I placed the left eye covering the colour change from light brown to cream. The second eye was placed 11 stitches to the right.
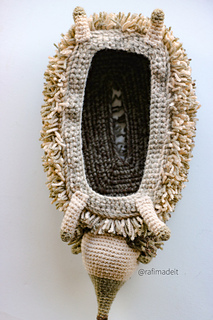
For the body I used 2 strands of Aran, which worked up quite quickly. I did not make that internal piece (belly side) though. I started the back side with a chain of 40 stitches, and continued following the chart until the top of my tissue box was covered (7 rounds). I crocheted in continuous rounds, without joining - just a personal preference.
I watched several YouTube videos on loop stitch, and my favourite one was by Toft (Kerry Lord). I did, however, end up developing my own way to hold the yarn, and after some time that movement became more natural and I built up some speed. I created my loops on the “wrong side” of the fabric.
Once I covered the top of the tissue box I stopped increasing, and just crocheted the same number of stitches around, alternating a round of sc stitches and a round of loop stitches, according to the pattern. After a number of rounds I changed colours and continued working the same number of stitches until the sides of the tissue box were completely covered.
I then worked one round of sc in the front loops only, to start wrapping the crochet fabric around the base of the box, then started decreasing.
Once you cut the loops, the resulting texture is really nice. I didn’t use any toy filling for the body because, as I mentioned before, I didn’t make the internal part (belly piece).
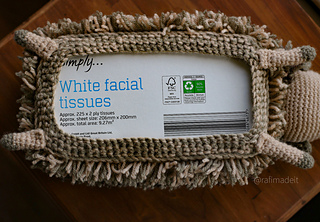
My tissue box was quite large, taller than the standard Kleenex box. Box dimensions:
Length: 22cm or 8.6in
Width: 11.5cm or 4.5in
Height: 9cm or 3.6in
If I ever make another hedgehog tissue box cover I think I would adapt the pattern for the body to cover one of those square tissue boxes, just so the final piece would be smaller.
It took me about 12 hours to complete this project.
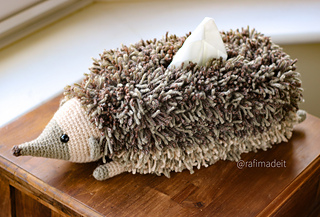
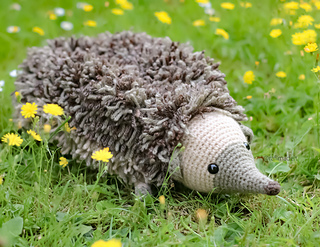
The finished hedgehog looked really nice and my son’s teacher loved it!


 rafaelaedwards notebook
  handspun
 queue
queue favorites
 friends
 needles & hooks
 library