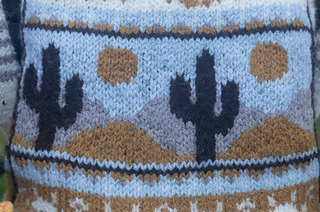
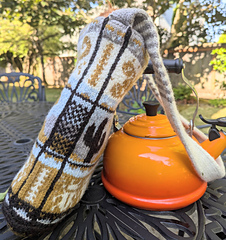
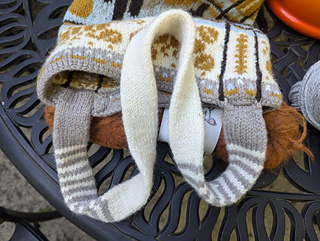
What an experiment! I made up the construction as I went along, so my notes below are not an exact recipe. I did try to add all the detail I would need to remember how to do this again, and you’re welcome to provide feedback in the comments on what is and is not helpful if you try to do something similar.
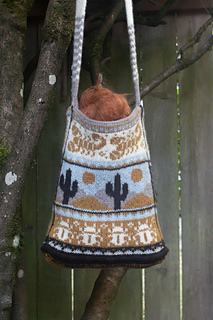
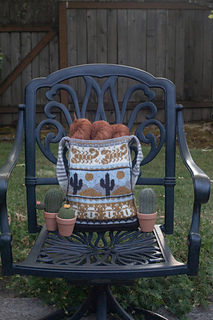
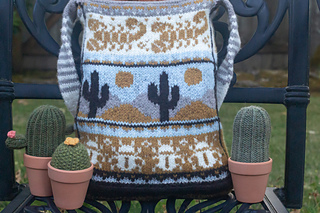
This bag has a lot of detail - possibly too much for some people’s tastes. Think of it as a sampler I used to try out various techniques in construction and embellishment. I’m happier with some results than others. The important thing (to me at least), is that I learned a ton doing this and look forward to refining the process with a future project.
Apologies in advance for the typos - I’m busy! … and possibly also lazy when it comes to writing … but not lazy in general, as I am forced by nature to make things (just not good writing :p)
Simpler Ideas for the Adventurous Beginner
If you like the idea of a bag, and are daunted by the copious notes of dubious quality that start after this section - consider the following flat bag option.
- follow the single sided cowl pattern (including the top and bottom ribbing)
- choose an even number of chart repeats, so the bag folds between charts and not mid chart
- You’ll probably want this to be at least a little longer than it is wide, so figure out how many stiches you will have across one side of the bag (a multiple of 12 or 24) and use that to figure out how many rows you want.
- When you have produced a cowl of suitable bag proportions, bind off the top edge tightly (so the mouth doesn’t gape)
- sew the bottom edge closed with the technique of your choice.
- Make a handle or two and sew it/them on. Handles should overlap the bag by at least an inch (depending on bag size) in order to be properly stable.
Handle Suggestions
- if your bag is small, an i-cord handle might work (suggest min of 5 stitches for hand/shoulder comfort)
- If the bag is too big for one i-cord, I recommend 2 handles - these could be i-cords, tubes, single-sided garter, etc. Just make sure your handles look proportional to your bag (long and wide enough) and are sturdy enough to hold it up and not cut into your shoulder … in case you fill it with rocks! … which as a rock hound I might actually do.
Diving in to the Full Adventure
This modified from the single sided cowl pattern although it starts like the infinity version with a provisional cast on. It’s knit in a circle with 2 full chart repeats on the front and back and 9 stitches for each side.
This could easily be made wider by using more repeats on each side and increasing the number of edge stitches. A larger tote could even use a full 12 or 24 stitch chart.
For larger bags, I use double handles (one on the front and one on the back) so the bag hangs evenly. This bag is pretty narrow, so the single edge to edge handle (coupled with felting to give the bag structure) still allows it to hang straight without collapsing in on itself.
I also plan to line this (I have a lot good intentions!). The felting really helps stabilize the colorwork strands on the inside, and thus far I haven’t had trouble with snagging. However, a lining would give this a more finished look and increase it’s longevity!
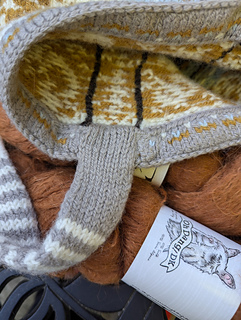
Top Hem
After knitting the top doodle panel:
- p around
- Knit a mirror image of the right-side top doodle panel
- fold the mirrored panel to the inside at the purl row
- sew the hem down matching the last row of the mirrored inner panel to the bottom of the right side matching panel
Top Edge
I crocheted a tight chain in the top purl row where the bag is folded over to stabilize the opening.
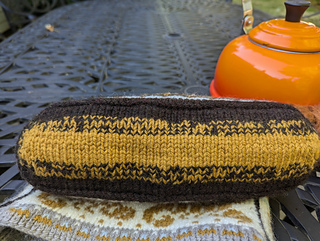
Handle
18 stitches knit in the round
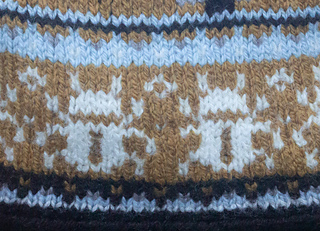
Afterthoughts:
- Add a colorwork pattern to match the sides of the bag?
- This bag is done with stripes (busy, I know), because I was trying not to have leftovers. I used up all of that taupe color!
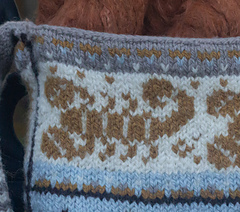
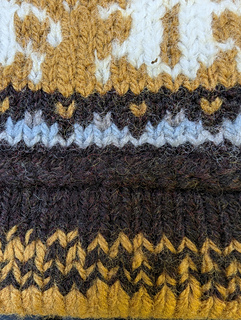
Edges
The edges are 9 stitches wide in the pattern
p1, k7, p1
In the k7 I chose a pattern that used two colors from the main pattern.
Afterthoughts:
The checkerboard is too wide. I believe it would look nicer 3, or maybe 5 stiches wide, but not 7. If I do this again (and I probably will), I would do a single pattern all the way up the side panel instead of changing the pattern.
Checkerboard (3 wide)
row 1: p1, k2 MC, K1 CC, K1 MC, K1 CC, K2 MC, p1
row 2: p1, K3 MC, K1 CC, K3 MC, p1
repeat 1 and 2 up the side using any two of the available colors
last row: repeat row 1 one more time
Columns (3 wide)
row 1: p1, k2 MC, k3 CC, K2 MC, p1
row 2: p1, k3 MC, k1 CC, K3 MC, p1
repeat 1 and 2 up the side using any two of the available colors
last row: repeat row 1 one more time
Edge Piping
The edge piping is done by crocheting a chain in each edge purl row. Holding the yarn on the inside of the bag:
Row 1: insert the crochet hook through the first purl stitch (and into the bag) and pull up a loop
Row 2: insert the crochet hook through the next purl stitch and pull up a loop. Pull the new loop over the previous loop on the hook
Repeat row 2 until you reach the bottom of the bag. In the last purl pull enough yarn to make a respectable tail, snip the tail at the desired length, and pull the tail through the previous look on the crochet hook.
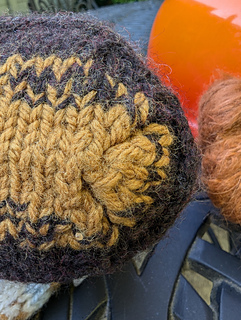
Bottom Edge Braid
I used a provisional cast on. If you don’t use a provisional cast on you will need to pick up the desired number of stitches around the bottom first.
holding two strands together
yo, k2 tbl, move last stitch to left hand needle all the way around
Afterthoughts:
How do I feel about the bell shape? It’s grown on me. However, if I were to do it again, I might try to fit the bottom to the bag with less flare. Ideas (not necessarily to all be implemented at the same time)
Use one size smaller needle for the braid?
Consider single instead of double strand?
Decrease 4-8 stitches around the bottom before doing the braid to accommodate the bulk of 2 strands vs. the 1 strand body.
Bottom
The bottom is knit in an oval holding two strands together. I initially tried it single strand and thought it felt too light to be the bottom of a bag. Especially compared to the colorwork body, which is a bit bulkier than regular singled stranded knitting.
General notes (actually instructions hopefully TBD):
complimentary decreases (1 right leaning, 1 left leaning) at each corner where the edge of the bag meets the bottom.
decrease every other row
8 stitches decreased on each decrease row (2 at each corner)
last decrease on each side decreases 3 stitches, too leave space for a final row to close the bag.
bag is closed using Kitchener stitch with 1 three stitch decrease on each needle
Afterthoughts:
This is multicolored because I was trying to use up all my yarn, and had to switch colors when I ran out. I think it worked out just fine, but it would also be fine as a single color, striped, or some other option.
Felting
Warning! Only do this if you know all the yarn you used in the project will felt. Consider felting a swatch first if you don’t have prior exp felting the yarn. If you included any super wash yarn in your project, definitely skip this step.
I filled the bag loosely with rags and then put it in a delicates bag with more rags. Washed on hot with towels (to load balance, so my washer doesn’t croak). Stopped the washer and removed the bag before spin cycle. Pressed out excess water, then rolled in a towel to remove more moisture. Blocked aggressively to desired shape.


 rhyolyn notebook
  handspun
 queue
queue favorites
 friends
 needles & hooks
 library