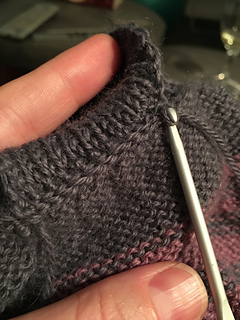
03-02-2018
Four rows in and I’ve found a mistake “row four: knit the same as row three”. Row three contains two increases and means you end up with two stitches two many if you knit “the same”. Knitting a repeat of row 2 doesn’t work either, so I’m doing seed stitch across.
04-02-2018
I hate directional increases anyway, especially with fine yarn like this, but M1L on a purl row is a new level of knitting hell.
05-02-2018
Leaving aside the technical stuff that I hate (looking at you, M1L), this is actually a really easy pattern to follow - provided you read ahead as instructed, and pay attention to what you’re doing. I’m currently on row 21, the first CC change, and have no mistakes and no dropped stitches (practically unheard of, ha!). I did find it easier for me to write out in longhand what colour/pattern/embellishment I’d be following on each of the 6 raglan increase repeats, which I’ve notated below in case I made this again:
R12: begin raglan increase (p)
R13: MC no increase (k)
R14: MC no increase (p)
Rep 1
R15: MC increase round (k)
R16: MC no increase (p)
R17: MC no increase, add buttonhole (k)
Rep 2
R18: MC increase round (p)
R19: MC no increase (k)
R20: MC no increase (p)
Rep 3
R21: CC increase round (k), change @ first M1R
R22: CC no increase (p)
R23: CC no increase (k)
Rep 4
R24: MC increase round (p), change @ first M1R
R25: MC no increase (k)
R26: CC no increase (p)
08-02-2018
There’s a definite error in this pattern; if you knit as directed, you start the buttonhole on a knit row, placing it at the right hand side of your upside-down work. This makes it come out on the RIGHT hand, underside placket. Unless the author intended an invisible button (which it doesn’t appear, given that two are visible in the photos), the buttonhole row needs to be worked as follows. NB that for the below, I am placing the buttonhole on row 17, taking the instructions literally (“after 16 rows have been worked from start, add a buttonhole row”).
R17: knit across, following moss + stockinette pattern, to 6 before row end. K2tog, yo, p1, k1, p1, k1.
This places the buttonhole on the LEFT hand (top) placket, and additionally preserves the moss stitch pattern of the placket, the loss of which bothered me a lot in the instructions as written.
(I have since realised that interrupting the moss stitch is preferable on the completed product, but have absolutely no intention of undoing all those rounds.)
08-02-2018
Note also that on a purl raglan increase row, the direction of the M1 stitches given in the raglan increase definition needs to be reversed in order for the pattern to be preserved.
15-02-2018
Longhand notation continues:
Rep 5
R27: CC increase round (k), change @ first M1R
R28: CC no increase (p)
R29: MC no increase (k)
Rep 6
R30: MC increase round (p), change @ first M1R
R31: CC no increase (k), join in the round
R32: CC no increase (p)
R33: CC final increase round (k)
R34-35: CC
R36-37: MC
R38: CC, start of sleeve division
Continue counting pattern from here when picking up sleeve sts
R39-41: CC, fourth block
R42-43: MC
R44-47: CC, fifth block
R48-49: MC
R50-52: CC, sixth block
R53-54: MC
** NOTE I stopped the stripe pattern here, and ended 32 rows of main colour after the sixth stripe block **
R55-59: CC, seventh block
R60-61: MC
R62-66: CC, eighth block
R67-68: MC
R69-72: CC, ninth block
R73-74: MC
R75-77: CC, tenth block
R78+: MC until work measures desired length
18-03-2018
The lifted increases, ironically, were made more difficult by linking to that article and would have been better documented with a simple derivation of what to do - which is exactly what was done for the second row of the lifted increase set-up. I already knew how to do these as it turned out (under another name), but was confused by the overly long and unnecessary article; as these aren’t socks and there’s no gusset, forcing new knitters to read that and apply it to this project will just result in frustration (which I have indeed observed in the notes of other projects).
Long hand notation for sleeves
R1-2: MC, lifted increase and corresponding decrease
R3-6: CC, fourth block
R7-8: MC
R9-12: CC, fifth block
R13-14: MC
R15: CC, sixth block + decrease round
R16-17: CC
R18-27: MC from here
R28: decrease round
R29-41: MC
R42: decrease round
R43+ MC until work reaches desired length (30 rows of main colour after sixth stripe block)
 riverspun >
  notebook > projects > Subtracting Days


212 projects
stashed
269 times


 handspun
 queue
queue favorites
 friends
 needles & hooks
 library