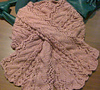
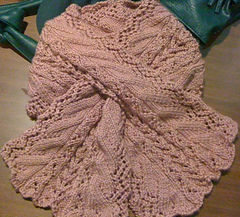
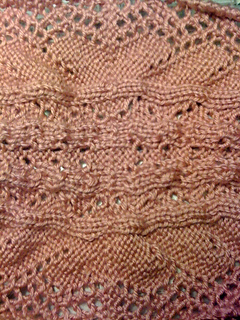
This is a fantastic pattern, well-planned and charted. And the Caron proved to be a perfect choice -- soft enough to feel great, but crisp enough to really show off a complex lacy design.
Finished this as a jabot, as in the pattern, but my sister didn’t like it, so I ripped out the narrow parts, and did the whole thing in the lace shown, with a keyhole, for my niece.
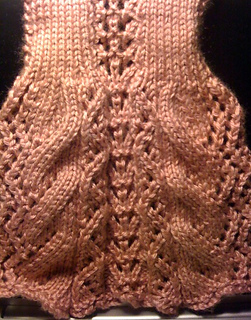
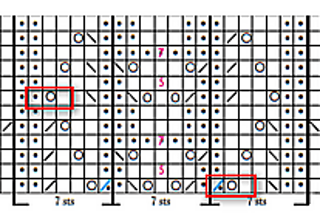
Simple Tip to make this easier: Place Markers at the solid bars in the chart. They mark the different zones (cable edging, center lace, etc.), and markers make it easier not just to follow the chart, but to count stitches in each section at a glance. If you check between markers before you move on, it saves heartbreak later -- you notice the count is off BEFORE you finish the row and have to frog.
NOTE: TWO PLACES TO BEWARE IN CHARTS 1 & 2
In Row 1 and Row 7 of both charts, there is one YO from knit to purl. It’s the combination that requires an extra wrap for the YO, or the YO disappears on the return row, causing a faulty stitch count.
NEW SOLUTION! I was reading through a British pattern which mentions the same thing occurring, and they had a brilliantly simple solution. Don’t know why I didn’t think of this before!
Just wrap the YO the opposite direction! I was just following along with a knitting guide, and this is much better. (It all evens out when you work the return (WS) row anyway, only this avoids the problem of getting a slightly bigger YO hole from the extra wrap!)***
Basically, you K1, then do NOT bring the yarn forward under the needle to purl the next stitch: you bring it over the top of the needle, instead.
BEST WAY: Finish Row 1, LEAVE OUT that YO, then make sure to do Row 2 immediately, adding the missing YO as a pickup. (With LH needle, pick up from the front the leg that stretches between the two stitches.) That’s actually the best way, in terms of ease and consistency in size of the lace hole. The same goes for Rows 7 and 8.
You could temporarily add a marker there, if necessary.
It’s whenever you see • O (knit box) in the chart, a YO followed by a purl. It’s worked from right to left, so written instructions would read: K1, YO, p1. (See marked photo.)
Good news: If you forget and go past it, it’s easy to correct on the next row. Just look at the other YOs on the needle, and pick up the yarn between the K and p stitches where the YO should be, and knit that. Restores the stitch count and can’t even be seen.
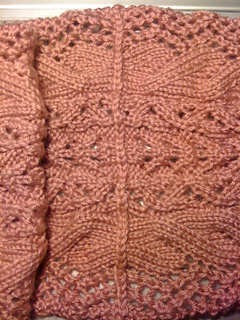
Note about finishing: I knitted the halves together (the three-needle bind-off), and the result seems to go well with the design.
I was scared of kitchener finishing, but I’ve since learned it, and it would probably be marginally better. An excellent video is marked below:
https://www.youtube.com/watch?v=nkW3kP7RZdk
(Memorize the Kitchener Stitch, by L2Belt)


 truefeather77 notebook
  handspun
 queue
queue favorites
 friends
 needles & hooks
 library