NOTES |FRANÇAIS| :
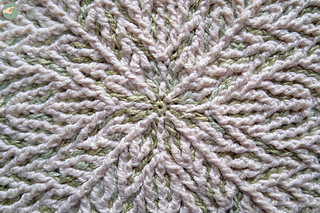
→ Le motif est complexe et difficile à suivre, il faut rester très concentré ! Difficile d’accès aux débutants, il reste néanmoins très agréable à crocheter.
→ J’ai crocheté les carrés au crochet 2mm.
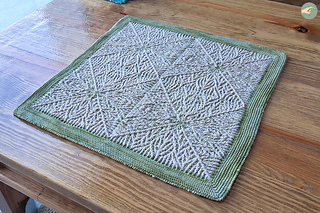
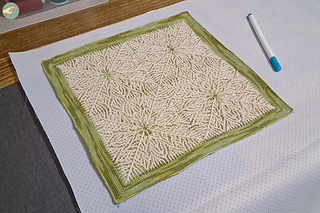
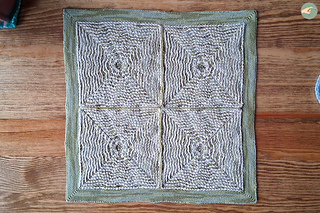
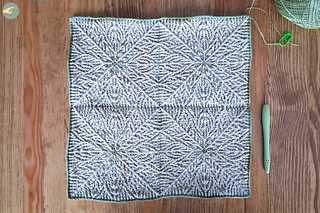
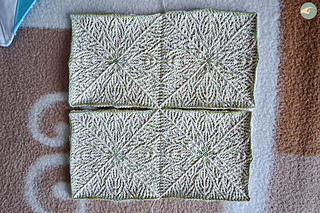
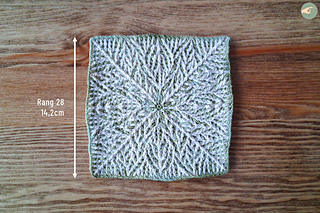
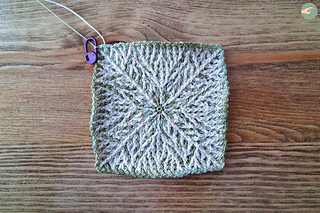
→ Au départ, je souhaitais crocheter la version 1, soit un seul grand carré. Cependant, au rang 36, je me suis rendue compte que cela aurait été trop petit, même en allant jusqu’au rang 49. En effet, j’ai utilisé un fil très fin ! J’ai donc défait les rangs jusqu’au rang 27 pour refaire le rang 28 avec des ch1 au lieu des ch2. Non bloqué, ce carré mesurait environ 14,2cm de côté et j’ai pensé que l’assemblage de 4 de ces carrés sera parfait en taille après le blocage et la bordure.
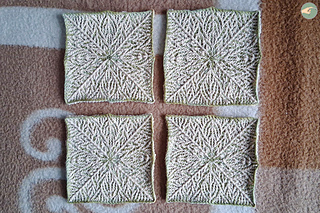
→ Une fois les carrés finis, j’ai rentré les fils puis je les ai lavés et bloqués. Ensuite, je les ai assemblés entre eux avec le coloris B et une fine aiguille en m’aidant de la vidéo de Lilla Bjorn depuis son tutoriel.
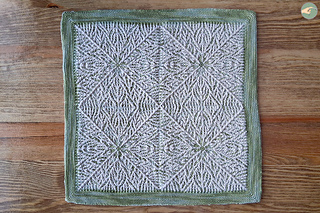
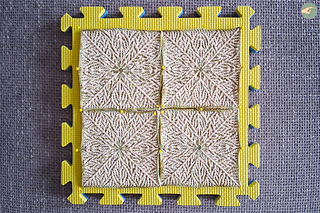
→ Avec un crochet 1,75mm et le coloris A, j’ai fait le rang 1 de la bordure en suivant les explications de la vidéo de Lilla Bjorn. J’ai enchaîné avec 7 rangs en point herringbone half double crochet avec, pour les coins, (1hhdc, 1ml, 1hhdc) dans la maille en l’air du rang précédent. J’ai terminé par 1 rang en point écrevisse avant de faire un dernier blocage à l’humide pour aplatir le carré final et éviter les bords qui rebiquent.
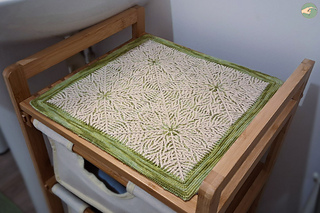
→ Terminé initialement le 24 Janvier 2026 et après quelques jours placé sur le dessus de ma tour de salle de bain, j’étais embêtée par le fait que le carré bougeait et glissait beaucoup lorsqu’on posait quelque chose dessus et, surtout, lorsqu’on le reprenait.
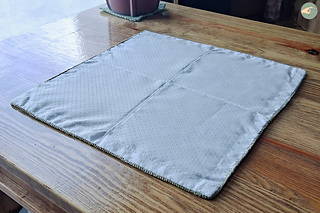
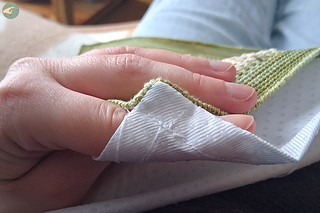
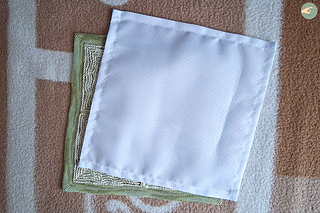
→ J’ai alors acheté, chez Tissus des Ursules, de la toile antidérapante blanche avec des petites boules de PVC en dessous. Après y avoir fait un ourlet à la machine, je l’ai cousu à la main sur l’envers de l’ouvrage au crochet avec du fil en polyester blanc.
→ Le tissu est étonnant à coudre, même si pas difficile, dû aux boules antiglissantes.
→ Pour finir, j’ai repassé les 2 côtés de l’ouvrage en utilisant une pattemouille et mon mini fer Prym. Cela a très bien fonctionné pour aplatir les coins, sachant que c’est la première fois que j’utilisais cette méthode, surtout sur du crochet !
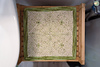
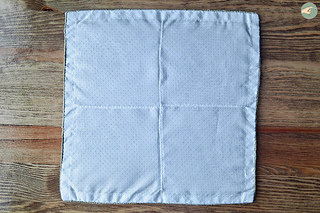
→ L’ouvrage final mesure environ 28,5cm de côté.
→ Le tissu antiglissant est extrêmement efficace, j’aime beaucoup et je ne regrette pas le temps passé sur cet ajout.
→ Le motif et les couleurs ne sont pas faciles à photographier..!
NOTES |ENGLISH| :
→ The pattern is complex and difficult to follow, so you have to stay very focused! Although difficult for beginners, it is still very enjoyable to crochet.
→ I crocheted the squares using a 2mm crochet hook.
→ Initially, I wanted to crochet version 1, which is a single large square. However, on row 36, I realized that it would have been too small, even if I had continued to row 49. This was because I was using very fine yarn! So I unraveled the rows back to row 27 and reworked row 28 with ch1 instead of ch2. Unblocked, this square measured about 14,2cm (5.6”) on each side, and I thought that assembling four of these squares would be the perfect size after blocking and edging.
→ Once the squares were finished, I weaved in the ends, washed them, and blocked them. Then I joined them together using color B and a fine needle, following Lilla Bjorn’s video tutorial.
→ Using a 1,75 mm crochet hook and color A, I worked row 1 of the border following the instructions in Lilla Bjorn’s video. I continued with 7 rows of herringbone half double crochet, working (1hhdc, ch1, 1hhdc) into the chain stitch of the previous row for the corners. I finished with 1 row of crab stitch before doing a final wet block to flatten the final square and prevent the edges from curling up.
→ Initially completed on January 24, 2026, and after a few days sitting on top of my bathroom cabinet, I was annoyed by the fact that the square moved and slid around a lot when you put something on it and, especially, when you took it off.
→ I then bought some white non-slip fabric with small PVC balls underneath from Tissus des Ursules. After hemming it with a sewing machine, I sewed it by hand onto the back of the crocheted piece using white polyester thread.
→ The fabric is surprising to sew, although not difficult, due to the anti-slip balls.
→ Finally, I ironed both sides of the piece using a damp cloth and my Prym mini iron. This worked very well to flatten the corners, considering it was the first time I had used this method, especially on crochet!
→ The final piece is about 28,5cm (11.2”) on each side.
→ The anti-slip fabric is extremely effective. I really like it and don’t regret the time spent on this addition.
→ The pattern and colors are not easy to photograph…!


 aGhexia notebook
  handspun
 queue
queue favorites
 friends
 needles & hooks
 library