

 Countrywool


Weeping Heart Lattice Sweater
This pattern offers a tunic vest version that uses slightly less yarn than the sweater. Optional waist shaping included.
Needles: Circular 32”or longer: # 6 (or size needed for gauge)
Circular 16” - # 6 for neckband
Double Point Needles # 6
4 more spare #5 or smaller circular needles, any length + point protectors for holders
YARN: Lamb’s Pride Worsted (4 oz/190 yds) Lanaloft Worsted (3.5 oz/160 yds), Peace Fleece Worsted (4 oz/200 yds)
SWEATER: 1120, 1280, 1440, (1600, 1760, 1920), 2240, 2400, 2560 yards
TUNIC: 950, 1075, 1120, (1250, 1375, 1525), 1875, 2075 yards
2 yards cotton, or slippery, yarn for blocking
Darning needle
Cable stitch holder
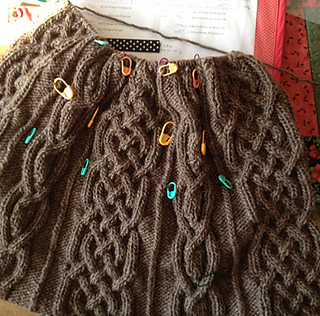
Stitch markers (at least 30 of 8 different kinds) AND point protectors
Measurements:
Circumference measured at underarms: 39, 42, 44, (48, 50, 53) 58, 64, 69”
Circumference measured at bottom of hem: 47, 50, 52, (56, 58, 61) 66, 72, 77“
Side length: SWEATER(hem to underarm) 16, 16 ½ , 17 (16 ½ , 17, 17 ½ ), 17, 17 ½ , 18”
TUNIC (hem to underarm): 20, 20 ½, 21. (19 ½, 20, 20 ½), 21, 21.5, 22”
Shoulder depth (top of sleeve to underarm) 8, 8, 8, (9, 9, 9), 10, 10, 10”
Sweater sleeve underarm length: 14, 14 ½, 15 (15 ½, 16, 16 ½) 17, 17 ½, 18”
Total length: SWEATER: 24, 24 ½, 25 (25 ½, 26, 26 ½), 27, 27 ½, 28”
TUNIC: 28, 28 ½, 29, (29 ½, 30, 30 ½), 31, 31 ½, 32”
Depth of neck opening 3”
Steps to making this sweater or tunic vest:
- Pick finished chest size for garment. Cabled items require at least a 4” larger measurement to fit well, and even more for a slenderizing effect. Making the WEEPING HEART LATTICE ARAN HAT pattern will allow for sampling the stitch gauge accurately, but the row gauge of the sweater will change significantly after washing because of the weight, so it is suggested that the body be washed and left to dry when it measures 3-4” less than desired side measurement, and THEN the row gauge can be correctly measured.
- There are 2 cast on options. The first is for a straight sided garment with no shaping. The second is flared with shaping rounds of decrease incorporated. The bottom edge is approximately 2” wider for the flared garment. The picture on the front shows a flared bottom.
- The garment is worked in the round from the bottom up. At the underarms, the front and back stitches are separated and 3 stitches are added to each. The neck is shaped with short rows and all pieces are re-joined at the shoulders. If a tunic vest is desired, a semi I-cord edge is worked on either side of the shoulders to allow for better fit. The sleeves are picked up around the shoulders and worked in the round down to the cuff.
- There are blank spaces in the written directions and tables of numbers to the right/below the directions. Find the desired size at the top of each page, and follow that line of numbers down to find the column that corresponds to that size. Match each number with the blank space in the pattern to fill in with the correct stitch number or measurement for the size.
55795 projects
stashed 36425 times
12617 projects
stashed 8327 times
5848 projects
stashed 3360 times


