No idea of yarn weight because I just design to the correct needle size - do a swatch and then do the calculations. I will have to start being a bit more particular about this :). there is a huge lot of yarn - maybe 1200 gr? I dyed it in the sliver in a selection of multi colours,spun it all then didn’t like it for the project I’d imagined and it has sat in a corner for over 15 years.
This is a top-down raglan jacket with cables at the raglans. (The waist will be defined with a cable panel, then the skirt of the jacket will gently flare to mid-thigh.) This has changed.
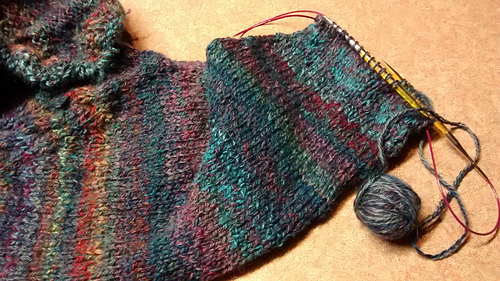
I used a long-tail cast-on so I can go back and pick up for the collar - (which I haven’t decided on yet). Yes I have - it’s a hood with a cabled edging. (Maybe it will be a sideways cable collar to match the raglans/waist panel.)That would make a nice cuff and hem trim too. So we will have to see. I much prefer knitted-in joins to sewing…and knitting in the round to panel knitting. I might have chosen crochet if this hadn’t been such a bulky yarn, but that would have made for a very bulky garment.
(February 2015: this is now tracking to be a hooded sweater with a placket button closure above the raglan decrease level and cabled rib cuffs. Not sure yet whether it will have a shirt tail or a cabled bottom band. We shall see.)
I initially began this jacket in garter stitch but it was waaay too heavy so I undid it (drives my husband crazy) and started again. I’m nearly at the end of the raglan increases now - about 8 rows to go, I think! then it will cease to be such a long time between the ends of rows. I have over 200 sts on right now.
June 29 - Up to the second sleeve now - put all the body stitches on yarn after the cables at the waist, so that I could do everything else then use up the last of the yarn on the jacket skirt. So, next will be collar, cuffs, some put aside for front bands and then back to the body to finish. there are some things I would have done differently if starting out again - for instance, I didn’t think through the gussets under the arms very well, so I had to bodge it a bit. I also think it may be a tad roomy. Hoping I don’t spend the summer undoing it and making it smaller. But I could always felt it a little to shrink it. Not a great alternative but preferable to two months’ wool knitting in the summer.
October 10 - Have had to partially frog as when it got big enough to try on it was waaaaay too big. What went wrong with my calcs? No idea. Will return to it when I feel stronger.
February 2015…hahaha! Feeling stronger now! I have frogged a huge amount and am going to alter the original plan a bit. Now it’s going to be less cabled and have a hood, as it gets a wee bit nippy here in the winter :D.
And now it’s a hoodie! The pattern is evolving.
April 14th:
Snow on the ground helps to sharpen the resolve.
11/2 sleeves finished. Fancy cable ribbed cuffs - hardly worth it because the detail disappears in the color pattern.
July 5th:
finished body and now working on the border. The border needs to be worked in a particular way because it’s knit at 90 degrees to the body - I used the same proportions as if I was picking up for a button band - decreasing 3 sts in 4 rows.
Sideways bottom border and cast off:
Do not break off the body yarn. Cast on in scrap yarn the number of stitches you need for the border (I cast on a total of 12 stitches) and knit 2-4 rows. Using the working yarn, I worked this border as follows:
Row 1: Purl 1, K1tbl, P1, K6 (for cable), P1, K1tbl, K1
Row 2: sl edge st, P1tbl, K1, P6, K1, P1tbl, K next st tbl together with the first body stitch. sl next st, wrap and turn.
Row 3: sl wrapped st, P1, K1tbl, p1, C6L, P1, K1tbl, K1
Row 4: sl1, P1tbl, K1, P6, K1, P1tbl, K1tbl with body st. Sl next body st, wrap and turn.
Row 5: Ptog sl stitch and 1st border st, K1tbl, P1, K6, P1, K1tbl, K1
Row 6: as Row 2.
Row 7: as Row 3*
Rep between * until the end of the border, making sure that you finish with the right number of rows to complete the cable correctly. You might need to put in an extra decrease row, or leave one or two out, to get the right number. Take beginning of work off the waste yarn and graft the two ends together.
C6L: take off next 3 sts onto a cable needle, hold at the front of the work, knit 3 sts, K3 from cable needle.
The song is drawing to a close, the night is old and the barman is pouring the last drinks…
I lurched out of the bar at 4 a.m. on 27July 2015. As I pulled up my hood to disguise my bleary eyes, a small, secret smile of accomplishment touched my lips.


 KatyPi notebook
  handspun
 queue
queue favorites
 friends
 needles & hooks
 library