In these designs I used a stitch I found in an old Dutch knitting series “Alles over breien” {All About Knitting}.
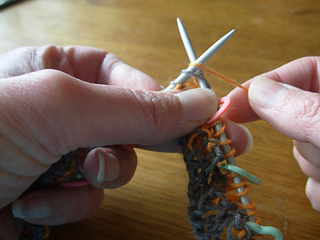
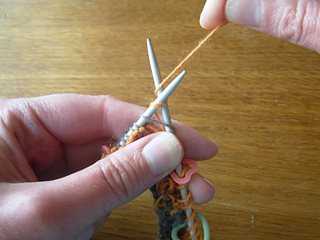
It is a long and crossed stitch which you make this way:
Insert needle in stitch as to knit, YO both needles, YO right needle and complete the knittingstitch, sliding off 2 loops from the left needle. In this pattern I will call this stitch the long and crossed stitch.
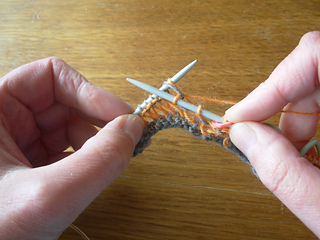
First photo of the knitting stitch: Yarn over both needles
Second photo: Yarn over right needle as usual.
Third photo: Finishing the stitch.
Edit:
I finally know now how this stitch is called in English: It is the twisted drop stitch. You can find it at You Tube.
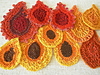
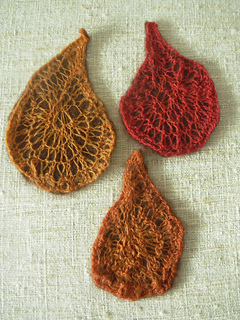
Large knitted paisley
CO 58 stitches - place a stitch-marker - CO another 18 stitches.
ROW 1. Use the long and crossed stitch, knitting across.
ROW 2. {k1, k2tog} till stitchmarker, ending with k1 - k8, k2tog, k2, k2tog, k2, slip 1, k1, pass slip-stitch over.
ROW 3. Use the long and crossed stitch, knitting across.
ROW 4. New color: {k2tog, k1} repeat till stitchmarker - k7, k2tog, k1, k2tog, k1, slip 1, k1, pass slip-stitch over
ROW 5. Removing stitchmarker, bind off 6 stitches, use the long and crossed stitch for the rest of the stitches.
ROW 6. {k2tog} 5 times, {k1, k2tog} twice, k2, k2tog, k2, {k2tog} 4 times, slip1, k1, pass slip-stitch over.
ROW 7. k2, k2tog, k3, next 5 stitches use the long and crossed stitch, k3, k2tog, k2.
ROW 8. {k2tog} 4 times, k1, {k2tog} 3 times, slip 1, k1, pass slip-stitch over.
ROW 9. BO all stitches, but leave a tail long enough to use for stitching together.
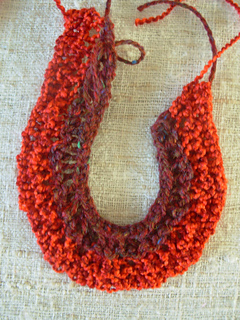
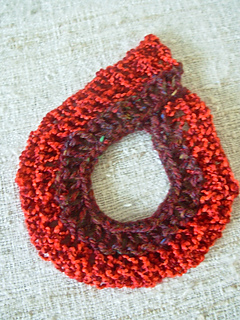
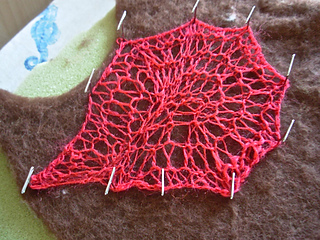
Finishing: Stitch together as you can see at the photos at my project page. Weave in all ends. Moisten the paisley and use pins to block, stretch and form it. Leave it to dry completely. You can either use this knitted paisley as it is, or you can go on with it, using your hook or some embroidery to embellish it. Good luck!
Variation - knitting the outside and adding a different inside
Knit the first 4 needles, according to the pattern above.
ROW 5. Use the long and crossed stitch, knitting across.
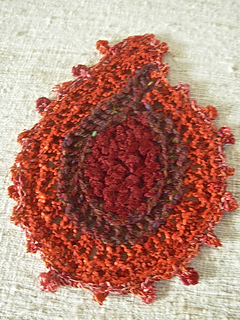
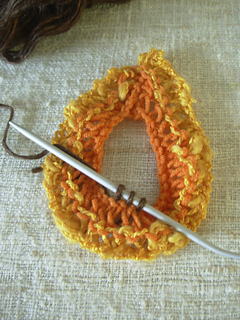
ROW 6. Bind off all stitches except the last one. Put your hook into this stitch and connect the paisleyform at the backside. You can also knit or stitch it together. Fill in the opening in the middle, using your own fantasy. You can use crocheting, knitting, appliqué, weaving, looping, embroidery….. Just have a look at the photos to get some ideas.
Variation 2:
Use larger needles to get a bigger paisley and a more lacy effect
Small knitted paisley
CO 39 stitches - place a stitchmarker - CO another 15 stitches
ROW 1. Use the long and crossed stitch, knitting across.
ROW 2. New color: {k2tog, k1} repeat till stitchmarker, k7, k2tog, k1, k2tog, k1, slip 1, k1, pass slip-stitch over.
ROW 3. Removing stitchmarker, bind off 4 stitches, use the long and crossed stitch for the rest of the stitches.
ROW 4. {k2tog} 5 times, {k1, k2tog} twice, k2, k2tog, k2, {k2tog} 5 times, slip 1, k1, pass slip-stitch over.
ROW 5. k2, k2tog, k3, next 6 stitches use the long and crossed stitch, k3, k2tog, k2.
ROW 6. {k2tog} 8 times, slip 1, k1, pass slip-stitch over.
ROW 7. Bind off all stitches, leaving a tail of thread for stitching together.
Finishing: See large knitted paisley
Variation - knitting the outside and adding something different inside
Knit the first 3 needles according to the pattern above.
Bind off all stitches, till there is only 1 stitch left over. Take that stitch at your hook and crochet the paisley form together at the backside - or knit or stitch together.
Fill in the middle part as you like.
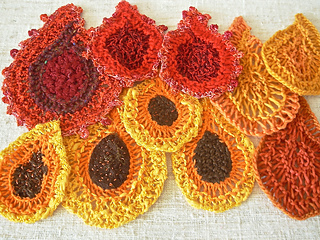
*Photos from top to down, beginning after the photos of the knitting-stitch:
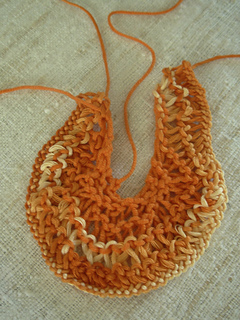
- Finished form before stitching together
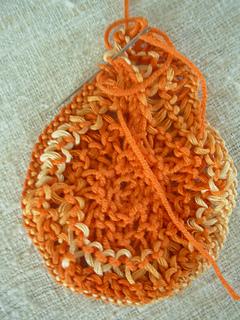
- Stitching together 1
- Stitching together 2
- Stretching/blocking
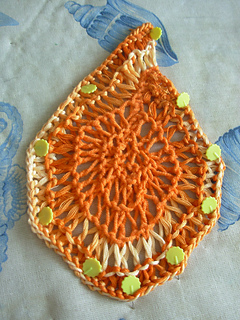
- Finished paisley
- Knitted paisley variation
- Making the connection with the hook
- Hooked together
- Finished with crochet and looping at the inside and crochet at the outside. First I made crocheted arches inside the form for the base of the looping. Then I crocheted a chain of 50 cm. This I used for the looping. I did the looping a bit wild. If you want to learn the basic looping stitch - it is easy - just have a look here: http://www.youtube.com/watch?v=9fMxa9T-yQo
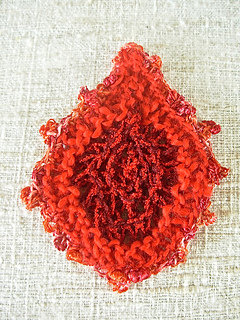
- Smaller paisley, outside crocheted, adding also some picots.
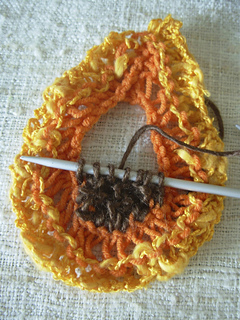
- Knitting inside, starting with picking up 3 stitches
- Continuing knitting, taking up stitches at the sides and increasing and later decreasing as needed, using seed stitch.
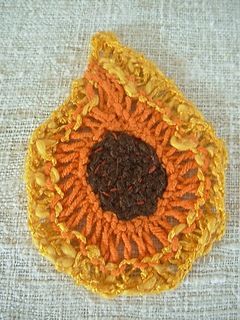
- Finished paisley with knitting inside
- Small paisley with appliqué and embroidery
- Using large needles with thin yarn, putting it at fleece and felting it, first needlefelting and then wet felting.
- Some felted paisleys
- Using the same yarn with different sizes needles.
EDIT
If it is too difficult for you to knit the long and crossed stitch in the first row, you can knit an extra row first, just knitting across before starting the pattern. In this case you reverse the CO before and after the stitch marker - So you CO 18 stitches - place stitch marker - CO another 58 stitches for the large paisley or you CO 15 stitches - place stitch marker - CO another 39 stitches for the small paisley.
You can also use bigger needles for the CO, for easier knitting of the first row.


 RiaHooghiemstra notebook
  handspun
 queue
queue favorites
 friends
 needles & hooks
 library