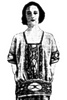
“EMBROIDERED JUMPER, 1923”
29 September, 1923
TROVE link: http://trove.nla.gov.au/ndp/del/article/140826706
TRANSCRIPT
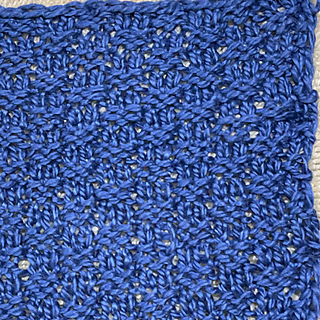
The Jumper is knit in double moss stitch with the front panel, basque and sleeves in stocking-stitch.
MATERIALS: Four hanks of Celanese crepe twist silk, in dark saxe blue, one hank each of red, brown, and buff chenille. Best guess on yarn weight: Fingering / 4-ply
One pair bone or steel knitting needles. No. 11 (= 3mm), a steel crochet hook. No. 11/2 (2.75mm), and four button moulds (to be covered with crochet)
MEASUREMENTS: Length from shoulder, 25in.; width round bust, 46in; width round hip band, 36in.; length of sleeve from neck, 14 in.
STITCH GAUGE
Tension of the knitting, seven stitches to the inch.
The jumper is knitted in double moss stitch with front panel, basque and sleeves in stocking-stitch. The stocking stitch pieces are afterwards overworked in cross stitch in brown, buff, and red.
The pattern is worked as follows:—
First Row.—* Knit 2, purl 2. Repeat from * to the end.
Second Row.—* Purl 2, knit 2. Repeat from * to the end.
Third Row-—Same as Row 2.
Fourth Row—Same as Row 1.
These four rows complete pattern. Stocking stitch is alternate plain and purl rows.
THE FRONT.
Cast on 164 stitches on No. 11 needles. The first 56 and last 56 stitches on needle are knitted in the pattern, the central 52 stitches are worked in stocking stitch. Repeat this pattern until you have a depth of 13 in.
Then knit 56 stitches in pattern, knit four, and put these stitches on to a spare needle. Cast off the next 44 stitches for the front neck; knit four, and knit 56 in pattern.
THE SHOULDER.
Continue to work on the last set of stitches, in pattern for 7in., keeping the four stitches at the neck edge in stocking stitch on every row. Finish at the neck end.
Cut the silk, leaving a few inches to be darned in afterwards. Now darn in the silk at the neck end of the other set of stitches and knit the same number of rows as before. Then return to the first set of stitches and cast on 44 stitches for the back neck, and knit across the other set of stitches. You should now have 164 stitches on your needle.
THE BACK.
Now go on working in the double moss stitch pattern until you have done 18 in. in depth below the back neck and cast off.
THE SLEEVES.
Cast on 28 stitches on No. 11 needles and knit a strip in stocking stitch for 13 in.
Cast off. Knit another sleeve exactly the same. Join the two ends of sleeve together on the wrong side- Join on the silk at one edge and work a row of d.c. (crochet) all round with stitches close together. Then join on brown chenille and work three more rows, putting one d.c. into each d.c.
THE HIP BAND.
Cast on 36 stitches on No. 11 needles and knit a strip in stocking stitch for 36 in.
Cast off.
ROUND THE NECK.
Join on the brown chenille at one corner and work two rows of d.c. all round, with stitches close together. The front and back necks may be tightened a little if required. Then join on the buff chenille and work two more rows, putting one d.c. into each d.c., except at the corner, where one or two stitches may be missed to make the work lie flat.
TO MAKE UP.
Press all the stocking stitch on the right side with a damp cloth and a hot iron, and press the moss stitch lightly on the wrong side. Sew up the side edges from the bottom, leaving a depth of 6+1/2 in. open at the top for the armholes. Stitch in the sleeves on the wrong side. Overcast the lower edge of the jumper with blue silk, and draw up till it measures 36 in., or whatever measurement is desired for the hip band. Get the centre of basque and pin it to the left underarm seam. Then place the front end about 3/4 in. over the back end at tbe right side and oversew to the jumper all round.
With the brown chenille work three rows of d.c. all round the edge of basque with stitches close together. Make four buttonhole loops on the front end and sew four covered buttons on the opposite end of basque.
The buttons are made as follows:
—With the red chenille, make three chain. Join into a ring. Work six d.c. into this ring. In the next row, * 1 d.c. into first stitch, 2 d.c. into next, and repeat from * all round. Do one or two more rows of d.c. into each. Cover a button mould and draw up the last row with a darning needle. Make four buttons.
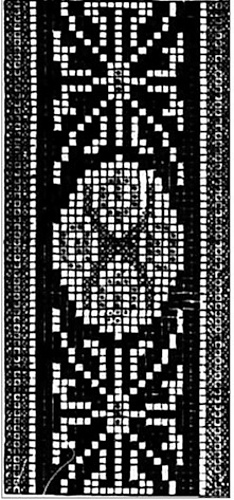
THE CROSS STITCH.
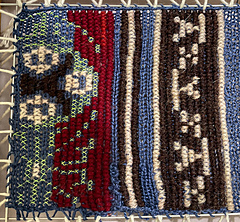
Work the cross stitch design as shown in the diagram below on the stocking stitch panel, basque, and sleeves. The whole pattern shown in the large diagram appears on the basque, a portion of the pattern on the sleeves, and a whole pattern and a piece, with the smaller design at each side of the front panel.
The black squares on the diagram represent red stitches, the dots fawn stitches, the crossed squares brown stitches, and the white squares one stitch of the knitting. Each cross stitch is worked over one stitch of knitting, and each back stitch is taken straight up or across one stitch. (These directions are taken from the Ladies’ Field Fashions.“)
Many thanks to the volunteers on TROVE who have transcribed and proofread the original patterns!
vvvvvvvvvvvvvvvvv
MY NOTES
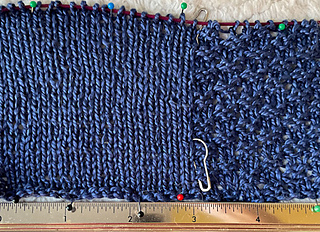
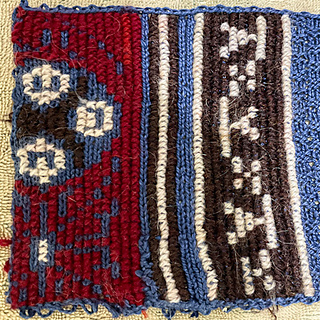
The swatch I knitted is designed to be 30 sts of stockinette next to 22 of double moss. My best guess on yarn weight is fingering / 4-ply, since that seems to be very common for garments like this. However I’ll point out that I got 6 stitches per inch rather than the instructions’ 7.
I obviously don’t have silk, but fortunately I do have #3 perle cotton, which is approximately the same size. It’s rather a darkish bright blue, not grayish as I gather “saxe blue” is, but the best I could do with what’s in stash.
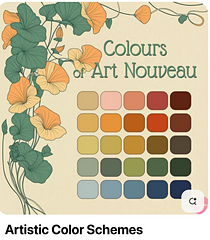
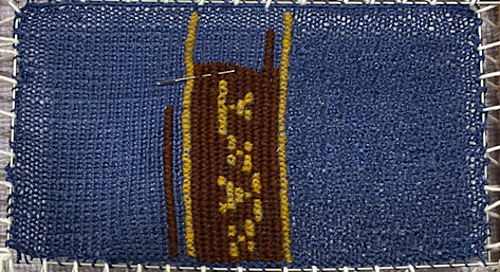
It’s blocked very nicely, and I (after a bit of experimenting) strung it on a frame to embroider. I consulted an Art Nouveau palette to try to get a bluish red, buff-ish color, and compatible reddish brown. The whole reason I got into this rabbit hole is that I can’t imagine what the embroidery will look like, especially since the engraving shows it on a white background!
I’m a bit disappointed in the final version, as I think I would have done better to use the first set of colors. The gold is more saturated than what would be called “buff,” but both the brown and the red in this set of colors are less dark and would probably stand out better against the dark blue.
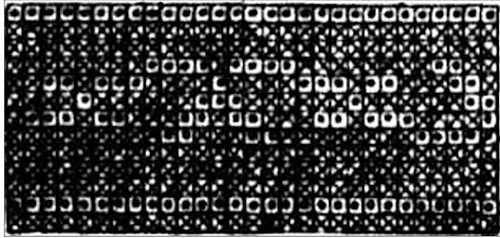
Here are my attempts a better charts for the embroidery.
Believe these, not my actual stitching! I hope I found all my stitching errors when i charted these.
I’m a bit curious why the larger, vertical chart doesn’t complete either of the blue “snowflakes” (or you may prefer to call them “octopi”) at the top and bottom. One possibility is that if you’re embroidering a longer stretch, you “should know” how you’re supposed to continue the pattern to make it longer. The other possibility is that the designers intended this to be just the length it is.


 claning notebook
  handspun
 queue
queue favorites
 friends
 needles & hooks
 library