I got inspired by Jimmie Rodger’s Blue Yodel No. 10 which has the line “It ain’t your drop stitch stockings, Or your blue buckle shoes.”
I need a pair of ‘blue buckle shoes’ to go with my drop stitch stockings.
I find it very odd that there aren’t any drop stitch stocking patterns out there and that there seems to be very little mention of them, at least google did not find many. I did however find this
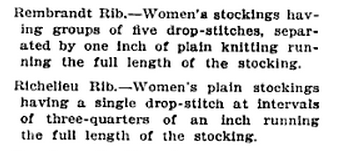
from The Drygoodsman’s handy dictionary, page 31
I intend on using the Richelieu Rib, that is 3 stitches/1 dropped stitch. An advantage of drop stitch is that it is easy to make ‘outsized’ thigh high stockings on smaller cylinders.
Soooo, this is how it starts.
From the Top
- 2 or 3 rows of selvedge with the ribber, tension very loose.
- 20 rows of ribbing, 1/1
- remove ribber needle, place rib stitch onto it’s neighbor stockinette needle
- repeat with the rest of the ribber needles,
- replace each stockinette needle this is critical; pay attention to these slots.
This way, when you drop your stitches, if you do it right they will stop dropping at the ribbing. Note where each rib stitch was. You may only drop the rib stitches!!!
Leg
- crank as usual
- tighten tension as you go
This part is trial and error. We all have differently shaped legs. Indeed our leg’s shapes often change so this part might take a few trial to get right. Just remember that each dropped stitch adds up to 2 stitches to the width of the stocking and some length, depending on how you stretch it. There is more room for error with this stocking than with standard stockings which is why it’s great for thigh highs. So for a 72 stitch cylinder this is equivalent to 108 stitches, more or less. Anyway, I am thinking for myself I’ll need 300 or so rows. I am think that this might be stretchy so it should need less than my other thigh highs. Make that 200 or less rows.
Heel
- decide on what sort of heel you desire, I like Sweet Tomato heels, but I’m in the minority.
- drop the stitches above the heel stitches
You may choose to either continue your stocking with a solid sole. You might even want to have a solid foot. Whatever you do, only drop the stitches that were ribbed.
Soooo for this specific project it looks like I will start with just one sock just to work out the kinks. I cranked 200 rows for the leg. Dropped 12 stitches 10 rows above my sweet tomato heel and then 6 more 5 rows shy of my toe. I suspect that that 200 rows will go farther than usual. I tightened the tension at 20 row intervals. I’m not particularly observant of exactly where it’s it and that would probably vary by machine and yarn anyway.
Well now! That sure grew in length once I completely dropped the stitches. I think That for me 180 rows for the leg is enough, perhaps less. This stocking desperately needs a garter to hold it up taut. The full stocking pic I posted is really saggy, especially at the ankle. This prototype goes all the way up my leg. I suppose my legs are slightly longer than average and probably a bit thinner than most.
UPDATE: 2nd prototype stocking is much improved. For me I needed 180 rows for the leg. I made the tension a little bit tighter all around and it’s less sloppy. I should finish the 2nd stocking shortly and hope to get some nice photos to show details. This in a way might be the easiest way to do thigh highs on CSM, based on my experiments.
and…. I think I might try writing it up for handknitters. It’s kinda magic when you stretch the stocking and the stitches drop. It lengthens and grows in the nicest sort of way.
I am BTW calling this done even though I didn’t complete a pair. It is a study.
Moar new stuff
I decided to add a few photos that give hints for people who want to try this.
- cuff/leg edge pre-drop
- cuff/leg post-drop
- toe with waste yarn holding stitches to be dropped I am working on a formally written up pattern for real for both handknitters and crankers. I have ideas for other cylinder too.


 gobbism notebook
  handspun
 queue
queue favorites
 friends
 needles & hooks
 library


