I got row gauge w/size 7 needles, but not stitch gauge. Rather than go down a needle size, I adjusted the number of stitches as follows (see below for what I’d do differently):
- Cast on 78 stitches for back (19-1/2 inches) (repeat pattern 3 times)
- Cast on 42 stitches for right & left fronts (10-1/2 inches)
- Cast on 42 stitches for each sleeve (10-1/2 inches)
Adjustments for Right Front. Purl 4, k1, last 8 stitches of pattern (columns 15-22), 22-stitch pattern, 6 edge stitches (columns 23-28), k1
Since I had fewer stitches to work with, I used the knit stitch after the buttonband and started one column to the right on rows 5 and 11 (so there would be a k2tog to pair w/the yarn-over).
On rows 17 and 23, I had to incorporate the last stitch in the row into a decrease, to pair with the preceding yarn-over.
Adjustments for Left Front: Slip one stitch purlwise, k or p 1 (depending on pattern), last 5 stitches of pattern (columns 18-22), 22-stitch pattern, 8 edge stitches (columns 23-30), k1, p4
On rows 5 and 11, I had to incorporate the knit stitch after the selvedge into a k2tog, to pair with the preceding yarn-over. Likewise, on row 21, I had to incorporate the knit stitch before the buttonband into a decrease.
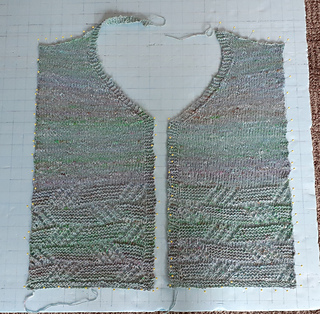
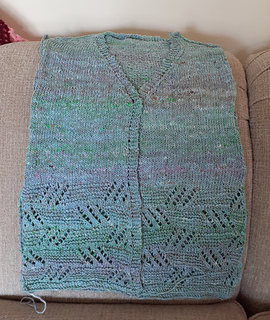
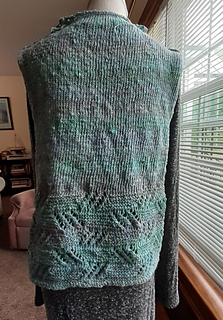
Buttonband and Buttonholes. I didn’t realize that the buttonband was designed to curl, and decided to knit it in garter stitch. My apologies to the designers (though the garter stitch band echoes the pattern in the lace design). I probably should have moved the buttonholes one stitch to the right, but they should be okay.
I worked a buttonhole every 26 rows in the lace section, to account for the extra length I added. That had me making buttonholes at rows 7, 9 and 11 of successive lace patterns. In the stockinette section, where the row gauge is slightly different, I worked buttonholes every 22 rows, at row 81 and 103, counting the last lace row as row 60.
V-Neck Decreases. I interpreted the instructions to decrease 1 stitch at neck edge every alternate 3rd and 2nd row to mean decreasing at rows:
- 01 - 11 - 21 - 31 - 41
- 04 - 14 - 24 - 34
- 06 - 16 - 26 - 36
- 09 - 19 - 29 - 39
That’s four decreases for every 10 rows.
Adjustments for Sleeves. Slip one stitch purlwise, last 12 stitches of pattern (columns 11-22), 22-stitch pattern, 6 edge stitches (columns 23-28), k1
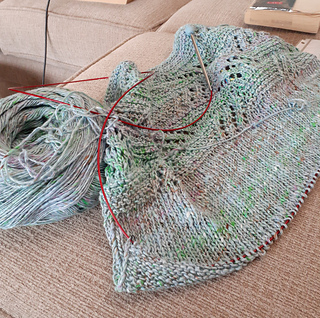
I made the sleeves 15 inches long for this tall size. I added one more repetition of the lace pattern (through row 36), and increased at both sides at rows 9, 21, 33, 49, 63, 77, 91 and 105. I ended with 58 stitches at the top (14-1/2 inches).
Blocking & Seaming. I pinned out the pieces on my blocking board and steamed them, rather than soaking them. That seemed to work nicely.
I used 10rowsaday’s technique for seaming the shoulder seams, side seams and sleeves. The technique is wonderful for slipped stitch edges, but the yarn proved a bit problematic at this point, as the loosely woven portions tended to break after repeated contact with the edge stitches. I had to be very careful.
I left a few inches at the bottom of each side unseamed. Given the sweater’s extra length, I thought it would be more comfortable and add to the “swingy” appearance.
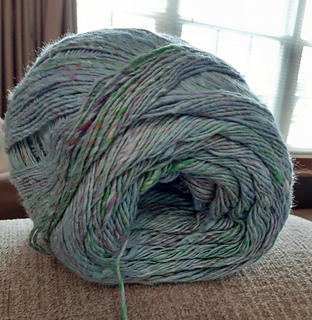
Lessons Learned. The sweater turned out a tad too small. I neglected to take positive ease into account in my calculations. With my row gauge (4 stitches to the inch), I could have used the instructions for the small size, and it would have resulted in a medium, with plenty of room and “swinginess.” I think it would also have given more room at the upper arms, given the extra fabric at the shoulders. The yarn makes a lovely fabric, though, and the colors are stunning.
Buttons. I found some appropriate buttons at katrinkles.com (also available through KnitPicks). The Lines design was perfect for this sweater.
Yarn Usage. I completed the back with 107 grams, or 27% of the total. I think I should have plenty of yarn, even though I’m adding two inches of length to front and back.
I used 44 grams to make the right front, and 37 grams to make the left front. I’m sure the back neck tab doesn’t account for the difference. I do think there was a lot more of the thin yarn in this section of the skein. There were 12 grams of the first skein left when I finished the second front piece.
The first sleeve took 46 grams of yarn, and the second 45 grams.


 marystoverscalais notebook
  handspun
 queue
queue favorites
 friends
 needles & hooks
 library