I plan to do some extra repeats of the body to make sure I use as much yarn as I can. (Turned out to be the perfect size without increasing. Used almost all of my skein.)
Using HeidiB686’s notes as reference for how much yarn to use up before the lace boarder.
She used 38.4 g for the body, and about 45 g for the lace edge and bind off. So adding 10% yarn is 42 & 49.4 g for 91.74% yarn used, and adding 15% yarn is 44.16 and 51.75 g for 95.91% yarn usage. As I’m adding repeats, I’ll shoot for at least 44-45 g used for the body section.
Size 5s for cast on and garter tab. I just use a third tip to work back and forth. 113.9 g at start. Adding random beads in the body.
Miyuki size 5 triangles. I’m using the lighter color for the random beads, and the darker color for the lace boarder beads.
Light - iris lilac, (TR1156), #5 triangle.
Dark - lilac color-lined grey, (TR1836), #5 triangle.
I use different increases than the pattern describes. Because I’m only using a R and a L increase reguardless of which side I am on, I will try to describe where I use each one.
For my ml and my mpl, I am doing an e loop. For my mr and my mpr, I am doing a forward loop. You can see directions for how to make it here. This makes a much looser edge, but uses a bit more yarn. Sometimes when you encounter these stitches on the next row, you need to ktbl or ptbl so that it isn’t twisted “too many” times. The rest you just k or p into as usual.
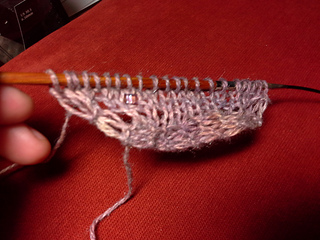
It’s impotant to keep your RS and WS the same with L increases on the right side of your rows, and R on the left side of your rows so that your increases alternate. If they don’t alternate, you create a smooth line that pulls away from the edge of the shawl.
So the beginning of each row has the L increases, and the end of each row has the R increases. This is reversed for the rainbow stitch increases on the RS side. First you do R then you do L. On the WS you do the usual L then R for the rainbow increases. I took a close up pic so you can see how the stitches pull away from the center rainbow lines. You can make the holes smaller here by purposefully giving the m1’s and extra twist before you knit or purl into them.
92.6 g left after 2nd repeat.
89.6 g left after 3rd repeat.
65.2 g left after 4th repeat.
It looks like there won’t be enough yarn to add an extra repeat, and the shawl is plenty big already, so I’m just going to move on to the lace chart. I also switched my increases to normal bar increases on the right side rows for the rest of the shawl. This should slow the rate that the edge is growing. Because it doesn’t stretch as much as the looped increases.
Switched to size 6 tips before row 13 of chart C.
47.4 g left after row 16 of chart C.
What’s really nice about this pattern is that the more challenging parts are at the beginning (double sided lace) when you’re really excited about starting the project. Then as you get to the lace edge, it picks up speed because it has plain return rows. It’s getting harder and harder to put down because I feel like I’m almost done.
40.4 g before lace border chart D.
I added 3 beads for the yellow squares and 2 beads for the green squares on row 15 of the last chart.
15.3 g left before bind off.
For my bind off - cable cast on 2. K2tog tbl 3 times. If the last stitch was a yo, slip k wise before you bind it off. Above the 3 beads, in the yellow box stitch, I chained chained 5, slip stitched into the same stitch, put the loop back on the left needle and continue picots to next yellow box.
3.5 g left after bind off.
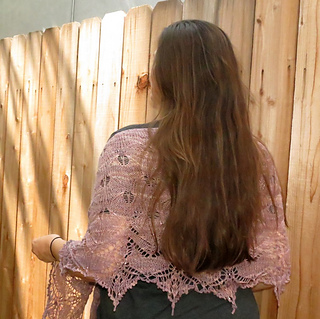
25 x 96 inches before blocking.
27 x 96 inches after blocking.
Notes about this yarn. If you have breathing problems or sensitive dust allergies, I don’t recommend working with this particular fiber blend. I have noticed little clouds of particles while I’m knitting with it.
Nails - Jamberry Timeless


 minminlea notebook
  handspun
 queue
queue favorites
 friends
 needles & hooks
 library